1.Welcome to the Runcible Guide
Welcome to the Runcible Guide
(welcome message)For Beta Users:
This documentation includes:- Features complete and included in the beta
- Feature included in the beta and not complete
- Features not compete and not in the beta.
Note: This is a note. 🙂
1.1.Beta: Open Issues of Note
From the Editors: This is Curt’s list of what he feels are meaningful usability issues that we know about in the Beta.
The problem with creating software of this scale is choosing the balance between the minimum features necessary to go to market (in enterprise software – a lot), and the desire to get software into the hands of customers who will validate or invalidate your assumptions.
- It’s not obvious when a parent hierarchy is limiting a task’s workflow choices. We do not show blocking ancestry. (necessary) Likewise it’s not always clear why you can’t do something when you don’t have permissions to – we don’t give the user enough feedback when he lacks permissions to do something (mostly, change state).
- Changing a parent is not cascading state changes to children. This was originally by design and we must change it. (necessary)
- Changes to the gantt view are not cascading – tasks are not ‘floating to the soonest time’. This is a simple issue, but has performance consequences we must naturally pay in a simultaneous multi-user system. Wrapping and testing this kind of transaction is an issue we kept postponing in favor of feature complete, and now it’s bitten us. (necessary).
- You cannot log in two different users with the same browser. We originally did this by design but feel it was a mistake because of our over-concern for security. (nice to have)
- There are still areas of the app that are not being updated dynamically via websockets. This was a decision we made in order to get to v1 feature complete. Most of it the user will not notice. The most common issue is on single page views and tabs. The workspace tends to update just fine. (necessary)
- There is still a problem with the chat not echoing what you’re posting even if it’s being broadcast. Likewise websockets are not always aware that they’ve lost connection overnight and the browser requires a refresh. (necessary)
- We have not Less-ified the CSS, nor optimized the CSS or the Div structure. We considered this a high cost, that was best paid for prior to release. Why? It’s plenty fast, and works just fine. Feature complete was our goal. (nice to have)
- Closing and re-opening the same sliding page causes some sort of delay because the last fetch was incomplete. (unpleasant);
- We postponed Drag and Drop to Tag on the Board view. (urgent) We had too much debate over this issue so we postponed it until we had feedback. IMHO we fell into the methodology trap instead of just leaving it up to the user. This illustrates the fact that as we evolved Runcible we ‘subtracted methodology’ in favor of user centricity.
- We postponed the control panel for managing the different periods, and without it, managing your entire business’s operations with Runcible isn’t as intuitive as it should be. (nice to have). Our thinking was that during the beta period no one would likely use it, and it would have to be the very last feature we built – despite being one of the first we designed..
1.2.Runcible's Requirements
What you will need to use Runcible?

A Laptop, Desktop or Large Tablet.
You certainly can operate Runcible from a tablet – we designed it that way – but Runcible isn’t a tool for consumption of media (what phones and tablets do), it’s a tool for creating and managing your business – and you need visual real estate to interact with that much information. If you do not have to manage large complex projects then a tablet is enough. People who manage many large projects, or large departments, will love what they can do with Runcible on a large monitor. (It’s like that 80’s movie Wargames – really. You can see everything live and in real time. No kidding. It’s almost creepy. )
Hint: Runcible does work on a phone but really needs a dedicated phone application to be useful on so small a screen. And we will commit to producing phone apps at some time in the future – albeit they will not present the workspace itself.
A Current Browser.
![]()
Runcible supports versions of Chrome, Safari, Firefox and Edge, that support web sockets (constant connections) but it is likely that it will work with most browsers.
Tip: We develop on Chrome, write our tests, and test on other browsers. (It is what it is.) We develop on various operating systems: OSX, Linux, and Windows.
Hint: We did not develop for older browsers that do not handle current technology, and we really have no incentive to. It’s not good for us or our customers.
Hint: If you run into issues with your browser, please let us know about them, otherwise we can’t fix them.
Hint: Firefox preserves a ‘strange’ non-standard behavior: using the shift-(mouse-scroll) combination to move backward and forward through the page history. To our knowledge they refer to this behavior as a ‘feature’. Horizontal scrolling is necessary for Runcible. Please search for plugins or modifications to Firefox about:config if you wish to use Firefox. We don’t feel comfortable posting that information here.
Memory

Runcible takes the same amount of memory and processing power as do Facebook or Gmail, depending upon the complexity of the Workspace you choose. If you work with just the task list or activity stream it is very light. If you are resourcing people on many projects or viewing data from many organizations it will take more.
A Reliable, Stable, Internet Connection
![]()
Runcible relies on ‘web socket’ technology that maintains a constant channel to the server in order to maintain constant updates from the server. Runcible tries to restore connections whenever they break, but if not, you will need to refresh your browser window to reconnect.
Note: We made a deliberate design decision to use web socket technology instead of constantly polling the server for changes. Without it, experience and performance demands would have been impossible for us to meet.
1.3.Is Runcible for My Organization?
Who did we have in mind, when we created Runcible?
A lot of people, really.
Mostly, people just like us, who have built and worked in services or what collar businesses and feel.. alienated… by the way work is still done today.
Sizes of Organizations
We thought we could teach entire organizations to drive the business and work together to drive the business.
- Groups of Independent Contractors
- Departments and Teams
- Small and Medium Organizations
- National Organizations
- Multi-National Organizations
- Large Global Enterprises
Types of Organizations
Organizational hierarchies have been changing along with economic velocity. Meaning that people, groups, organizations, and even nations, are reorganizing frequently.
- The Hollywood Model (independent people that rally around opportunities when they occur.)
- The Project Model (Permanent staff of temporary teams organized of the fulfillment of objectives, then disbanded)
- The Team Model (parallel teams doing similar work)
- The Department Model (departments who specialize in some portion of the workflow and require reorganization of the organization to change.)
- The Government/Bureaucracy Model : Organizations that rarely change and are resistant to change unless threatened.
- The Military Model: traditional, strict roles, processes and methods that only change in response catastrophic failure.
What Roles In The Organization?
- Do-er” person who does work as assigned. (Every job in the company)
- Help desk/call center lead
- Help desk/call center admin
- Traffic Manager
- Assistant PM
- Scrum / Kanban leader
- Project manager
- Delivery manager
- PROJECT GOALS (REVENUE/PROFIT)
- Department Manager
- Profitability / Utilization goals
- Career Development
- COO/VP Delivery/ Head of Delivery
- Sales Admin
- NPS
- Sales/marketing/Account Rep
- SALES QUOTS
- Sales Manager
- SALES GOALS
- President/VP Sales
- SALES PROJECTS
- COMMISSIONS
- Career Development
- Recruiter (recruiting is a form of sales)
- “HR/Recruiting” manager.
- Recruiting Projects
- Benefits Administrator (hr/acctg)
- Payroll admistrator (hr/acctg)
- Project Accounting (acctg)
- Expenses Management
- Invoicing
- payments
- Bank reconciliation
- Import / Export of Data
- Regional Accounting Mgr
- CFO etc.
- Usual Accounting Functions
- P&L
- SR Exec
- STRATEGY PROJECTS
- MGMT MBO’S.
- CULTURE PROJECTS (YES, REALLY – BY TEAM)
- Ops Admin
- RATES
- System Admin
- Permissions
But Use Only What You Need
Runcible is very powerful. It’s powerful enough that no matter how large your group or organization grows, you will never likely use all of it’s features.
So use only what you need to. Start with just task management, or collaboration, or document management or Recruiting, or CRM.
Use additional features as you and your organization require them.
2.Getting Help
1) This Guide – From within Runcible, navigate to this guide by selecting Help in the Main Menu, or by the link at the bottom of the System Status Panel.
- The User Interface Guide (Just the facts)
- The User’s Guide (Working with Runcible)
- [The Tutorials Videos] ( … )
- The Manager’s Guide
- The Culture Driver’s Guide
- The Operations Guide (COO, VP Operations)
- The CEO’s Guide
- The Accountant’s Guide
- The Administrator’s Guide
- The Advanced Topics Guide
2) Post a Question in the Answers Forum
We (the developers) receive notification of your questions.
3) Open a Support Ticket – All active users have access to the Runcible Support project.
( … )
4) Use Support Chat –
( … )
2.1.Our Sales and Support Philosophy
Our Sales and Support Philosophy:
We have been you. We understand. So, we don’t farm out our sales or support. We all work on support and sales questions. We love our product and understand how it can change the world of work. We want you to love it as much as we do.
We are a mixture of people from around the world. We understand language problems. We have people in different time zones. We are best at English and Russian because well, we’re from America, Canada, England, Ukraine, and Russia. 🙂
We know that you can sometimes be under stress. We will help you. We will be compassionate. We will be understanding. We want you to succeed. But to do that we ask that you put your emotions to constructive use. Consideration encourages truth. Truth builds trust. And trust builds investment in each other. And investment in each other builds great relationships. 🙂
We also know that because Runcible is a big and rich product, sometimes you want to get help from a teacher, instead of obtain support. If possible we will help you learn. But only if it’s possible, ok? Otherwise we will schedule a session with you to help you.
2.2.Glossary of Terms
Our Organization consists of nodes, which we sometimes call ‘reporting dimensions‘. Nodes can contain Legal, Geographic, Functional, Line of Business, Customer, and Cost Center dimensions of an organization.
Our Organization contains Pages. Pages can contain Organizational Nodes, Users, Contacts, Companies, Contracts, Programs, all types of Tasks.
The list of Companies includes our Organization, as well as customers, suppliers, vendors, or any other organization we choose.
Companies can contain contacts. Contacts can belong to our company, or to other companies, like customers, suppliers, partners, channel members, contractors, and vendors.
A Company has many Programs. Each program can contain many Projects. Each Project can contain many Deliverables. Each Deliverable can contain many tasks. Each Task can contain many more Tasks.
Each Program can make use of one or more contract. Each contract can contribute one or more Allocations of funds. And each Program can contain Program Accounts, Members(users),
We use three types of permissions: Customizable Access permissions on a Page, Workflow Permissions , and very limited Role-based Permissions to control access to some parts of the application’s menu.
We use Workspaces do display sets of panels including their existing filters. We use Favorites to display single Pages.
The Workspace consists of Panels. The Panels contain Items. And the items in each panel can be Filtered. The Workspace Panels work together to Filter the contents of the Tasks Panel.
There a are many different Types of Tasks. One of which is also called “Task” or “Card” depending upon how its displayed: as a row in a Table or Outline or a ‘card’ on a Board.
We use six categories of tasks: Containers for grouping tasks into Projects, Deliverables and Folders. Stories which cannot contain other stories. Tasks which can contain other tasks. Financial tasks that must be approved outside of the Program. Business Requirements for recording lists. And Documents for creating content.
A workflow consists of a fixed set of Stages and each Stage contains a customizable set of States. We change States by pressing Buttons. Each button refers to a Choice in the Workflow.
We schedule a task on a Timeline, and we book or reserve appointments on a Calendar.
We can book appointments any time during the week, any time during the day, and at specific a time-of-day.
Disciplines contain Roles. Users can serve in many Roles, at different Rates.
Our Organization uses many Rate Sheets. Rate Sheets consist of a subset of Roles. Each Role on each Rate Sheet can have a different Rate.
Users can have individual rates. Contracts can override those individual Rates. Project Rates can override those Contract Rates. Custom Project Rates for the Individual can override the Project Rates.
We Record or Charge time, expenses, adjustments, and commissions against a Task. We Bill that time to a Program. We Invoice the Customer for what’s been Billed to the Program. We record Payments against Invoices.
Disciplines contain Skills contain Skill Levels, Contain Skill Weights. Users choose their Skill Levels. And give each other thumbs-up and thumbs-down on those Skill Levels, which in turn produces Skill Ratings.
We Post to the Wall on Pages. We watch the Activity Stream and Comment on posts. We filter the Activity Stream using Channels. We add content to channels by Subscribing to Events on Pages.
We Chat using the People Panel to open the Chat Window. If People aren’t available we use the Chat window to send a Message. We use the User’s Profile Page ->Chat Tab to view the Chat History, and open a Chat Window to Continue.
We use Accounting Periods to control Revenue and Costs. We use Operational Periods to control forecasts, appointments, and the Recording of Charges against Programs. We use Payroll Periods to Control Timecards.
We Forecast Costs. When we Forecast Costs we allocate Costs to Individuals, and from individuals to Tasks. By Allocating Costs to Tasks we find the true cost of running our organization. We later make adjustments to the Forecast Costs to reflect the Actual Costs. And then we Close the Accounting Period.
2.3.Style Guide
Runcible is a rich and deep product, and this Guide is detailed. Because it’s detailed, we styled the document to satisfy the goal of making it easy for you to scan through it, and to find what you want to, without a lot of reading.
Heading 2 is for Topic Headlines – Usually Provided by the Page Title
Heading 3 is for Subtopics that you use to introduce using a Question form
Heading 4 is for Subtopic Headings, and all other headings under it. Options(what), and Actions (how), Stated as a Question.
We start off any section that contains subsections with an introduction.
Then if possible or useful, a list of the subsections as a menu of links to the content that follows.
[alert style=”grey ml60″]
For a Sub-Menu we use the Grey Alert Style using the Alert Shortcode and ml30, ml60, ml90, ml120 to indent it.
• So that it’s clear to users that these are links
• So that it’s clear to users that these are links
• So that it’s clear to users that these are links
[/alert]
Standard Section Headings are:
What is the purpose of this thing?
A list of topics here.
What do I see on the Display?
A list of topics here.
What actions can I take?
[actionbadge] An Ordered list of actions from the most basic to the most complex.
A list of topics here. Notice we use the ‘actionbadge’ shortcode before user-actions so that they’re easy to separate from informative text.
[actionbadge] With each action in H4 Like This
To Describe A List of Actions we use hard returns (paragraphs):
• Indented and Bulleted Text…
• To describe a List of actions…
• That the user can take.
So that each step is easy to see with the human eye.
But for simple lists that are not actions, we use soft returns:
• And for just a list of things
• We don’t separate them into paragraph lines
• But just use a soft return.
Then We Use Bold Text
To introduce a paragraph of text.
Images: To assist you in quickly understanding the context just by scanning.
Proper Case Names: Of Runcible objects: Like the “Workspace“, or “Tasks.”
Bold Text: To assist you in scanning quickly through text for context.
Text: We try to confine to the basics: options (What) you have and things you can do (How).
Blocks: And we use block-quotes for information beyond the basic:
Note: Notes supply additional information: Who, Why, When, Where, What Else, What Not to do.
Tip: Tips suggestion ideas on how to do something better, or more advanced.
Hint / Why?: We draw attention to something that might not be intuitive
Tidbit: Some editorial background from the team on why we did something, or our personal experience.
Videos: Tutorials that help you understand by doing.
Question and Answer Sections Look like This in H4 (Answer: What Problems Might I Encounter?)
What do we do in the question and answer sections?
We use sentence case in bold for each question, and an indented answer like this.
How Do We Organize Page Content?
In Each Guide, We Use Sections (Topic Pages) and Content Blocks ( Reusable Text)
We Build the Guide(collection of Pages in a hierarchy
-> Using Sections (Pages)
-> That Include Content Blocks (text that can be dynamically inserted into pages using shortcodes).
How do we choose Topics vs Subtopics?
We try to use one page per topic.
We can place multiple topics on a page if:
Opening the topics together in single-page context assists the user, or not doing so would confuse the user
AND
It is unlikely that the user will search for the topic for its own sake.
When placing multiple topics on the same page: We insert a Horizontal Rule between them.
How Do We Choose to Link to Topics or Duplicate Information?
Many sections and subsections refer to similar or duplicate content.
Our intention is to get the user to a page and fully answer his or her needs on that single page, without loading another one.
This means that we duplicate instructional content throughout the document.
We duplicate content using Content Blocks, and then insert these blocks into the pages where we want to present them.
If a user might search for that content exclusively, then we will break it out into its own page, and link to it.
3.Runcible Mobile Application
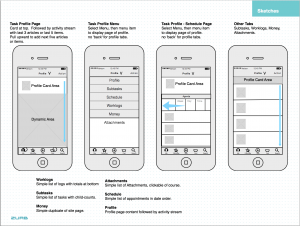
We designed a novel and powerful mobile application for Runcible.
But unfortunately, it isn’t done. Yes we know we need it. We know.
(We don’t yet have enough men, or even dwarves, elves, and hobbits to get it done.)
4.The User Interface
Introduction
Purpose
Audience
The Runcible User Interface
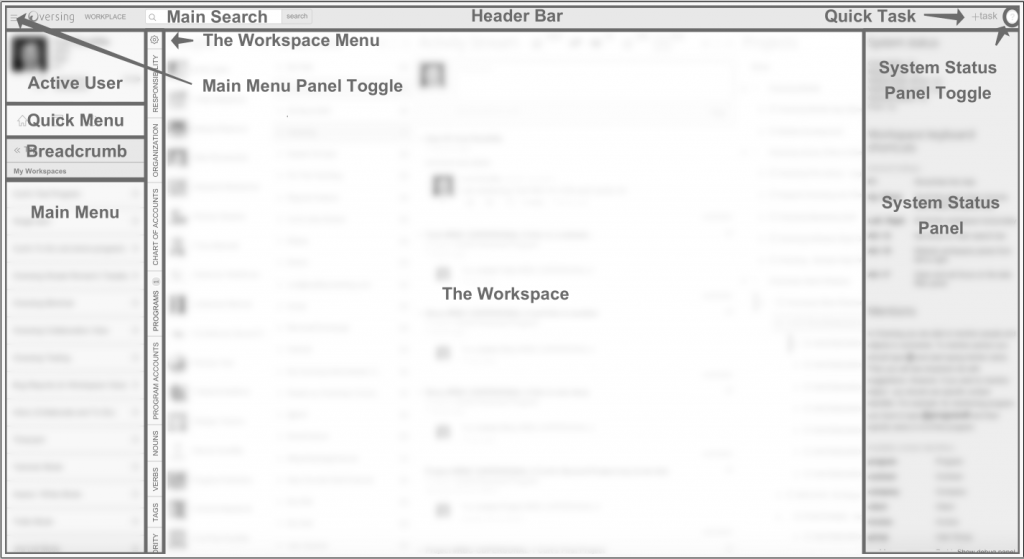
The Header Bar
The Header Bar contains these controls:
• Main Menu Control
• Logo Space
• Search
• +Task
• (?) System Status
The Main Menu Panel
The Main Menu Panel contains these controls:
• Active User Panel
• Quick Menu
• Main Menu
The Workspace
The Workspace contains these controls:
• The Workspace Panels
• The Workspace Menu
The Deck
To Use the Deck
• Drag and drop items to the deck to build quick collections of tasks you want to work with.
• Drag items from the deck to the Workspace Panels to tag or move them.
(Note: The Deck feature is not available in the beta.)
4.1.The Header: Menu Toggle, Main Search, +Task, and Status
4.1.2.The Branding (Logo) Space
Logo Space
![]()

We reserved this space to display your organization’s logo.
Note: This feature is not visible in the Beta
4.1.3.Main Search
Main Search
![]()
Use Main Search to find every kind of entity in Runcible, including: People, Clients, Companies, Contracts, Projects, Tasks… anything.
- To search for any Runcible Page
- Enter a search string. Runcible will search just the Name, Description and Human Readable ID.
- Press Enter or select the search icon. A sliding page will open with search results.
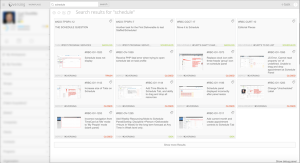
- Runcible displays the search results as ‘cards’ . Cards are different for different types of Pages.
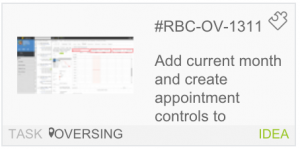
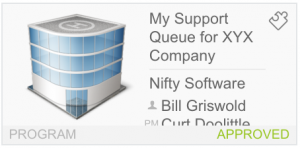


- Click on any Card to display the profile page for that item.
- Click on [ icon] to Open a new tab or window In Context in a new Workspace.
- Click on “Show More Results” to see more records.
Tip: Sort Order – Results are sorted by Name, with active items first and closed items last.
Tip: Using ID’s – Each Task has a human-readable id: like ABC-DE-99999, consisting of an abbreviation for the company, for the project and then the sequence in the project. You can quickly find any task by searching for its id.
Tip: Wildcards – you can include a % sign as a wildcard.
Note: We will include smart search in the Main Search in a future version of Runcible. It is not available int he beta – for no other reason than resource constraints.
Note: We will include full text search in future versions of Runcible.
4.1.4.+Task and Quick Tasks
![]()
Use +Task to add a task to any Project in the system, no matter what you’re doing right now.
Adding a Single Task with +Task
- Select +Task. A new Task panel will slide open.
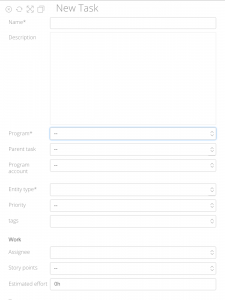
- The +Task Panel will search the open workspace and try to ‘guess’ where you want to add the task.
Tip: “+Task is (a little) Smart.”
- The only required fields are Name, Type, and Program it belongs to. It will default to a Task.
-
Tip: For personal projects just enter a task name. That’s all you need.
-
- Press Save. Runcible will open a sliding panel with your New Task Page.
That’s it.
MORE…
There are a lot of ways to create and use tasks in Runcible. See Working with Tasks to learn more.
4.1.5.The Status Panel
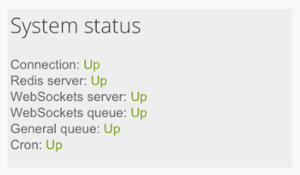
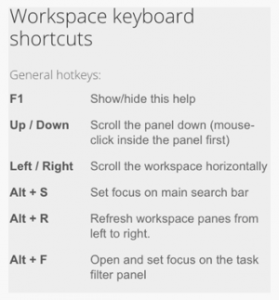
You can open the Status Panel by pressing the ![]() icon on the top right of the screen, or by pressing the F1 key. The Status Panel will slide in from the right and show you the current status of connectivity with the server, and a list of hot keys that you can use to enter information without using mouse or trackpad.
icon on the top right of the screen, or by pressing the F1 key. The Status Panel will slide in from the right and show you the current status of connectivity with the server, and a list of hot keys that you can use to enter information without using mouse or trackpad.
Connection Status
Connection: “Up”
Whether or not you have an internet connection.
Redis server: “Up”
This process provides Runcible’s Cache service.
Websocket Server: “Up”
The web socket server keeps your workspace current by sending messages from the server to your browser whenever something changes.
If this service is down, the server will restart it. If you lose a connection (which happens), wait a moment and the browser will usually restore the connection.
WebSockets Queue: “Up”
When data is changed in Runcible a message is sent to the Queue, and then the updates are sent to the websocket server, and then to your browser.
If the websockets queue is down your browser will not be updated with changes even though, any change you enter will have ben saved by the server.
General queue: “Up”
Runcible is an ‘event driven’ application. So when you change something, a message is sent to the queue, and it’s processed without asking you to wait while we recalculate dates and dependencies and costs and such.
Cron Server: “Up”
The Cron server runs small jobs, like checking the status of workflow items. If this service is not functioning, then you will need to contact your administrator or our Support staff.
Note: The server will attempt to restart any of these services if they stop for whatever reason. Runcible should alert us. You cannot restart them. So please contact us if you encounter a problem.
Note: when we publish a new build of the software, we stop and restart these services, and this often requires you to refresh your browser.
Keyboard Shortcuts
Runcible provides Shortcut keys for common tasks. (We won’t duplicate them here. Open the Status Panel to see them.)
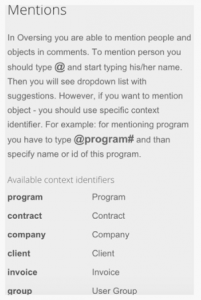
Mentions
You are able to mention people and objects in comments. When you mention someone or something, Runcible will subscribe the person to the conversation, and record the mention in their activity stream.
Use mentions to alert people to a comment, or to create a relationship between a comment and an object.
- To mention a person, type @ and start typing the person’s name. Runcible will show you a dropdown list with names matching the characters.
- To mention object – use @object-type# For example: to mention a program, type @program# and than specify name or id of this program. Runcible will show you a dropdown with suggested programs.
Example: @task#myco-mytask-999 will link the task myco-mytask-999 to the comment.
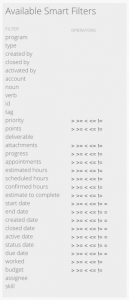
Smart Filter List
( … )
Runcible Notices
If we feel it is important to get information to you, we will either post it to your activity stream, or in the Shortcuts Panel
Runcible Contact Information
If for some reason you can’t remember our web site or contact information we supply it here for your reference.
4.3.Pages
What is a Single Page?
4.4.Sliding Pages
Sliding Pages
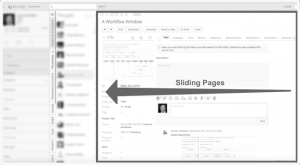
Sliding Pages open by “sliding in” from the Right of the workspace. Each additional page you open slides in over the previous like a deck of cards. Each layer keeps track of your progress like a breadcrumb trail.
Note: Yes, as you can imagine, you can make your browser very slow if you open a LOT of layers of sliding pages.
4.5.Page Controls
Panel (Page) Controls
Page Controls are shown the top of each Panel in row like this.
Use the Page Controls to:
4.6.2.Using Panels To Build Workspaces

The workspace is a blank background that you can organize to open, close, and use various combinations of panels to suit whatever style of work you prefer.
To open a panel,
- Scroll the Workspace Menu up and down until you see the panel you want to open
 or
or 
- Select the Workspace Menu item to open the panel
- The item will disappear from the menu. It will open on the workspace, and load its information.
To close a panel:
Either
- Select the
 panel control at the top of the panel to close the panel.

Or
- Select the Title (Name) of the Panel from the top of the Panel to close the panel.

Tip: Just keep clicking on the panel Title to rapidly close panels.
4.6.3.Saving and Deleting Workspaces
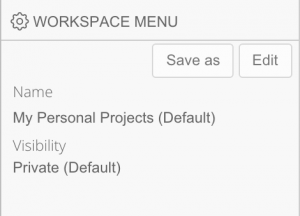
To Save a New Copy of the Current Workspace
- Select
 to maximize the workspace menu.
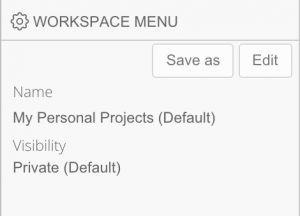
- Select “Save As”
- In the “Name” field, enter a Workspace Name
- Select “Save”
- The new Workspace will be added to your Workspaces Menu on the Main Menu.
- The workspace will refresh.
That’s it.
To Update the Current Saved Workspace
To save your current workspace over (and erase) a previously saved version of the current workspace,
- Select
 to maximize the workspace menu.
- Select “Edit” to open the Edit Menu
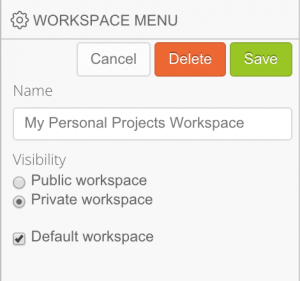
- Edit the Name if you want to modify it (it will still save over – and erase – the previously saved workspace)
- Select “Save” to save over (and erase) the current workspace.
That’s it.
To Rename the Current Saved Workspace
To rename your current workspace over (and erase) a previously saved version of the current workspace,
- Select
 to maximize the workspace menu.
- Select “Edit” to open the Edit Menu

- Edit the Name (it will still save over – and erase – the previously saved workspace)
- Select “Save” to save over (and erase) the current workspace.
That’s it.
To Delete a Saved Workspace
- Open the Main Menu
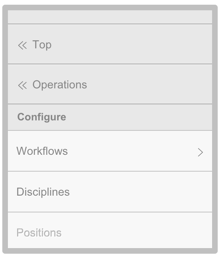
- Select Top -> Workspaces to display your Saved Workspaces
- Scroll until you find the Saved Workspace you want to remove.
- Select the Saved Workspace from the Main Menu to display it in the Workspace.
- Select the [ icon ] in the Workspace Menu to Maximize Workspace Menu
- Press the Edit button to display the Delete option
- Press the Delete button.
- Press OK to confirm the delete.
- The Workspace will clear. And your Saved Workspace has been deleted.
Warning: A workspace is like any other file or document. If you close it, or load another one, without saving it, the previous workspace is gone, lost, and must be recreated.
Note: You cannot save the current workspace over (and erase) a different workspace. A workspace must be loaded and displayed in order to modify it. This is by design. (Thanks.)
4.6.4.Public and Private Workspaces
Public Workspaces allow others to USE your saved workspace by selecting it from your list of Workspaces, or to COPY your workspace, and save to their Workspaces Menu.
When you save a Workspace, you can select whether to List it as a Public workspace, or Private workspace.

The Public or Private option determines whether other people can see a saved workspace on your User Profile’s Workspaces Tab.
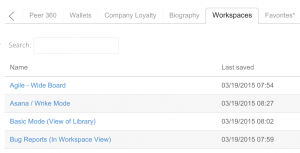
To View Others’ Public Workspaces
- On your User Profile Page ->Workspaces Tab, you’ll see a list of all your Workspaces, both public and private.
- If you open someone else’s Profile Page -> Workspace tab, you’ll see only Public Workspaces.
That’s it.
Tip: We suggest you only make public those workspaces that you want to let others use.
Note: Future: In the future we’ll make public Workspaces searchable. We will also make them Sharable, so that a user can add your workspace link to his or her Workspaces Menu. (Feature was cut for beta release). At present you can only copy someone else’s workspace. If they modify it, then you will not see those modifications.
4.6.5.Selecting a Default Workspace
Your default workspace will open any time you open Runcible in a browser.
To select a default workspace:
Open the workspace you want to choose as your default workspace.
• Select![]() to maximize the workspace menu.
to maximize the workspace menu.

• Select “Edit” to open the Edit Menu

• Select [ x ] the “Default Workspace” checkbox.
• Select “Save”
That’s it.
Note: Only one default workspace can be active at once.
Note: Shortcuts to Runcible can include links to workspaces and pages. If you open Runcible with a link that includes a page or workspace, it will open it, and ignore the default workspace. The default workspace is only opened if no other workspace or page is listed in the URL.
4.7.The Workspace Panels
The Panels are organized into blocks for different purposes:
- Collaboration
- People (Chat)
- Channels
- Activity Stream (News Feed)
- Inbox (Responsibilities)
- Views
- Responsibilities Queue
- Inbox
- Views
- Program and Project (Task Filters)
- Organization
- Chart of Accounts
- Program Dependent
The contents of these panels are created within your project.- Program
- Project
- Program Accounts
- Nouns
- Verbs
- Tags
- Teams
- Points
- Independent Filters
These panels are not dependent upon your project, but apply across all projects.- Priority
- Skills
- Types
- Task Panels
- Tasks
- Tasks Quick Report
- Task Details
- Tasks
- Scheduling and Resourcing
- Schedule Panel
- Schedule Quick Report
- Period Panel
- Reschedule Panel
- Schedule Panel
- Reporting
- Report Panel
- Reporting Menu
- Report Panel
4.7.1.Panel Controls
Selecting, Sorting, Editing Items
Select items in a Panel by clicking them. This will add filters to the workspace.
For example, selecting a Project in the Projects Panel will cause the Deliverables Panel to refresh and display only those Deliverables contained in the selected Project.
To select multiple items hold down Ctrl/Command or Shift while clicking them.
Use![]() to open the quick editing panel and edit basic details.
to open the quick editing panel and edit basic details.
You can also use ![]() as a handle to drag and manually sort items.
as a handle to drag and manually sort items.
Alternatively, you can use right-click to open the context menu and select “Send to top” or “Send to bottom” to arrange items.
Resizing Panels
You can resize panels by dragging the edges right or left.
Panel Controls
In the upper right corner of each panel, are the Panel Controls. They differ from Panel to Panel, because some panels have different capabilities.
![]() Reload forces an immediate update of all the information in the panel.
Reload forces an immediate update of all the information in the panel.
![]() Panel Filters allows you to customize the panel’s content.
Panel Filters allows you to customize the panel’s content.
![]() The Number of Filters active.
The Number of Filters active.
![]() Expand toggles whether the panel occupies your entire Workspace
Expand toggles whether the panel occupies your entire Workspace
![]() Collapse
Collapse
![]() New Tab moves a panel into a new tab of your browser.
New Tab moves a panel into a new tab of your browser.
![]() Unselect and Un-filter everything on this panel removes all the filters.
Unselect and Un-filter everything on this panel removes all the filters.
![]() Suspend Filters without removing them. Also displays how many Filters are Suspended.
Suspend Filters without removing them. Also displays how many Filters are Suspended.
![]() Close removes the panel from the Workspace. The name of the closed panel will then appear in the Workspace Menu. You can restore it from the Workspace Menu by clicking its name.
Close removes the panel from the Workspace. The name of the closed panel will then appear in the Workspace Menu. You can restore it from the Workspace Menu by clicking its name.
![]() Panel Size toggles between different widths for a particular panel.
Panel Size toggles between different widths for a particular panel.
When a closed panel appears in the Workspace Menu, a number beside it indicates the number of items selected on that panel.
4.7.2.The Collaboration Panels
The Collaboration Panels include:
- The People Panel: For Chatting
- The Channels Panel: For filtering your Activity Stream (News Feed)
- The Activity Stream Panel (News Feed): Shows activity as it happens.
- The Inbox Panel: For viewing your Responsibilities (Runcible Tasks) and Messages (Runcible Email)
4.7.2.1.People Panel
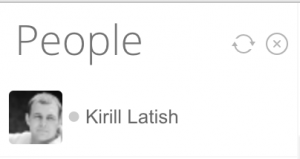
What Are People? They’re Users.
They’re Runcible Users in your Organization.
Tip: People (Users) are a Basic feature. Everyone will use them.
What Actions Can I Perform on the People Panel?
-
Open The User’s Profile
- Double click on the person’s name.
-
Chat
- Single Click the persons’s image.
- A Chat window will open at the bottom of your workspace.
- See Using Chat for more information.
-
Group Chat
- Select the name of each user while holding down the CTRL/CMD key.
- Right Click
- Select “Group Chat”
- A Group Chat window will open at the bottom of your workspace.
- See Using Group Chat for more information.
How do I add a User to the People Panel?
To add a user to your People Panel
- Search for the user
- Click on the user’s card to open his or her profile.
- In the button bar, select “Subscribe”.
Note: for the beta period, all your organization’s users will be visible in the People Panel.
What Filters Can I Use?
You cannot filter the People Panel.
What Right-Click Menu Choices are Available?
- Edit
- Insert Child, Insert Above, Insert Below
- UnIndent, Indent
- Move to Top, Move to Bottom.
What Does the Green or Grey Dot Mean?
If the user is active, the dot is green. If not active, then it will be grey.
Can I Drop Tasks on People?
Not on the People panel, no.
More…
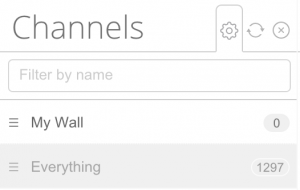
4.7.2.2.Channels Panel
What are Channels?
Selecting Channels controls what you see in the Activity Stream.
- Like almost everything in Runcible, a Channel is a type of Page
- Channel Pages contain different Subscriptions to Runcible Pages.
- The Channels Panel displays a list of Channel Pages.
- You can subscribe to many different Pages in the same PRIVATE Channel.
- You can subscribe to only one Page in a PUBLIC Channel.
But What’s the Point of Having Channels?
Do you know how you might wish you could design your own cable-tv package, and get only the channels you want?And if you could get only the channels you want, only the commercials you want? Well, its sort of like that. Channels allow you to customize your subscription to activity on nearly everything in Runcible.
Examples
- A Close Work Friends’ Pages
- A My Bosses Pages

- My Payroll Page for announcements
- The Industry Gossip Group Page.
- The #inAppropriateHumor Page
- The #Company Announcements Page
- My most important project page
- The Bug Reports Page on the Internal System software I use every day.
- My favorite customers list so that if they say anything I’m “in on it”.
- The #Sales Announcements so that I can feel good about my company.
You can subscribe to any Runcible Page:
- Public Hashtag Channels
- People, Groups, and Organizational Nodes
- Clients, Customers, Contracts and Invoices
- Programs, Projects, Deliverables, Tasks – and all the many task types.
So you can subscribe to pretty much everything in Runcible that has a Profile Page.
How to Subscribe to, and Unsubscribe from Pages
Try it
- Search for anything using the Main Search bar.
- Open a page.
- At the top left of the page, in the Workflow Bar (Button Bar) Select “Subscribe” (Or unsubscribe to unsubscribe)
- Select the Subscriptions Tab
- You will see a list of your channels
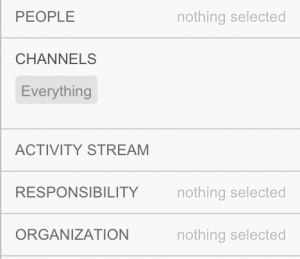
- Notice that all the boxes are checked next to the ‘Everything’ Channel.
That’s it. Now, let’s modify that subscription:
How to Customize Subscriptions
Once you’re Subscribed, you can modify which events you’re notified of.
- Uncheck the boxes for Worklogs and Instances, so it matches this image:
- As you select each box you’ll see a notification in the upper left that the change has been made.
- All activity on the item will be displayed in the Everything Channel in your Activity Stream.
That’s it.
What do each of these events mean?
- Action required: you are a member of the current workflow state, and MAY need to do something.
- Assigned to you: responsibility has been assigned to you.
- Reference to you: someone has used @mention to mention you.
- Thread you participating in: Someone has left a comment involving you.
- Comment: Someone has left a comment on a page.
- Worklogs no risk: Someone has entered time against the page, and marked it ‘green’ or no risk.
- Worklogs low risk : Someone has entered time against the page, and marked it ‘yellow’ or low risk.
- Worklogs high risk : Someone has entered time against the page, and marked it ‘red’, or high risk.
- State Change: someone has changed the state of the page.
- Change: Some data has changed – does not refer to comments, only data.
- Attachment: Someone has added a file attachment.
- Instance creation: Someone has created the page. (we always log it)
- Instance deletion : Someone has deleted the page.
Usually you’ll want to know if you’re responsibilities change using the first four events. The rest are optional depending upon your role.
What Types of Channels Are there?
You can use four different Channel types:
- My Wall Channel – Is Private and Permanent – no one else can subscribe to the Channel, but everyone can still subscribe to your profile page. And you cannot delete the channel.
- The My Wall Channel lets you post directly to your profile page’s wall, and read that wall, without opening a your profile page as a sliding page.
- The Everything Channel (Default or ‘General’ Channel) – Is Private and Permanent – no one else can subscribe to it. And you cannot delete the channel.
- The Everything channel serves as the ‘default’ or ‘general’, or ‘public’ channel. By default that’s where all Subscriptions are placed. SeeSubscribing and Unsubscribing
- The Page Channels – Are Private, and Removable – no one else can subscribe to them. And you can delete the channel.
- Subscribe to any Page
- The #Hashtag Channels – are Public and Removable. Others can subscribe to them. Runcible does not allow for the destruction of data, so you cannot delete a hashtag Page. You can only unsubscribe and delete the channel from your workspace.
- When you post in a Public channel, everyone in the channel will be able to read it.
Possible Point of Confusion: “Talking to Yourself” on Private Channel Pages.
There is a big difference between a Channel, a Channel Page, and the Channel Page’s Subscriptions (The pages it’s subscribed to).
Example;
- My “Breakfast Fruit” Channel.
- Includes My Posts to this CHANNEL’s Profile Page: “Breakfast Fruit”.And:
- Includes the posts from the pages I’ve used this channel to subscribe to:
- Page Orange: An Runcible Page that I subscribe with this channel.
- All Activity I am subscribed to on this page.
- my posts and replies to this PAGE
- Page Banana: Another Runcible Page that I subscribe to with this channel
- All Activity I am subscribed to on this page
- my posts and replies to this PAGE
- Page Grapefruit: Another Runcible Page that I subscribe to with this channel
- All Activity I am subscribed to on this page
- My posts and replies to this PAGE
- Page Orange: An Runcible Page that I subscribe with this channel.
- So, if I post to “Breakfast Fruit” I’m only posting to myself, NOT to the other three pages: Orange, Banana, Grapefruit. For this reason, it’s best to think of your private Channel Pages, as a place to keep notes on that channel. No one other than you can see them.
- Why? We are uncomfortable creating the ability to create channels that act as ‘broadcast stations’ across many pages, because we think it might lead to abuse.
What Does the Counter Mean?
The counter displays the number of unread messages in that channel.
Tip: Runcible can, and should, generate a lot of activity. Once you gain experience you will ‘tune’ your channels to inform you of activity you want to see, and ignore activity you don’t. Our advice is to just work with it for a few weeks rather than to try to guess what you might want to know.
What actions can I perform on the Channels?
- Select a Channel
- Selecting a channel displays the contents of that Channel in the Activity Stream (News Feed)
- Select Multiple Channels
- Select one channel
- hold the CTRL key
- Select more channels
- The Activity Stream will display the contents of the selected channels.
- Use CTRL click to deselect channels, or Select a single channel to unselect all others.
- Mark all Activity as Read in that Channel
- To mark all activity in a channel as Read, and set the counter to zero
- Right Click on the channel
- Select “Mark as Read”
- Your request will be placed in the queue, and in a few moments your workspace will be updated to reflect the change.
- To mark all activity in a channel as Read, and set the counter to zero
- Open a Channel’s Profile Page
- To open a channel’s Profile Page
- Double-click on the Channel
- A Sliding Panel will open and display the Channel’s Profile Page.
- From a Channel’s Profile Page you can leave posts in the Activity Stream.
- To open a channel’s Profile Page
- Edit a Channel

- Select on the
 icon. Runcible will display the editing panel.
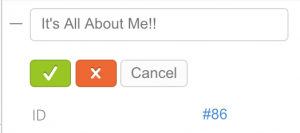
- Select the checkmark to save, or the cancel button to close the editing panel.
- Add a Channel
- Scroll to the Bottom of the Channels Panel
- Select the New Item by clicking on it.

- Type the new Channel Name
- To create a Private Channel
- Just type away. As long as the first characters is not a hashtag, Runcible will create a private channel.
- Press Enter to save, and create the new channel
- To create a Public (#Hashtag) Channel
- if the first character is a hashtag # Runcible will create a Public channel.
- Public (#Hashtag) Channels must consist only of upper and lower case letters and numbers – no special characters, and no spaces.
- Press Enter to save, and create the new public channel.
- To create a Private Channel
What filters can I use?
You can filter by text search. That’s it.
Do I need to use the channels Panel?
No. Especially if you’re in a very small group. Select the Everything Channel (it will always default to Everything), close the Channel Panel, and use the Activity panel without the Channels Panel.
4.7.2.3.Activity Stream Panel (News Feed)
The Activity Stream consists of two sections:
- Your Wall’s Post box
- The Activity Stream
What is the Post Box?
On your profile page, on the Wall tab, you see the Post box. The Post box at the top of the activity stream panel is a duplicate of this box. That’s all it is. Entering a post here, is the same as entering it on your wall.
But unlike all the pages, what you post will not necessarily show up in the Activity Stream unless the activity stream is displaying a channel that contains your wall.
Usability Note / Request for Feedback: We added the Wall Post box to the top of the activity stream late in development. Prior to adding it there, you either replied to post in the activity stream, or you clicked on the post to open the profile page for the post, and did your commenting there where you had more contextual information to work from.
What we didn’t like was that you needed to open your profile page to make a post on your own wall. We deliberated a lot on this question. We considered (a) adding a narrow panel for your profile page in the Task Detail Panel’s condensed view (single column), (b) Creating a separate Wall panel, (c) putting it at the bottom of the panel with it’s own header saying “Your Wall”, (d) eliminating it from the workspace entirely and just letting users use the Shortcut Key to open the profile in a sliding panel. So that if you wanted to make a quick post, it you’d press ALT-[KEY], the sliding page would open, and you could quickly enter on your wall from there.
One of the other factors is that you will be able to issue Runcible commands (command line options) by posting on your wall, and we thought it would be helpful to have the post box always visible for power users. (This feature is not available in the beta. We have it scheduled for later when users are more experienced.)
Our problem is that given the Slack/Facebook/Yammer UI, we feel that the user is easily confused by this feature. So your thoughts after you’ve had some experience, are appreciated. -Thanks. [Eds. My opinion is what we should cut it. -cd ]
What is the Activity Stream?
The Activity Stream shows changes to every Page you’re subscribed to, every Page you’re involved in, and every conversation you’re participating in.
The Activity Stream (News Feed) Updates Constantly.
The server will ‘push‘ updates to your Activity Stream.
- Anyone using your organization’s Runcible will be notified.
- When any update arrives, your browser will ‘flash’ the items that have changed, and then update them.
- The time between making a change and your browser being notified by the server depends upon how busy the server is. Usually it takes from half a second, to a second or two, but it can take much longer if there are many users making many changes at the same time.
- If you are not receiving updates, then refresh your browser. The server may have ‘lost you’ due to internet connectivity issues, or it may not be sure what you have loaded on your browser.
What Actions Can I Perform on the Activity Stream Panel?
- Mark as Read
Click on any post to mark it as read. Once the server responds, the ‘blue dot’ will disappear, and the counters will decrease. - Mark All as Read
Right-Click on any Channel. A context menu will appear. Select “Mark as Read”. Once the server responds, the counters will decrease and the blue dots will disappear. - Show More or Hide
If you are using Article View (See “What Filters Can I Use” below), only the last three to five updates will be visible by default.- Select Show More to see more updates.
- Select Hide to show fewer.
- Open the Page to see the entire Wall for that Post’s Page.
- Rate
Select or
or  to give positive or negative feedback.
- Note: By default, ratings increase your Karma, and cost ORCs.
- Give Feedback
To leave feedback on the post, select the [icon ] icon. Enter your comment. Then press “Enter”.- Note: By default, giving Feedback increases your Karma and costs ORCs.
- Note: You cannot (obviously) leave feedback to yourself.
- Note: By default, giving Feedback increases your Karma and costs ORCs.
- Leave a Comment on the Post
To leave a comment on the Post, select “Comment”. Enter your comment. Then press “Enter”. -
Note: Leaving comments does not affect Karma or cost ORCs.
- Reply to a Comment
To reply to an entry in the Activity Stream, select “Reply”. Enter your comment. Then press “Enter”. - Edit
To edit an entry in the Activity Stream, select the icon. Make your changes. Then select “Save” .
 - Delete
To delete an entry in the Activity Stream, select the icon. Then select Delete. Then select “OK” to confirm.
 - Open a Page
Double click on a clear area of the post to open the posts’s Page.
What Filters Can I Use?
Use the ![]() menu to display the Filter Menu.
menu to display the Filter Menu.
Views
The Activity Stream has two available views:

- Article View
Or, “Facebook/Yammer Style”: Activity is grouped by page into a single post, and the post is updated with each change. - Log View
Or, “Slack/IRC Style”: each post is displayed as it arrives in a constant stream.
Which view you prefer will depend upon the kind of work you do. Be default Runcible uses the Article View.
Category Filters
The Activity Stream has five filters:
 Everything
 Just Messages
 Just Notifications of Comments and Replies
 Just Notifications of Your Action Required – Responsibilities assigned to you.
 Just System messages – usually changes in value.
Type Filters
And you can also filter more precisely by Type of Notification.
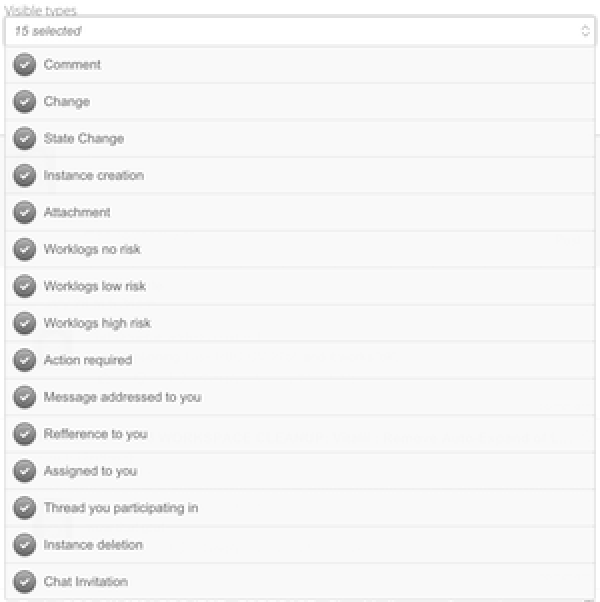
Note: “You can use the filter to hide a type of messages, and use the Channel to show the same type, and see nothing. In other words, it’s entirely possible to confuse yourself. (But its’ OK. Our support people have a sense of humor.)
No Full Text Search Filter on the Activity Stream Panel
Note: We were not able to complete work on the full text search of the Activity Stream Panel for the beta. Partly because given that main search already does full text, that it doesn’t seem to make sense for an event-driven activity stream. It would be slow problematic to implement. And so we think the current solution is best. Of course, as always, we’re open to thoughts.
There are Two Permanent Channels
Two Permanent Channels
- My Wall
Everything you have posted on your Profile Page’s Wall tab - Everything (General, Defautl)
When you use the ‘subscribe’ button, it adds that page to your Everything channel.
How did I Become Subscribed to some of these Pages?
- If you or someone else makes you an Owner. You can unsubscribe if you choose.
- If you or someone else assigns you the task. You can unsubscribe if you choose.
- If the workflow includes you as a Decision Maker, or the system makes you a Decision Maker. You cannot unsubscribe.
- If there are system events that require your action, you can’t unsubscribe if you’re a decision maker
Note: This feature – mandatory subscription – prevents orphaned tasks. (So, sorry. No “My dog ate it” excuses.)
What’s the Activity Stream’s purpose?
To provide you with a history of Optional notifications: so you don’t miss anything.
Or so that you can monitor and react to changes in real time.
Think of it this way: Runcible includes of views of your work that range from the most immediate to the longest term. So that no matter whether your work is reactive, selective, or directive, Runcible provides a way of working that suits your needs:
- Notifications of events in the Activity Stream
- Chats, Group Chats, and Messages
- Inbox List: Email, Memos, Directives, and Surveys
- Responsibilities List : All your responsibilities.
- Agenda: All work you are scheduled to do.
- Tasks List’s Me View: All active tasks for you to choose when to work on.
- The Task List’s Everything View: Everything you have permission to see.
1 – ( … )
2 – ( … )
3 – Your Email View of the Inbox Panel shows you:
- A history of different kinds of Runcible Email (which are like email messages but with workflows attached).
4 – Your Responsibilities View, on the Inbox Panel shows you:
- What you are required to do.
- What you can do.
- What you might want to do.
It’s a list of everything you’re responsible for. All as a sortable table. But that’s only a small portion of the activity happening in your team, group, or organization.
The Responsibilities view is important for people whose work is Event Driven: on approval of System Objects, like Customers, Clients, Deals, Contracts, Forecasts, Time Cards, Expenses, Adjustments, Invoices, and anything else that arises, rather than Tasks.
5 – Your Agenda Shows You What you are scheduled to do.
- Any time during the week
- Any time during a day
- At a specific time of day
6 – The Tasks List’ “Me” View Shows you:
- Every active Task for every Program, Project and Deliverable, that is assigned to me, but in the context of the program, project, and deliverable.
- What it DOESN”T SHOW is the System Objects that are not a part of Projects.
7 – The Tasks List’ “Everything” View Shows you:
- Everything you have permission to see in the organization.
So, How Can You Use the Activity Stream?
- You can use it as a sophisticated chat stream – like Slack or IRQ.
- You can use it to stay informed and collaborate, like Facebook or Yammer.
- You can use it as an alert system, to notify you of things you’re waiting for.
- It can function as a streaming task list. Anything that ‘pops up’ means you can, should, or must, work on it. So you can treat it as a kind of inbox.
- You can use it as a ‘heartbeat’, to get a ‘feel’ for what’s going on in your organization in real time.
Tip: This is one of the best features of the Activity stream. After a while you sort of can ‘feel’ whats going on. And it makes you feel ‘connected’ to everyone else.
Runcible is virtually programmable without programming. So between workflows, awards, social features, and tasks, we’re not really sure what creative uses you might come up with.
Q&A: “Will the activity stream accept incoming and outgoing hooks to other software?” Yes, we have that scheduled for the API Release. But that’s in the future.
More…
- See Channels for more.
4.7.2.4.Inbox Panel
The Inbox Panel has two views:
- The Responsibilities view
- The Messages View
See both below.
The Responsibilities View (Tasks)
What is the Responsibilities View?
It’s a Workflow-Based view of your tasks, rather than a program and project based view of your tasks.
Why? Some people work in a project context, and others work across many or even all projects. The responsibilities view is useful for people who across many projects using an inbox, priority or queue view of their work.
For people who process contracts, invoices, clients and customers, timecards or help desk or support calls, the Responsibilities and inbox views are more useful. They really have one project of their own: serving projects and the organization. So they are better served with a single view of the workflow items currently involving them.
Tip: The activity stream updates and then scrolls away. Tasks appear on your responsibilities view and stay there. Your task panel view changes constantly depending upon what you’re looking at. These three views provide information for three kinds of work.
Note: The Responsibilities table does not currently update in place when new messages arrive *that would be visible in the current subset of tasks*.

What Actions can I take?
- Open a Page
Double-Click on any row to slide open the profile page for the item. - Display the Task in the Tasks Panel (Only if the Tasks Panel is not open)
Single-Click on any row to display it in the Task Detail Panel - Print
Print the Table. - Export
Export the Table.
What Filters can I use?
- Search
Use a text search to limit the list to matching items. - Sort
Select a column heading to sort by that column. Select again to reverse the sort. - Visible Columns
Select which columns are visible in the table.
The Messaging View (Runcible Email)
Runcible-Email
(Secure email between Runcible instances)
Beta Note: We know it’s cruel, but Runcible Email is not included in the Beta Program. (Not enough Hobbits. Sorry.)
What is the Email View?
( … )
What Message Types Can I Send or Receive
- The Message: Tells you it’s been read. Lets you collaborate on it.
- The Survey: Collects answers to survey questions and shows you the results. All results are private.
- The “Memo”: Keeps a record of who has ‘accepted’ it (read it), and feedback is visible only to the author.
- The Directive: Contains a list of tasks that everyone is asked to complete.
( … )
Who Can I Send Runcible Email To?
Internal and external.
What Purpose Does it Serve?
( … )
What Actions can I take?
( … )
What Filters can I use?
( … )
Background Note: Runcible email is built using a separate type of program, with a separate workflow. And each email item is internally structured as an Runcible Task within that separate type of program. Why? So we can create the ‘feel’ of email for managers and executives whose job consists of communicating and organizing. But even better, we can provide the feedback and statistics and even costs. It’s easiest to think of these emails as micro-projects. The author does not have to refer to or select a program or project when he or she composes administrative communications emails.
[External System E-Mail]
Beta Note: We know it’s cruel, but External Email integration is not included in the Beta Program. (Not enough Hobbits. Sorry. We still aren’t even sure it’s a good idea. We’ll see.)
- [Exchange]
- [Google]
- [Others]
4.7.3.The Organization, Program and Project Panels
( … )
4.7.3.1.The Organization Panel

- Tip: Complex organizations are an Advanced Feature. Only organizations large enough for departments or locations will make use of the Organization features.
4.7.3.2.The Program Panel
What is a Program?
- A set of projects that achieve a goal.
- In Runcible, you create a program and choose or configure a workflow, add people, and then create projects inside of it – for a single customer: whether that customer is your organization, or a different organization, or an individual. Placing the configuration at the program level allows you to quickly start projects without doing any overhead work.
Tip: Programs are a Basic Feature. Everyone will use them.
4.7.3.3.The Project Panel
What is a Project?
Loosely: A set of related tasks that achieves a goal.
Technically: A set of deliverables that you want to produce with limited time, people, and budget.
In Runcible: A collection of Deliverables and Tasks.
Tip: Projects are a Basic feature. Everyone will use them.
What Filters Can I Use?
Smart Search
Smart search values include: id, account, program, noun, verb, priority, points, assignee.
Stages
Work is the default view. You can choose from Work, Everything, Backlog, Active, Closed, Trash
Visible Types
Project, Deliverable, and Folder
What Right-Click Menu Choices are Available?
- Edit : Open the editing panel.
- Insert Child, Insert Above, Insert Below: insert a new row.
- UnIndent, Indent: Change the parent of a row.
- Note: Until you have some experience with Runcible the logic of what kind of Pages can contain other Pages might be confusing.
- Move to Top, Move to Bottom.
Move the current item to the top of the list or the bottom of the list. This is useful for quickly rearranging things.
What Workflow does a Project use?
The Project is included in the Task Workflow for the Program.
Tip: The task workflow for each program contains all possible project, deliverable, folder and task types.
What Do the Counters Reflect?
The total number of tasks available in that project.
Can I Drop Tasks on Projects?
Yes. Dropping a Task on a Project will move it between projects.
Do I have to Use Projects?
No, you can create Tasks in a Program without creating a Project.
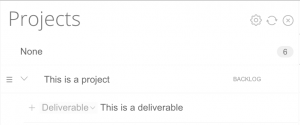
A Project’s Deliverables (Outputs)
 `
`
What is a Deliverable?
A deliverable is a tangible thing produced by completing a set of tasks, but that by itself does not satisfy the goals of the completing the project.
Projects can contain zero, one, or more deliverables.
Tip: Deliverables are a Professional Feature, although once you are comfortable with Runcible it’s likely that you’ll use them to organize your project tasks.
A Project’s Folders
What is a Folder?
A Folder is a container for Documents.
What is a Document?
You can use Runcible to create Wikis, Support Sites, Manuals, Scripts, Novels, to take Notes, or whatever you choose.
More…
See Documents for to learn more.
4.7.4.The Tagging Panels
Tags are dependent on the program, and Qualifiers are not. So if you display many programs you will also see many sets of tags.
Hint: From the Filters Menu [icon] Select “Collapse” to clean your workspace when you have a lot of programs in view.
4.7.4.1.The Program Accounts Panel

What is a Program Account?
Use Program Accounts to create your own mini-accounting system inside of any program and associate tasks with the accounts. Program Accounts allow you to manage complex budget relationships with internal and external customers.
Tip: Program Accounts are an Advanced Feature. Only those organizations that need custom budgets and custom reports for each program or project will need them.
What Filters Can I Use?
You can filter by account name.
More…
See Using Program Accounts.
4.7.4.2.The Teams Panel
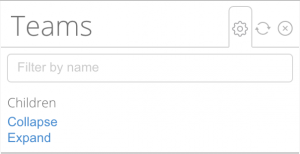
The Teams Panel helps you:
- Assign Tasks to one or more People.
- Create Teams using People in the Program.
- Add People to the Program
- Filter the Tasks Panel by person, role, or team.
Tip: Teams are a Professional Feature. They’re useful when you have a lot of people involved in a project or program.
Tip: Use Teams for the current program, and create Disciplines for Departments, or Roles or for Organizational Teams that persist across programs and projects. Teams, Roles and Disciplines you can reflect almost any possible organizational structure.
Tip: It’s also possible to create Departments using Roles, and to assign work to different departments, if you traffic work to departments rather than specific individuals.
What are Roles and Teams?
Within a program you belong to a team consisting of a collection of roles, each containing people.
Like this:
Organization View: Discipline -> Role(Rate) -> Individual(Rate)
-vs-
Program View: Program -> Team -> Role(Rate) -> Individual(Rate)
Roles
In simple terms, a role refers to a rate or cost per hour, day, or week.
People play a role, by practicing a discipline.
People can play many roles in Runcible.
Think of a list of roles like a restaurant menu of prices.
Roles are consistent across the organization.
Rate Sheets consist of roles with prices just like different restaurant menus.
Rate Sheets are consistent across programs that use those rate sheets.
Why? So that everyone in the organization speaks the same language, and understands one another.
Tip: In complex organizations we tend to use Role and Level as a proxy for years of experience. So Marketing Manager 1, 2, 3, and 4 would refer to people with more or less experience in the role.
Teams
A team refers to a collection of people within a program. Teams do not cross programs in Runcible.
A team is organized by role, the person – so that people unfamiliar with the projects will understand quickly what everyone does.
Tip: To create cross-program teams of people, create a new discipline called Team XYZ or Department XYZ, and assign people to it, and use personal rates instead of Role based rates on your programs and projects.
Note: In future versions we will add the use of Groups and Group Members to the programs so that you can use Group Pages to create cross-program teams.
What Actions Can I Take?
-
Add Someone to a Program
There are three ways to add someone to a program:
- From the Program Page -> Members Tab
- Select
 to slide open the Add People page.
 - Find someone:
- Choose a Discipline from the dropdown box.
- Choose a Date to check the individual’s availability from the calendar.
- Choose Skills
To choose skills:- Select (+) icon to add skills

- Select a Discipline and Skill from the dropdown boxes.
- To add another skill, repeat the past two steps.
- Select (+) icon to add skills
- Enter some search text in the search box.
- Each time you change a value the search list will refresh with the filtered results.
- Scroll until you find someone that fits.
- Select the “add to program” button on the right of the panel.
- Runcible will add the individual to the program.
- Select
- From the Schedule Panel‘s “Add to Program” button.
- Open the Schedule Panel
- Select the Everyone View
- Scroll until you find the Role you want.
You can add the Role or Individuals to your Program.- To add the Role to your program,
- select the “Add to Program” button.
- To add an individual to your program,
- Select > to view the people that can perform in that role.
- Select the “Add to Program” button next to the individual.
- To add the Role to your program,
- Runcible will display a dialog asking you to choose a rate for that Role or Individual.
- Select the Rate and then OK.
- The Role will be added to your program at the rate you chose.
- If you added an individual, he will be added to your program in the Role and at the Rate you chose.
- Continue adding Roles and People
Tip: You can use the Filter Menu to search by Skill, Role, or Organization Dimension, using Smart Search.
- By Dropping an appointment for a task on a person’s schedule.
There are four ways of dropping an appointment on a person’s schedule.
- From the Tasks Panel, Table(List), Outline or Board View
- Open an individual or role’s schedule.
- Drag a Task from the Tasks panel to the Schedule Panel
- Drop it in the Week, Day, or Time section of the schedule.
- Runcible will create an appointment for that task, using the Estimate to Complete value of the task, or 1 hour, if it is empty.
- From the Profile Page -> Time Tab, or the Task Detail Panel -> Time Tab
- Drag Assignee
- Select the Time Tab to display the schedule for the current task.
- Select the appropriate week from the Calendar Control
- Use the [] to Drag an assignee
- Drop it in the Week, Day, or Time section of the schedule.
- Runcible will create an appointment for that task, using the Estimate to Complete value of the task, or 1 hour, if it is empty.
- You may see a dialog asking you to select a rate if Runcible cannot determine it. Select a rate and press enter.
- Runcible will add that individual or role to the program in the selected role at the selected rate.
- Drag Time Block
- Assign a one or more people to a task.
- Select the Time Tab to display the schedule for the current task
- Across the top of the Schedule you will see a row of the Assignees.

- The most suitable time block for the Estimated Work Remaining will be highlighted.
- Select All Assignees to create an appointment for all, or any one of the Assignees, for one of them.
- Drag and drop a block of time onto the schedule to create an appointment.
- Runcible will create an appointment for that task using the duration of the time block that you dropped on the schedule.
- You may see a dialog asking you to select a rate if Runcible cannot determine it. Select a rate and press enter.
- Runcible will create an appointment and add the individual to the program if not already a member.
- Drag Assignee
- From the Schedule Panel’s Suggested Work Sub-panel (Cool feature)
- Using the Tasks Panel, in any view, select a task you want to create an appointment for.
- From the Schedule Panel, expand a Role or an Individual’s Schedule
- You’ll see the Suggested Work Panel.
The panel will display three options, each with a counter- Selected: if a Task is selected in the Tasks Panel
- Unscheduled: if a task is on the timeline for this period, but without appointments.
- Scheduled: if a task is on the timeline for this period, and it has appointments.
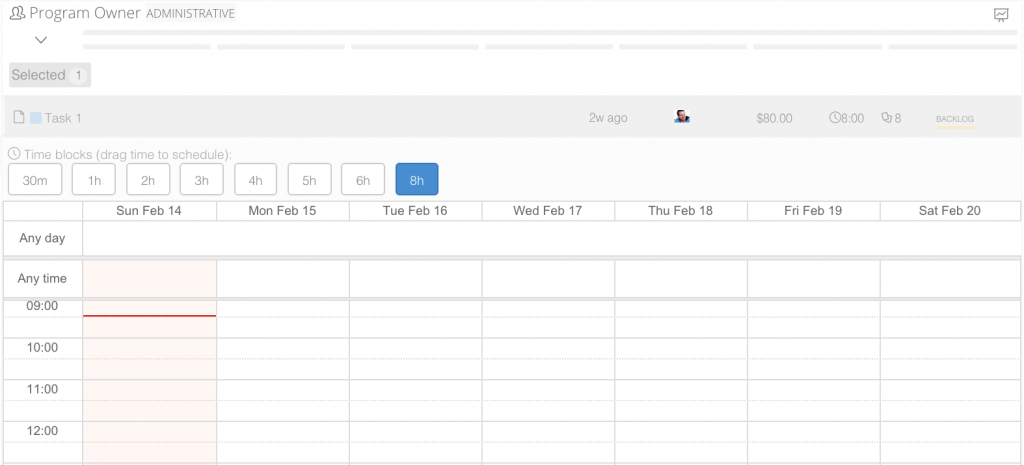
- Choose “Selected” if it isn’t chosen (it’s chosen by default)
- The Selected Tasks will appear below the choices.
- A set of time blocks will appear below the task
- The suggested time allocation will be highlighted
- Drag and Drop a time block onto the schedule to create an appointment.
- If necessary, Runcible will display a dialog asking you to choose a role and rate. If so, select them and Press enter.
- Runcible will create an appointment and add the individual to the program if not already a member.
Bug: Drag and Drop for the Gantt View is broken as of this writing.
Note: There are a few time intensive processes in Runcible: Scheduling, Rescheduling, Cost Allocation, and Permission changes. This is common in all similar software of this scale. So under heavy use it can take a few seconds to notify your browser that the appointment was scheduled. In a future version we will show the appointment and then remove it if it failed, rather than wait for the server to create it in your browser. This was an oversight on our part. Apologies.
- Create a New Team
To create a new team:- Scroll to the bottom of the panel
- Select “New Item”
- Type a new team name
- Press Enter. The new team name will be created.
- Add Someone to a Team
To add someone to a team- Expand the “Everyone” Team
- Scroll to find the person you want to add to your team.
- Drag and drop that person onto the new team.
- Remove Someone from a Team
To remove someone from a team- Select
 to open the editing Panel

- Select the Delete icon. The person will be removed from the Team.
- Select
- Open and View the Rate
- Select
 to open the Editing Panel for either the Role or the Individual.
 - The Rate per hour (only) is displayed in the Editing Panel
- Select
Can I Remove Someone from the Program?
No. You can remove someone’s permissions. But once they’re added to the program you cannot remove them. This is by design.
Note: We may add the ability to ‘hide’ an individual in a future version. We may also add the ability to remove an individual if no activity has been recorded for him.
4.7.4.3.Nouns, Verbs, and Tags Panels
Runcible includes three kinds of tags for three different purposes: Nouns, Verbs, and Tags.
Do I need to use Nouns and Verbs? Can’t I just use tags?
No you do not need to use nouns and verbs, you can just use tags. And you don’t need to use tags either.
Why Do I Need Three Kinds of Tags?
Because while everyone today understands the use of Tags and Labels to help find or organize information, Runcible satisfies the needs of advanced users too. And advanced users very often make use of both physical and functional tags. So Runcible provides Physical tags: Nouns, Functional tags: Verbs, and Arbitrary Tags: Tags/Labels).
What do the Counters Mean?
They show how many Open tags are available in the selected Program and Project.
They do NOT show the tags in the currently filtered view. They show only how many tags maximum can be in that view.
What Actions Can I take on the Tag Panels?
- Drop a Task to Tag
Drag a one or more Tasks from the Tasks Panel, and drop them on a Tag in the Tags Panel. The server will tag the tasks and then send an update to your browser. Your browser will display tag icons on your Task in the Tasks Panel.Note: You can drag tasks to tags, but you cannot drag tags to tasks.
- Select to Filter Tasks
- Select one, or control-select more tags, to filter the Tasks Panel
- Notice that the tag is added to the Tasks Panel Smart Search list.
- Select again to de-select and remove the filter.
- Select one, or control-select more tags, to filter the Tasks Panel
- Add New Tag
- To add a new Tag, scroll to the bottom of the panel.
- Select New item. And start enter the tag name.
- Press enter, and the new tag will be created.
- Open the Editing Panel
- Select the
 menu
menu - The Editing Panel will appear
- Select “Cancel” or the the [icon] menu again to close.
- Select the
- View Counters
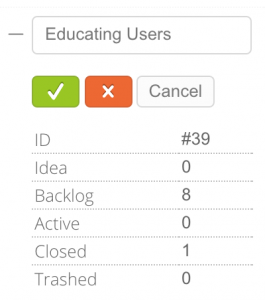
- Open the Editing Panel
- After a moment the browser will display the number of tagged tasks in each Stage.
- Change the Tag Color
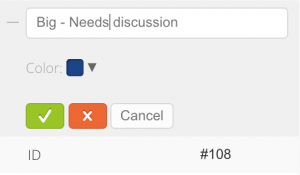
- Open the Editing Panel
- Select the dropdown box.
- Select a color for the tag.
- Select the Checkmark or press Enter.
- Edit the Tag
- Open the Editing Panel
- Edit the text field
- Select a color for the tag
- Select the Checkmark or press Enter
- The server will update the Tasks Panel
- Delete the Tag
- Open the Editing Panel
- Select the [X] Delete icon
- The server will update the Tasks Panel
What Filters Can I Use?

- Name
Enter text and the panel will automatically apply the filter. - Status
Select All, Active, or Inactive to see the tags in that state.
The Nouns Panel
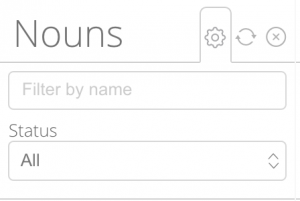
What are Nouns? (Things That Tend To Stay The Same)
A physical goal that you’re trying to achieve or maintain across multiple projects and deliverables in the same program. See “Using the Nouns Panel”.
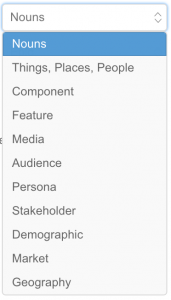
Tip: Nouns are an Advanced Feature. Creative, Marketing and Software talent will often use them. In agile management, nouns generally refer to Feature areas or ‘Components’.
Examples
We provide examples to choose from, or you can just type your own.
The Verbs Panel (Things That Tend To Get Completed)
What are Verbs?
A verb is a Goal that you’re trying to achieve across multiple projects and deliverables in the same program, that helps people do something.
Use verbs and nouns to tie parts of projects or deliverables together.
Examples
Epics – Collections of stories that achieve a business goal
Initiatives or Programs — Collections of problems, opportunities, or goals on many projects that together achieve an abstract business objective
We provides some examples to choose from, or you can just type your own.
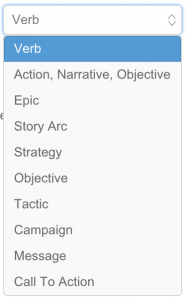
Tip: Verbs are an Advanced Feature. Creative, Marketing, and Software talent will often use them. In agile management, nouns generally refer to “Epics’. Epics (think of story arcs in a novel), contain Stories (think of chapters in the novel). And Stories contain Tasks (Think of scenes in a novel).
The Tags Panel (Everything Else)

A label that you want to put on tasks so that you can group them together or find them.
There are no default tags.
Tip: Tags are a Basic Feature. Everyone will probably use them.
4.7.5.The Qualifications Panels
Qualifications Panels are not dependent upon the program (so much).
What Actions Can I take on the Qualifications Panels?
Drop a Task to Tag
Drag a one or more Tasks from the Tasks Panel, and drop them on an item in the Qualifications Panels. The server will tag the tasks and then send an update to your browser. Your browser will update your Tasks in the Tasks Panel.
Note: You can drag tasks to tags, but you cannot drag tags to tasks.
Select to Filter Tasks
Select one, or control-select more tags, to filter the Tasks Panel
Notice that the tag is added to the Tasks Panel Smart Search list.
Select again to de-select and remove the filter.
Open the Editing Panel
Select the ![]() menu
menu
The Editing Panel will appear
Select “Cancel” or the the [icon] menu again to close.
4.7.5.1.The Priority Panel
![]()
A set of priorities that you can associate with tasks.
Runcible solves the problem of combining positive ranking by business value, and negative ranking by business impediment, by weighting business values with positive numbers, and weighting business impediment with negative numbers. This allows you to sort by either positive, negative, or by using absolute value: both.
Note: The world is full of debate over the topic of prioritization, and we thought this was the best possible solution. Why? Because there is value in organizations using the same standard so that employees are trained to speak the same language. This builds mutual comprehension and trust, and limits ‘creative yet empty verbalism’. But, if you’re a rebel, how do you augment a standardized Priority tree for a program where you have unique demands? Use Nouns, Verbs, or Tags to create an alternative hierarchy.
Note: . In the future will plan to add custom aliases to each project for each Priority Name.
Tip: Priorities are a Basic Feature. Everyone will probably use them.
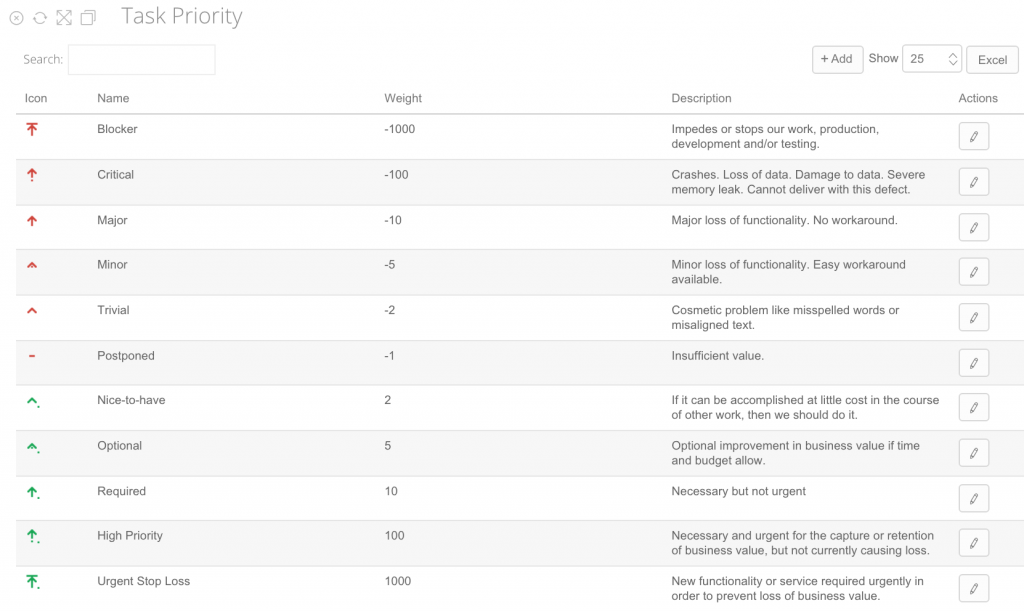
What Filters Can I Use?
None.
4.7.5.2.The Points Panel
A way of estimating (loosely) the relative size and complexity of a task by tagging the task with ‘points’. You can later refine these estimates, and over time develop a ‘good sense’ of how long tasks will take.
Tip: Points are a Professional Feature, for people, teams, departments, and organizations who must estimate their work.
Why Would I Use Points?
Some organizations ( many organizations ), or at least some set of people within them, have to estimate work that they have not done before, or that could vary a lot in the time and money it takes to complete the work.
The purpose of using points is to guess the estimated ‘size’ of the work, if it’s big, then break it into pieces, do the work, look at how long it actually took, and to slowly build a database of ‘guesses versus actuals’: for the organization, for the team, and for the individual.
Then when a new task, problems, job or project arrives, you can look at the past tasks, problems, jobs, or projects and choose those that are about the same ‘size’. And use the ‘guesses versus actual’ number to improve your estimates.
And for larger projects, you can learn everyone’s ‘velocity’. What that means, is how many points of work the team, and individuals on the team, can produce in a time period.
The idea is to increase the accuracy of estimating so that you create trust and certainty. It is not to make people work faster. (That doesn’t happen other than by accumulated experience – there is no magic bullet.) In general, the purpose of the agile methods is to create empirical evidence that builds predictability and trust between staff and customer, whether the customer is internal or external to the organization.
There is a very elaborate ‘science’ to this process of estimating. And it works extremely well. Because it uses empirical measurements to do two things: control management’s wishful thinking, and control staff’s inescapable cognitive biases. We evolved to be rather optimistic when working in groups, in order to bias us toward cooperation. But the ‘incentive’ produced by that cognitive bias, tends to obscure reality from us. The universe is not all that friendly to mankind. And without cognitive biases, we might be overwhelmed by it. Runcible, and estimating, help us get beyond those biases.
Note: We have a wonderful set of more advanced estimating features in the queue – including triangulation and ‘poker’ but like many things we could not complete them for the beta program. It’s a big feature set and it will take the hobbits some time.
What Actions Can I Take?
Select
Select one or more Points to filter the Tasks Panel.
Task Drop
Drop one or more tasks onto a Point to tag it.
Advanced
Set Story Point’s Time Equivalent
For example, if you notice that your project’s actual work tends to be 1.5 times your story point estimates, you can change your Program’s Story Point Time Equivalent to 1.5. And all time estimates going forward will be calculated by using 1.5 times the number of story points. We have found that adjusting this value during a project can help the team produce better time estimates from their ‘scale’ estimates.
To set the multiplier:
Open the Program’s Profile Page
Select “Edit”
Scroll down to Story Point Time Equivalent
Change the value.
Press Save. The setting is now changed.
Note: This setting affects all projects, deliverables and tasks in the program from the point at which you change it onward. It does not affect previously calculated values.
Tidbit: When building Runcible we consistently performed at 4x our point estimates. It’s not uncommon to perform at 2-2.5x. Smaller groups will have larger variations, and larger groups less. The more complex the more variation, the lower the complexity the less variation.
What Filters Can I Use?
None.
4.7.5.3.The Skills Panel
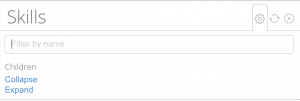
For those tasks that require certain skills, you can tag them with the skills so that the right person chooses or is assigned the right work.
Tip: Skills are a Professional feature. They’re useful when others may need to understand whether someone can reliably do the work or not.
What Are Skills?
Runcible includes: Soft Skills, Hard Skills, and Desirable Skills
• Soft Skills: Personal attributes that enable someone to interact effectively and harmoniously with other people.
• Hard Skills: Personal attributes that enable someone to interact effectively and harmoniously with other people.
• Desirable Skills: A weighted value of just the skills that are valuable to your organization.
These Skills also appear on everyone’s Profile Page.
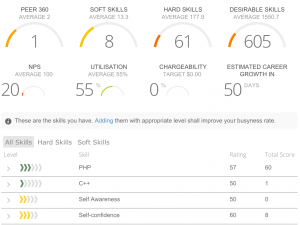
Do I need to Use Skills?
You don’t need to put skills on all tasks. But if you do put skills on tasks where you are not sure who will do the work, then you’ll have some insurance that the right person does the work.
What Are Skill Levels?
Every skill is described using one or more levels. So you always assign both a skill and level.
Every skill level is described as a statement of something demonstrable – that you can see.
Tidbit: We were trying to get away from the “LinkedIn” problem, where skills were so vague as to be meaningless, and where they tended to be popularity measurements rather than quality measurements.
And so we wanted:
– A system where ‘overstatement’ of your skills was a risk to your reputation.
– And where opinions of peers in your craft were meaningful and those without that knowledge less so.
– Where each level of skill required as objective a statement as possible.
And that’s how Runcible’s weighted Skill system works.
What Are Disciplines?
A discipline is a branch of knowledge, or a ‘craft’, or an ‘area of expertise’.
Runcible organizes skills into disciplines.
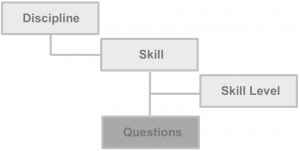
More…
See Disciplines
What Are Skill Ratings?
Tip: Our data, accumulated over many years, suggests that the most expensive errors often occur when we put people unable to the work on a task, and the work must be rescued by someone more senior, whose absence on other projects affects their budget, schedule, and quality as well. The cascading costs of these mistakes sometimes can be far higher than the entire profit from the project.
What Other Actions Can I Take?
- View the Skill Levels
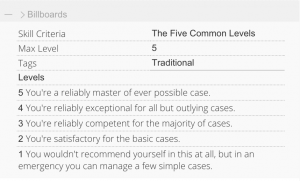
- Expand the Skills to use the Skill Levels
What Do the Counters Mean?
The Counters represent the number of available tasks tagged with that skill.
Note: The counters are not present. This is an open issue waiting fix.
What Filters Can I Use?
Text. (Smart Search is not enabled for this panel)
Tip: For skills, Runcible uses a text vector that looks like this: “Marketing/Creative/Tools/Photoshop” to categorize skills. When searching for filters, Runcible searches the entire vector. This means you can do fairly complex searches for skills once you get some experience with it.
Tidbit: We spent too much money trying to research and use industry standard skill lists. But it turns out that they are about as antique as is tax policy or the calculation of gross domestic product. Most are weighted toward organizational models that no longer are practiced, educational training that is no longer relevant, government bureaucracies that are unsustainable, and low skilled work. So we did our own research and created our own skill hierarchies more suitable for the current decade (and century). We will add more for more niche disciplines in the future. You’re welcome to add your own as well. We will keep them customizable for the near future, and eventually standardize them so that skill ratings across organizations evolve to become comparable.
More…
See Skills
4.7.5.4.The Types Panel
![]()
The Types Panel lists all Task Types that can appear in the Tasks Panel.
You can use Types to:
• Limit the task types displayed in the Tasks Panel.
• Limit the types of tasks that can be entered in the Tasks panel.
Tip: Types limits Tasks for ALL programs active in the tasks panel.
Tip: The Types counters show the available task types in the view. If a type is not selected, and its counter is not zero(blank), Tasks of that type are hidden from the Tasks Panel Display.
Note: Types are a basic feature. Almost everyone will use them.
What Actions Can I Take?
Select / Deselect
You can select and deselect one or more Types to filter the Tasks Panel by those types.
What Does The Counter Represent?
The Count of Tasks Available in the Program of that Type.
What Filters Can I Use?
None.
Why Don’t All Task Types Appear In My Program?
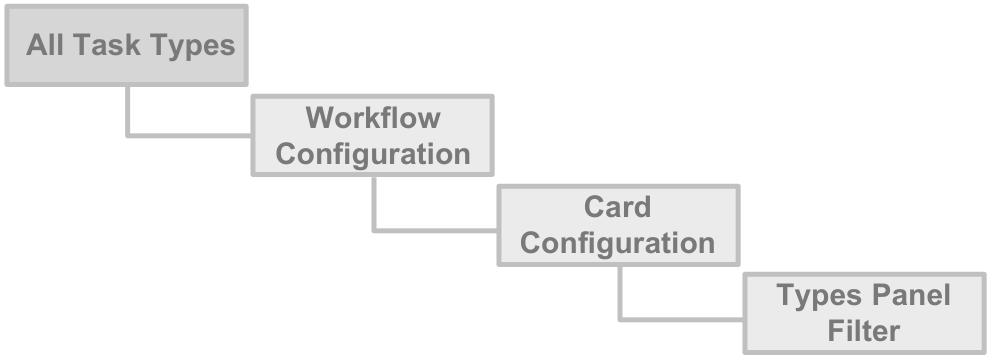
The full set of Runcible Task Types is limited by:
The set of task types you configure in the Workflow Editor.
…then:
The set of task types you choose in the Program -> Settings -> Card Configuration Tab.
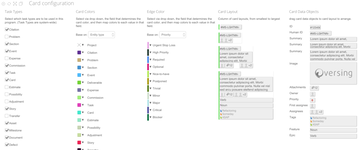
…then:
The set of task types that you choose to filter by in the Types Panel.

So, for example:
Lets say that you want to use an agile-style workflow that someone else has configured. So you select it as the workflow for your program.
But you don’t want to use financial tasks. So in the Program->Settings -> Card Configuration tab, you Select only Stories and Tasks, and deselect the rest of the task types.
And you only want to see stories in the Outline View, so you select just “Stories” in the Types Panel.
And so you close all the Panels except for the Tasks and Task Detail Panel. Then you save the Workspace.
So now when you open that workspace, you’ll see just the Tasks Panel, Task Detail Panel, and a list of stories, without having to construct a custom workflow. And whenever the Author of the workflow updates the workflow’s Stories and Tasks, your program will be updated as well.
4.7.6.The Tasks Panel

The Tasks Panel provides Views – ways of representing tasks – and Filters – ways of selecting what tasks to display. It’s where you’ll do most of your work – sort of like how you probably do most of your work in your inbox in email.
Background: Creating Custom User Interfaces – Without Learning a Query Language.
All roads lead to Rome, and all Panels lead to the Tasks Panel.
The Theory: Users can filter each panel. Then, by selecting items in panels they create “search tags” for the Tasks Panel. We then added the search technique from OSX to build a set of “smart tags” that are easy for ordinary humans to read. The server converts these tags into database language and returns the right data to the browser.
The combination of smart tags and the Panels let even novice users construct sophisticated views of Projects and Tasks without needing to learn a variation of the database language ‘SQL’ (pronounced es-kyoo-el, or see’-kwull), and while using a click or touch interface. Users can instead, create a ‘query’ interactively in real time using tags, then close those panels unnecessary for the work they plan to do, and save the entire workspace to the Workspaces Menu as a custom user interface that suits the way they want to work.
We have found that any attempt to create a simple user interface for all people in all roles has failed in the marketplace. Because while a simple UI is easily adopted, satisfies new users and the small business segment, enterprises consist of power users and organizations require business rules if they are going to adopt software.
Our goal was to create the same level of ERP available in the top of the enterprise market, but that can be used by every person in an organization, and managed and administrated by power users.
So Runcible’s Workspace is designed to create custom user interfaces for whatever job you do, and however you prefer to do it – from the most basic collaboration to the most advanced business management.
What Actions Can I Take?
Each View has different capabilities. So we’ll discuss the actions you can take in each in the section for each View.
But in general, you can:
• Select Views
• Apply and Remove Filters
• In some views, Rearrange Tasks
• Drag and Drop Tasks on other panels to tag them.
• Display a Task in the Task Detail Panel
• Open a Task Page as a Sliding Page
• Add Tasks either inline or using +Task
• Edit Some Properties of a Task
• Use Hotkeys
• View a Report on the current group of Tasks.
What Tasks Can I See?
Anything you have permission to see. See Runcible’s Permissions for more information.
4.7.6.1.Filtering the Tasks Panel

What Filters Can I Use?
You can filter by:
• Tasks assigned to you (“Me”), or to “Everyone”.
• Stages and States
• Scheduled or Not
• Staffed or Not
• Late or Not
• Smart Filters
• Panel Selections
These filters are covered below.
Filter by “Me” or “Everyone”

Select “Everyone” to display all tasks.
Select “Me” to display tasks that are assigned to you – the current user.
More…
See Assigning People to Tasks
4.7.6.2.Filtering Using Stages and States
![]()
Filter by Stage
Runcible’s Stages
| Stage | Meaning |
| Ideas: | Things you might or might not want to do, but don’t want to forget. |
| Backlog: | Things you must or might do, but aren’t doing yet. |
| Active: | Things you are doing. |
| Closed: | Things you’ve finished doing, and won’t do any longer. |
| Trash: | Things you decided you don’t need to do or finish doing. |
What are Stages?
Stages allow Runcible to display tasks categorized as To Do, In Progress, and Done, regardless of the States that you have defined in the workflow.
In ordinary language we describe time sequences as “before, during and after.” (Grammatically they are conjunctions.)
In the context of Tasks, we use the terms To-Do(before), In Progress(during), and Done (after).
For Tasks in Runcible we use Backlog(To-Do and before), Active(In Progress and during), and Closed(Done and after).
Note: And we use these terms for three reasons: (a) to incorporate Agile Management concepts into task management, and to (b) leave the terms To-Do, in Progress, and Done for you to use in your workflow as Choices (Buttons); and (c) because ‘Done’ is a notoriously fuzzy and abused term. Why? A single task may go through many hands, and each person is ‘done’ with his part, but the task itself is still incomplete. So you can have many ‘done’ states within a workflow, but the task is still incomplete. Moreover, you can have many tasks completed, but not verified by another person, and signed-off by yet another. So we us the term “Closed” to mean “everything is done that could possibly be done, by everyone involved in this task”.
Adding Ideas and Trash
![]()
But then Runcible adds Ideas to the beginning and Trash to the end.
Ideas
Use ideas for those things you don’t want to commit to but don’t want to forget.
(Of course, you can also use Ideas to placate people who have ‘good ideas’.)
Trash
Move the task into the Trash Stage and remove it from your workspace views.
Trash does not delete anything. It merely removes it from all your views. You can recover items from the Trash as long as you create a workflow choice to do it.
To empty the Trash for a Program, and permanently delete the data:
• Open the Project and then select the Settings Tab
• Scroll down and select “Empty Trash”
• Confirm it.
It will take a few moments but the task and all related information will be deleted permanently.
Note: Runcible is an accounting system right? Underneath it all is a big accounting system. While you can delete any task that does NOT have monetary impact, you can’t delete anything that DOES have monetary impact. You can only close it and enter an adjustment to reverse it.
Background:
Runcible stores Task related data in the Program.
It stores transactions in the Program Sub-Journals.
It stores the financial records in the Program Journal.
It posts the sums of those journal entries to the Ledger.
What’s the Relationship Between: Stages, States, Choices, Current State and the Workflow Buttons?
• Stages Contain States
• States Contain Choices
• Pages Display Buttons for each Choice in the Current State
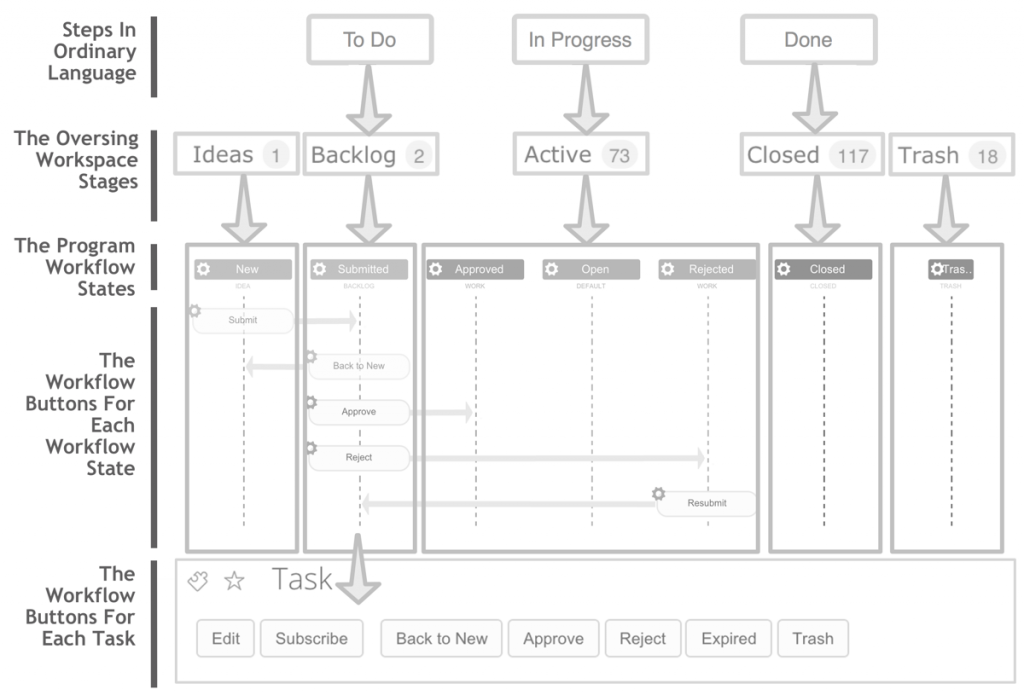
Show All Stages: “Everything”
Selecting “Everything” will display all tasks regardless Stage or State.
The Ideas, Backlog, Active, and Closed states will be highlighted so it’s clear which states are visible.
Trash is not included in the Everything view. To view tasks in the trash, select the trash view.
Tip: Use “Everything View” to find tasks.

Show Only the To-Do Stages: “Work”
Selecting “Work” will display all tasks in Backlog or Active Stage, regardless of what State that they are in.
The Ideas, Backlog and Active states will be highlighted so it’s clear which states are visible.
Tip: Use Work View as your ‘default’ view.

Show Individual Stages
Selecting any Stage will display only the Tasks in that Stage.

Filter by State

Filtering by State is useful when you want more control over your list than Stages provide.
In this screenshot our program uses a workflow with the default States for Tasks. But it also includes a set of custom States for the editorial process: the management of Articles for publication on a web site.
So lets say you’re in the Editorial group, and all you want to see is the work that is both completed or ready for review by you.
To see only the Completed and Review States:
• Select (down state) Completed and Review.
• Select (up state) all the other ribbon buttons.
The Tasks panel will refresh and display your new selections.
Note: there is no ‘Select None’ option. Why? That would clear the entire panel. We have an open issue to simplify deselecting states in programs with many states.
Warning: You can easily select a set of States, then a Stage that doesn’t include them – leaving you with an empty list of tasks.
Note: We have an open issue in Runcible to divide States ribbon by Stage.
4.7.6.3.Filter by Scheduled or Staffed
Filter by Scheduled or Not

What Actions Can I Take?
Select or Deselect
When Selected only those items that are scheduled or unscheduled will appear in the Tasks list.
Background
When you move a Task to a State in the Workflow that has been configured with the Scheduled property,
• It will be flagged as ‘Scheduled’ in the database.
• The Duration, Start Date, and End Date are calculated and saved.
• The task will now appear on the Gantt Chart view. And, otherwise it will not appear on the Gantt View.
Why?
To keep Runcible simple for less advanced users, while giving the kind of flexibility and power to very advanced users that no other product provides. Not all work requires scheduling. And agile methods do not require that we estimate or schedule items in the backlog. Furthermore, we wanted it to be possible to mix Agile iterations and Kanban Streams with Phases and Schedules. So we wanted to keep the unscheduled backlog off the schedule. It’s one of our core goals: For every person in an organization, For every role in an organization. For every style of working. For every style of management. We help you do it your way whenever possible.
So you could easily configure your workflow like this:
Idea -> Backlog -> Scheduled(Planned Sprints) -> Sprint/Phase Backlog -> In Progress -> Done -> Closed.
or
Backlog -> Scheduled -> In Progress -> Done Like Jobs and Work Orders.
or
Scheduled -> In Progress -> Done. Like Phases
or
Backlog -> In Progress -> Done
or
To Do -> Done
(Runcible is very powerful.)
To Configure the Schedule Property
• From the Main Menu: Top-> Operations -> Configure -> Workflows. Choose Configure your workflow
• Add a New State by dragging and dropping it.
• Change the Stage to Scheduled. Name it anything helpful. Like “Next Iteration” or “Scheduled”.
Anything moved into the new Scheduled Stage will flagged, and added to the Gantt chart, at the current date.
Hint: The Scheduled Stage is part of the Backlog Stage. This is by design. We debated whether to add it to the Tasks panel views but decided it added complexity where it wasn’t warranted. Your comments and opinions are welcome on this topic.
Filter by Staffed or Not.

What’s the Difference between Assigned, Scheduled, and Staffed?
• Unassigned: No one has been assigned to this task, and only its owner-creator is responsible for it – other than the workflow members.
• Assigned: At least one person has been assigned to to do the work for this task – other than the workflow members.
• Unscheduled: The Task has not been flagged as scheduled, and has not start or end date.
• Scheduled: The Task has been flagged as scheduled, and has a start and end date.
• Unstaffed: The Task is not Closed, and no Appointments exist in the future.
• Staffed: The Task is not Closed, and Appointments exist in the future.
Filter by Late or Not
The Late filter displays only those items whose due date (time) has passed.
4.7.6.4.Filter Using Smart Search Tags
The Search List Contains Tags Showing the Filters and Selections
Existing Smart Tags are displayed below the Smart Filter field – including selections you made in other panels.
![]()
To Remove a Smart Tag or Selection
Click on the Tag. Runcible will delete it, and refresh the panel. If you move your mouse over a tag the (x) delete icon will appear.
![]()
Click to Activate Smart Search Tags
Click the Smart Filter text box, or Start Typing and Runcible will display for a drop down list of possible smart filters.
Scroll up and down the list for more options.
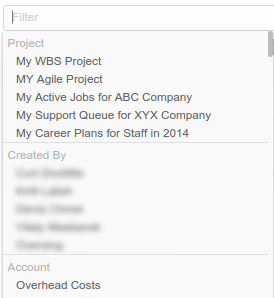
Tip: Runcible will only show a few suggestions at a time. Type more text to filter the list even more.
Or Just Start Typing a Smart Tag Name
When you first start using Runcible you’ll think that there are a lot of possible Smart Tags to remember. But they’re pretty obvious after a while.
You can open the System Status Panel (F1) or ![]() and scroll down. You’ll see the available Smart Filter Tags.
and scroll down. You’ll see the available Smart Filter Tags.
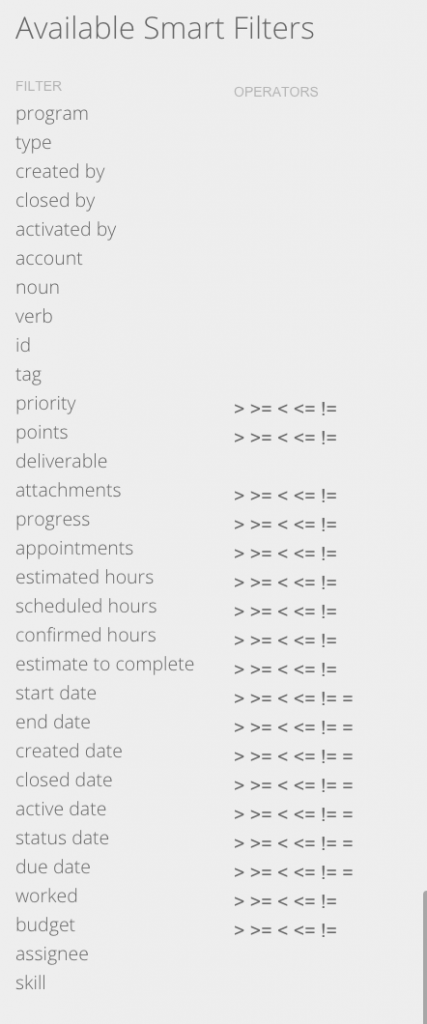
Select a Tag to Add It To the Active Filters List
Select any item in the list to add it to the list of active smart tags.
Using Operators in Your Smart Search Tags
Just keep typing, and add an operator (=, !=, >, <, >=, <=), and Runcible will add the operator to the top of the smart filter list.
Now select any value in the list and press Enter. Runcible will add the Smart Tag to the Filter List.
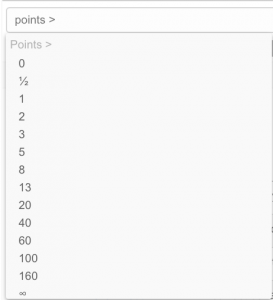


The Logic of Tags: OR versus AND
When multiple filters are applied, filters of the same category are combined with OR operators, and these groups are combined with AND operators.
For example, if the filters contains three projects, two tags, and one priority, the logic for displaying Tasks would be:
(ProjectA OR ProjectB OR ProjectC) AND (Tag1 OR Tag2) AND Priority.
4.7.6.5.Filter by Panels
Filter by the Panel Selections
And of course, the panels add filters to the Tasks Panel.
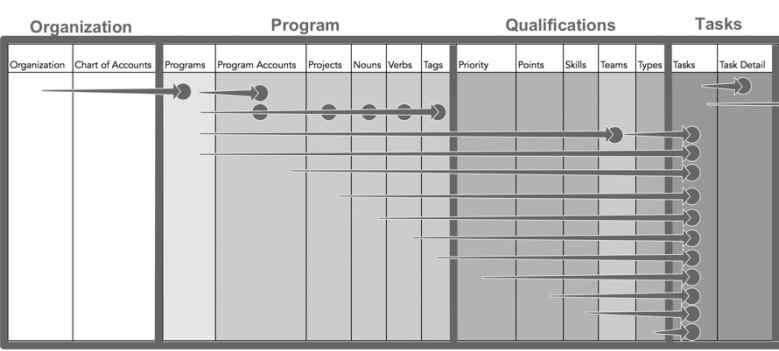
What Panels Filter What Panels?
• Organization filters Programs Panel
• Programs filter all Program Panels: Accounts, Projects, Nouns, Verbs, Tags, and Teams as well as Tags
• Qualifications filter Tags.
• Tasks filters (displays) Task Detail.
In addition:
• Tasks suggests information to Scheduling.
• Period filters Scheduling, Rescheduling and Reporting
4.7.6.6.Drag and Drop on Panels
You can use these Drag and Drop Events:
• Drag and Drop to Tag or Remove Tag
• Drag and Drop to Schedule and Assign
• Drag and Drop to Change Stage
• Drag and Drop to Move Between Projects or Deliverables
• Drag and Drop to the Dock
Drag and Drop to Tag or Remove a Tag
Drag and Drop a Task to an item in one of the Tagging Panels to tag.
Drag and Drop a Task to the same item to un-tag it.
The workspace will be updated by the server with the new tags or properties.
You can Tag using these panels:
Chart of Accounts, Program Account, Tags, Teams, Nouns, Verbs, Priority, Points, Skills.
You cannot Tag using these panels:
Organization, Programs. Types.
Drag and Drop to Schedule
You can create an appointment by Dragging and Dropping a Task on:
The Task Detail Panel’s Time Tab.
-or-
The Schedule or Reschedule Panels
The appointment will be created.
You may see a dialog asking you to select the person and the role for the appointment.
Issue: as of this writing the appointment is always scheduled for you, rather than letting you choose the person to assign it to.
To Drag and Drop to Change Stage
You can change stage by Dragging and Dropping a Task on the Stage Selectors.
If you have chosen the option to organize your tasks by State, you can change State by dragging and dropping between states in the list.
Note: when you Drop Tasks on a Stage Selector , Runcible will try to put them into the first available State. So if you have this arrangement:
BACKLOG STAGE
BACKLOG STATES:
Backlog,
Reviewed,
Approved,
ScheduledWORK STAGE
WORK STATES:
Current Queue,
Assigned,
Accepted,
In Progress,
Complete,
Pending Review,
Accepted, Closed
Note: If you drag and drop from the Backlog Stage: Approved State, to the Work Stage Selector at the top of the Tasks Panel, Runcible will move it to the Work Stage: Current Queue State, because that’s the first available State in the Work Stage for that workflow. (Runcible tries to be smart when possible.)
Drag and Drop to Move Between Projects and Deliverables
You can Drag and Drop between Deliverables and Projects.
However, as a general rule, the Task, and the Project and Deliverable containing the task, must be in the same state.
If Runcible can ‘figure out’ how do move the Task, it will. If not it will tell you it can’t (and it often can’t). So you’ll need to change the state of the task or the destination deliverable or program and try again.
Note: You cannot move tasks between Programs until the Deck feature has been implemented. Even so, Tasks will be copied to the destination program and trashed in the source program. So we clone and delete tasks moved between programs.
Project, Deliverable, and Story ‘Accounting’
When you start anything in the Projects Panel, Runcible starts tracking statistics on it. Like the change in how many tasks, points, hours, costs, etc. Why? So we can produce a burn down chart and calculate velocity. In other words, so that we can, over time, get very good and predicting “velocity”: how much stuff it’s really possible to do (without paying the consequences of trying to do more.)
[Drag and Drop to the Dock]
Drag and Drop a Task to the Dock. From the Dock you can then drag and drop elsewhere.
More…
See Using the Dock for more information.
4.7.6.7.Oops! Where are My Tasks
Why can’t I see Items in a Panel? There can be a number of different reasons. Try these steps:
- Number one reason: Select “Everyone” and “Everything” filters, and then clear the Types Panel selections.
- Check or Clear the Tasks Panel’s Filters.
- Check or Clear the Other Workspace Panels’ Selections
- Check the Workspace Menu for Selections in Closed Panels.
- Search for it in the Main Search box and make sure it exists.
- Check Permissions
- Reload the Panel
- Reload the from a saved Workspace
- Check Connectivity
- Refresh the Browser
Hint: The only ‘hidden’ filter is the States Ribbon, under the Tasks Panel’s Filter Menu. This is by design, so that we keep the Stages and States in the Tasks Panel but the Types and other filters in the Workspace.
Hint: Our experience is that Runcible shows you what you ask it to. But like many things, we may ask for something we don’t intend to. Otherwise, it’s usually that you don’t have permissions to see what you’re looking for.
Reload the Panel
To reload the Panel, click the ![]() in the panel’s Panel Controls (in the upper right corner).
in the panel’s Panel Controls (in the upper right corner).
Check the Tasks Panel’s Filters
Click the remove filters button ![]() in the Panel Controls, which are located in the upper right corner of the panel:
in the Panel Controls, which are located in the upper right corner of the panel:

Alternatively, click the filters icon ![]() and make sure appropriate types / states / stages / etc. are selected.
and make sure appropriate types / states / stages / etc. are selected.

Also, check the Scheduled/Unscheduled, Staffed/Unstaffed, and Late filters.
![]()
![]()
![]()
![]()
![]()
Check selections in other Panels
Review selections in the panels to the left of the one you’re looking at.
For example: Choosing one or more Tags in the Tags Panel and Priorities in the Priority Panel causes only Tasks with those tags and priorities to be shown in the Tasks Panel.

Check the Workspace Menu for Filters in Closed Panels
The selections in the Workspace Panels are active even when a panel is closed. When a panel is closed, the panel appears in the Workspace menu. A number beside the panel name shows the number of selections in it. Open the menu and clear the filters.

Check Connectivity
The ![]() icon in the System Status Panel shows your connectivity. If it’s red, check your internet connection.
icon in the System Status Panel shows your connectivity. If it’s red, check your internet connection.
Click the ![]() for a more detailed connectivity status.
for a more detailed connectivity status.
Refresh Your Browser
If you temporarily lost internet connectivity, you should reconnect to Runcible automatically. Just in case you didn’t, try reloading your browser.
4.7.6.8.Tasks Panel Limits?
Runcible can display a lot of information. We knew the Workspace Panels were an innovative concept for this kind of application. And we wanted the rich context, provided by the panels. But that meant we needed to do a lot of work to keep performance within our desired targets. And we needed to prevent the user from requesting every task in an international organization. So here is how we did it:
Panels Use Pagination
If a lot of rows are present, like in the Activity stream, Runcible uses pagination to display only a little of the data at a time. Scrolling up or down the panel will load more data.
Panels Use Just in Time Rendering (Virtualization)
Runcible will render (Draw) only enough tasks to fill the visible workspace. When you scroll down, it will draw more and more tasks as you scroll. The tasks are loaded, but not drawn. This technique improves performance.
The Workspace Uses Websocket Updating (Pulses)
You might hear a “clicking” sound, and see a flash of color in the panels as you’re working. That’s the server sending updates to your browser. By sending updates to your browser you don’t need to refresh to see changes.
The Tasks Panel Shows only Deliverables when Selecting at the Organization Level
In a large organization, if you had many tasks, and many projects, filtering by organization would quickly overload your browser, if not your computer.
Runcible will only display Programs, and sometimes Projects and Deliverables in the Tasks Panel until a you select at least one program. Once you select a Program Runcible will display the Tasks for it. In either case the quick report will show you accurate information.
This approach allows us to report on the organization level and drill down into the projects if needed, without overloading the workspace with tens of thousands of tasks.
Tidbit: We developed Runcible’s predecessor over ten years in a business running 2000 projects per year. We used dummy data of the same scale to develop the product.
The Workspace has Practical Limits: How Many Tasks Can I Load?
It depends on which View you’re using.
– The tables are very light weight and for all intents and purposes scale is unlimited.
– The outline will comfortably work with a few thousand although you will begin to notice the performance penalty the more tasks you display at one time.
– Depending upon which card size you use, the Board is a little heavier than the Outline view.
– The Gantt Chart is the heaviest of all. But we have tested it with 10,000 records and it works fine.
If we were to suggest a good rule of thumb, it is to break your project into deliverables, phases, jobs, sprints, or iterations, or releases of one thousand tasks or less. And use the project panel to view subsets at a time.
4.7.7.Task Panel Views
What Views Can I Use?
Views change the layout of the Tasks Panel to suit different ways of working. Each view adds something to the previous view.

You Can Use Seven Different Views:

[The Pad View:]
A simple, clean, rearrangeable list of tasks for creating simple checklists. Without all the details.
The Pad view is the most basic view.
The Table (List) View:
(Managing a queue, or selecting work by priority) A sortable table of every type of task visible.
The table adds sorting and searching to the view.
The Outline (Tree) View:
What we consider the ‘default’ view: A hierarchical list of various types of tasks.
The Outline view adds hierarchy and subtasks to the view.
[The Column View:]
(Single Stack: Sequentially Performed):
A graphical list of ‘cards’, organized into columns, each column representing a different state. With the option of sorting the cards in the column so that each card can be completed sequentially.
The Column View adds Images and Stages to the view.
The Board View
(Presenting Collections: Non-sequentially Performed. For Agile iterations and Kanban streams.)
The Board adds Stages and Sorting to the view.
[The Timeline View:]
(Scheduling work)
The Timeline adds time and scheduling to the view.
The Gantt View:
(Managing Dependencies and schedules)
The Gantt adds dependencies to the view.
Can I Switch Between Views?
Yes. Of course. Always. Tasks all the same in Runcible. Runcible views just display tasks differently.
Tip: Projects, Deliverables, Folders, and all the different task types are all stored as tasks with different properties and rules. So when you switch between views Runcible displays only presents the information differently.
Runcible did not start out as a bug tracking or task list. We designed it from the very beginning as an accounting system for collaboration and tasks. And our various views have always been part of the architecture. We have even considered what a 3D view of projects would look like and experimented with it. We cut the feature not because it was difficult (its not), but because it started to become too easy to use Runcible as a game engine, and we felt it might expose us to misrepresentation in the market.
4.7.7.1.The Pad View
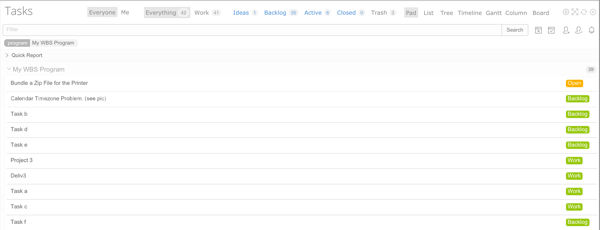
The Pad View is a simple list. With two views:
• Grouped by Stage
• Not grouped by Stage
Note: The Pad View is not available in the beta
In this hierarchy of complexity:
| A Task | A Page View |
| A Simple list | The Pad View |
| A List with Subtasks | The Outline View |
| An Ordered List with States | The Column View |
| An Unordered Bucket with States | The Board View |
| Lists on a schedule | The Timeline View |
| Lists and Buckets on a Schedule with dependencies | The Gantt View |
What Is It’s Purpose?
A clean, distraction-free task list for simple workflows. Especially where you don’t need to perform estimating.
How is it Different from the Outline View?
• Subtasks and Counters are not shown.
• The only fields shown are the name, assignee if present, and the current state.
• The Pad view uses Click-To-Edit, instead of opening an Editing Panel.
• Rearrange to change State
• Drag and Drop on the Stage Selectors to change state.
• Or open the Profile Page to change state.
What Fields Do I see?
• The Task Name
• The Workflow State
• The Assignees (if present)
That’s it.
What Actions Can I Take?
Toggle Views
Open the Filters Panel
Use the “Organize by Stage” option to to toggle between:
• a simple list of tasks, and
• a simple list of tasks organized by stage
Hover
Hover over a task and it will be hi-lighted.
Select
Select a task. It will remain hi-lighted.
Tip: The currently hilited task reflects the content of the Task Detail Panel. If you change the contents of the Tasks detail panel using the next and previous icons, the currently hilited task will also change on the Tree View.
Tip: The +Task Panel will use the values in the currently hilited item as its defaults.
Display a Task in the Detail Panel
Selecting a Task will Refresh the Task Details Panel displaying that Task.
Tip: For a Distraction-Free Task Detail Panel, hide the Info Section by selecting the > icon.
Open a Sliding Page for the Task
Double-Click to open a sliding page with that task.
Add a Task
1) Select an open Task position.
![]()
Scroll until you see ” + Task “
Tip: The default Task Type shown may vary depending upon the choices available for that spot. The most common is just “Task”.
Select it. The Cursor will move to the Right of the text.
Select a Task Type. Either:
1) Click on the Task Type. The list of tasks types that are possible in that location will appear.
–OR–
2) Type a few characters of the task type and hit tab. Runcible will understand your intentions and change the task type and erase the letters you just typed. For example, if you type “exp”-Tab, Runcible will change the task type to “Expense”, and start you with a blank Task Name again.
Tip: The task type you can enter is determined by the level in the hierarchy, the parent task, the deliverable and the project. You don’t need to understand all the choices available. Most of the time they’ll be obvious. (Really).
Enter the Text, then select “Enter“.
Tip: A new task will open as soon as you start typing. Press enter to save the current task and move immediately to the next. Runcible will create new tasks and save them as fast as you can type.
Tip: You can activate the Data Entry Mode by selecting “Hide Empty Deliverables” from the [icon-gear ] Tasks Panel Filters Menu.
2) Use Right-Click to open the Context Menu. Runcible will display the context menu.
The three menu choices are:
• Insert Child: adds a subtask under the selected task.
• Insert Above: adds a sibling task above the selected task.
• Insert Below: adds a sibling task below the selected task.
Select one of the choices, and a new Task position will open.
Click on the new task to enter a task name.
Press “Enter” to save. The cursor will move to a new task.
Edit a Task
Edit a Task in place
Click on the name to edit-in-place.
Press Enter or change focus (click somewhere else) to save.
Press Escape to cancel.
Display a Task in the Task Detail Panel
Select a Task to display it in the Tasks Detail Panel and edit it there.
Open the Task for Editing in a Sliding Page
Double Click on the Task to open it in a Sliding Page and edit it there.
Alt + D
Display Current Item in the Task Detail Panel, in Edit Mode
Alt + W
Display Current Item in Wide Format, then select “Edit” to edit it there.
Alt + E
Open Current Item for Editing in Wide Format – it will already be in edit mode.
Reorder Tasks:
There are two methods of rearranging tasks:
1) Drag and Drop
Use the Edit Menu/Handle to rearrange tasks by dragging and dropping them. The default behavior of most drag and drop user interfaces is to make a space for your item as you move it. We found this disorienting. instead, Runcible displays a colored line (a border) as you drag the task.
• Dark Grey Line: “You can drop it here”
• Red line: “You cannot drop it here.”
To Cancel a drag event, drag the task off the top of the page. Return the task to its original position. Or press the Esc key.
2) Use the Context Menu
Use Right-Click to open the Context menu. The context menu choices are:
• Send to Top: to quickly move this task to the top of the list.
• Send to Bottom: to quickly move this task to the bottom of the list.
• Indent: to make a child of the task above.
• Unindent: To raise a child to a sibling (peer).
Change Stage
You can change stage by Dragging and Dropping a Task on the Stage Selectors.
If you have chosen the option to organize your tasks by State, you can change State by dragging and dropping between states in the list.
Note: when you Drop Tasks on a [label_badget type=”badge” style=”default”]Stage Selector[/label_badget] , Runcible will try to put them into the first available State. So if you have this arrangement:
BACKLOG STAGE
BACKLOG STATES: Backlog, Reviewed, Approved, Scheduled
WORK STAGE
WORK STATES: Current Queue, Assigned, Accepted, In Progress, Complete, Pending Review, Accepted, ClosedNote: If you drag and drop from the Backlog Stage: Approved State, to the Work Stage Selector at the top of the Tasks Panel, Runcible will move it to the Work Stage: Current Queue State, because that’s the first available State in the Work Stage for that workflow. (Runcible tries to be smart when possible.)
4.7.7.2.The Outline (Tree) View
What is It’s Purpose?
Data entry and planning of complex projects.
In this hierarchy of complexity:
| A Task | A Page View |
| A Simple list | The Pad View |
| A List with Subtasks | The Outline View |
| An Ordered List with States | The Column View |
| An Unordered Bucket with States | The Board View |
| Lists on a schedule | The Timeline View |
| Lists and Buckets on a Schedule with dependencies | The Gantt View |
More..
See the Incremental Project Data Entry topic. (It covers the project workflow from sketching ideas through scheduling and invoicing)
What Fields Do I See?
Each row structured as a long narrow card. Each card contains the following information:
Expand/Contract: Use [] to expand, and [] to contract the subtasks. If there no subtasks exist, then no icon is visible.
Task Type: A different icon for each task type.
Note: There is no link to display the icons for each task type that’s available to users (although it is for developers). We have suggested that we provide a link in the System Status Panel.
More..
See the Task Types topic for more information.
Edge Color: The card’s edge color selected in the Program -> Settings -> Configuration tab. The edge color can display the Task’s Priority, Task Type, or the Estimate in Points – or nothing at all.
Card Color: The card’s color selected in the Program -> Settings -> Configuration tab. The card color can display the Task’s Priority, Task Type, or the Estimate in Points – or nothing at all.
Task Name: The name of the task as entered.
Last Status Change: How long ago was the last status change for this task.Every time the status is changed this field is updated.
Assignees: Icons for the people who are assigned to this task.
Note: Convention says that an individual should be responsible for a task. That’s not correct. We do however have an item in the queue to allow the workflow to require only one assignee in order to enter or leave a state.
Attachments: The number of files and images attached to the task.
If Revenue Transparency is Active
Estimated Revenue to Complete: Runcible recalculates this value every time any child’s time or money values change.
To get more detail on the revenue and costs involved in any task, double-click to open a task, and select the Money Tab.
Tidbit: We considered not displaying any monetary values on this view so that we could ‘skip the stress’ of exposing it to inexperienced users. But you can use Transparency Settings to shut it off.
We have not yet added the ability to off transparency for Time (hours, days, estimates). It’s in the queue.
The Time Fields
Scheduled: The number of estimated hours remaining for the task and its children currently in the scheduled state.
Unscheduled: The number of estimated hours remaining for the task and its children currently not in the scheduled state.
Estimate to Complete: The amount of time estimated to complete.
Estimated to complete - Scheduled = Unscheduled.
What Actions Can I take?
Hover
Hover over a task and it will be hi-lighted. Hover over data and its field name will be displayed.
Select
Select a task. It will remain hi-lighted.
Tip: The currently hilited task reflects the content of the Task Detail Panel. If you change the contents of the Tasks detail panel using the next and previous icons, the currently hilited task will also change on the Tree View.
Tip: The +Task Panel will use the values in the currently hilited item as its defaults.
Display a Task in the Detail Panel
Selecting a Task will Refresh the Task Details Panel displaying that Task.
Open a Sliding Page for the Task
Double-Click to open a sliding page with the chosen task.
Add a Task
There are three ways to add a task.
1) Selecting an open Task position.
![]()
Scroll until you see ” + Task “
Tip: The default Task Type shown may vary depending upon the choices available for that spot. The most common is just “Task”.
Select it. The Cursor will move to the Right of the text.
Select a Task Type. Either:
1) Click on the Task Type. The list of tasks types that are possible in that location will appear.
–OR–
2) Type a few characters of the task type and hit tab. Runcible will understand your intentions and change the task type and erase the letters you just typed. For example, if you type “exp”-Tab, Runcible will change the task type to “Expense”, and start you with a blank Task Name again.
Tip: The task type you can enter is determined by the level in the hierarchy, the parent task, the deliverable and the project. You don’t need to understand all the choices available. Most of the time they’ll be obvious. (Really).
Enter the Text, then select “Enter“.
Tip: A new task will open as soon as you start typing. Press enter to save the current task and move immediately to the next. Runcible will create new tasks and save them as fast as you can type.
Tip: You can activate the Data Entry Mode by selecting “Hide Empty Deliverables” from the [icon-gear ] Tasks Panel Filters Menu.
2) Use Right-Click to open the Context Menu. Runcible will display the context menu.
The three menu choices are:
• Insert Child: adds a subtask under the selected task.
• Insert Above: adds a sibling task above the selected task.
• Insert Below: adds a sibling task below the selected task.
• Select one of the choices, and a new Task position will open.
• Click on the new task to enter a task name.
• Press “Enter” to save. The cursor will move to a new task.
3) Use the +Task feature in the workspace header.
The pad and the Outline (Tree) view are great for sketching and evolving tasks. But when you are trying to record something more formal, use the +Task feature when you want to enter more data about a task at once, or when you want to enter data on something not visible in the workspace..
Edit a Task
You can edit a Task by opening the editing panel, using the Task Detail Panel, or by opening the Task’s sliding page.
To edit a Task in the Editing Panel:
• Select the ![]() Edit Menu / Handle. The Editing panel will open.
Edit Menu / Handle. The Editing panel will open.

• Change the values and then press save. The panel will close and the values will be updated.
Tip: This editing panel is designed to help in assigning and estimating when working with a lot of items.
Tip: If you need to more edit basic values than are displayed here, open and use the Task Detail Panel.
Tip: If you need to enter a lot of text, open the Task’s Page in a sliding page.
Other Task Editing Options
Display a Task in the Task Detail Panel
Select a Task to display it in the Tasks Detail Panel and edit it there.
Open the Task for Editing in a Sliding Page
Double Click on the Task to open it in a Sliding Page and edit it there.
Alt + D
Display Current Item in the Task Detail Panel, in Edit Mode
Alt + W
Display Current Item in Wide Format, then select “Edit” to edit it there.
Alt + E
Open Current Item for Editing in Wide Format – it will already be in edit mode.
Toggle Data Entry vs Edit Mode:
Sometimes you want to enter a lot of Tasks, particularly on Empty projects or Deliverables, and it helps to have a lot of open slots for tasks.
Try data entry mode
• Select the Filter Menu on the Tasks Panel. The Panel will open.
• Toggle “Hide Empty Deliverables” button.
In the up position, Empty Projects and Deliverables are hidden.
In the down position, Empty Projects and Deliverables are visible, and each shows a new +Task row.
Reorder Tasks:
There are two methods of rearranging tasks:
1) Use the Edit Menu/Handle to rearrange tasks by dragging and dropping them. The default behavior of most drag and drop user interfaces is to make a space for your item as you move it. We found this disorienting. instead, Runcible displays a colored line (a border) as you drag the task.
• Dark Grey Line: “You can drop it here”
• Red line: “You cannot drop it here.”
To Cancel a drag event, drag the task off the top of the page. Return the task to its original position. Or press the Esc key.
2) Use Right-Click to open the Context menu. The context menu choices are:
• Send to Top: to quickly move this task to the top of the list.
• Send to Bottom: to quickly move this task to the bottom of the list.
• Indent: to make a child of the task above.
• Unindent: To raise a child to a sibling (peer).
Note: Moving multiple rows. You cannot move multiple, disconnected rows at once since we have no idea how to place them when moved. Children of a parent will move with the parent.
Note: Limits. Depending upon your workflow rules you may or may not be able to move tasks everywhere you wish to. Why? A couple of reasons:
• Some task types can contain only certain other task types. The most common example is that stories cannot contain stories.
• Some task types can only be created at the first level (root) of the deliverable: the Story Types.
• You can’t move a task from an open project or deliverable to a closed project or deliverable.
• Every project and deliverable is its own little accounting system (as is nearly anything with subtasks of any kind). When you ‘start’ a project or deliverable by moving to an Active stage, that accounting system starts tracking everything that goes in or out of that container. There are certain conditions (we won’t go into detail here) where this could create an issue. If so you won’t be able to move it there.
Drag and Drop to Tag
Note: “Why not edit in place?” Because in testing we found that it’s far too easy to accidentally change (or destroy) data on touch screens without a two step process. We compromised and used a two step process in areas we felt challenging, and edit in place in those that we felt were less risky. (Time will tell. Lets go with the evidence.)
4.7.7.2.1.How Should I Use The Outline View?
How Should I Use It?
To Work with Stories
Meaning a single list of stories – with subtasks that are not visible without opening the profile page.
To work with any of the Story Types:
Story,
Problem,
Possibility,
Challenge, and
[Candidate]
• Select your Program in the Program Panel.
• If you want to limit your work a bit, select Projects and Deliverables in the Project Panel.
• In the Types panel select only “Story” (or the other story types: Problem, Possibility, Challenge, or [Candidate].)
• Close the Types Panel.
The only Task Type that will be visible or available in the Tasks panel will be Stories.
To work with story types:
• Enter a new Story task.
• Double Click on it to open the Task Page.
• The Wall Tab contains suggested Story boxes. You can use them, or just write everything in the Description field.
Description
Perspective
Requirements
Reasons
Acceptance criteria
• Select the Subtasks (Tasks) Tab.
• Enter subtasks.
The values you enter in the subtasks will roll up into (be summarized) in the Story.
To Work with Basic Tasks in a Hierarchy
Meaning a tree of tasks – with subtasks that are visible under each task.
To work with any of the basic Task Types:
Task,
Event,
Milestone,
Expense
• Select your Program in the Program Panel.
• If you want to limit your work a bit, select Projects and Deliverables in the Project Panel.
• Open the Types Panel
• In the Types panel select only Task, Event, Milestone, and Expense – and deselect all others.
• Close the Types Panel.
Then just add the various tasks.
That’s it.
To Work with Document Sections in a Hierarchy
Note: The Content Tab is not enabled in the Beta Version.
A document may be a new kind of project for you think about, but Runcible is designed like the writing tools used by professional story, novel, script, and book writers.
To work with the Document Task Types:
Document,
Section,
Article
• Select your Program in the Program Panel.
• If you want to, select Projects and Deliverables in the Project Panel.
• Open the Types Panel
• In the Types panel select only Task, Event, Milestone, and Expense – and deselect all others.
• Close the Types Panel.
• Save the Workspace under a new name.
Then just add the various tasks.
That’s it.
Tip: Whenever you select any of the Types, you will filter all tasks for all programs selected in your workspace.
So if you want to mix different types of work in the same project you can just unselect everything in the Types Panel, and see everything from every program regardless of which Types filters you used when entering tasks in each project and program.
To Work with Document ‘Scenes’ in Script Order.
Note: The Content Tab is not enabled in the Beta Version.
Runcible is an interesting tool for writing shooting scripts and video production because we combine the authoring and project management environments in one application.
To work with the Document Task Types:
Document (Script)
Section (Act)
Card (Scene)
You may also want to work with production management task types:
Task
Event
Expense
Then;
• Select your Program in the Program Panel.
• If you want to limit your work a bit, select Projects and Deliverables in the Project Panel.
• Open the Types Panel
• In the Types panel select only Document, Section and Card task types, and deselect all others.
• If you want to add production management tasks add Task, Event, Expense
• Close the Types Panel.
Then
Open the Nouns Panel, and keep it open.
• Enter the Locations. You can Enter them as you go.
Open the Verbs Panel and keep it open.
• Enter the Story Arcs or Plot Lines
Open the Tags Panel
• Enter your Characters as Tags
Create a New Workflow
• Everyone’s workflow is a bit different, but we would suggest the following example Stages and States for you to get started:
| Backlog | Scheduled | Active | Active | Active | Active | Closed | Closed | |
| Document Article Card |
Sketch | First Draft | Final Draft | Reviewed | Approved | Published | Closed | |
| Task | Planned | Scheduled | To-do | In Progress | Done | |||
| Expense | Planned | Scheduled | Paid | Submitted | Reimbursed | Paid | Closed | |
| Event | Planned | Scheduled | Rescheduled | Closed |
•
Then just add the various tasks.
That’s it.
How Should I Use the Projects Panel with Outline View?
We recommend that you work however is most comfortable for you.
But work with a few programs at a time.
Save workspaces for groups of programs that you use together.
Use the Projects Panel, Projects, Folders and Deliverables to break anything big into pieces.
Examples:
Project -> Phase -> Group of Tasks -> Tasks
Project -> Sprint -> Group of Stories -> Stories -> Tasks
Project -> Version -> Release -> Stories -> Tasks
Category of Job -> Jobs -> Tasks
Queue -> Sub-Queue -> Agent -> Tasks
Position -> Opening -> Candidates -> Tasks
Year -> Review Cycle -> Opportunity
Year -> Quarterly Objectives -> Team Member
More…
See Using the Projects Panel for more details.
Tip: The task order in the tree and on the board is stored differently. Rearranging the board does not rearrange the tree.
4.7.7.3.The Column View (Single Stack)

( … )
4.7.7.4.The Board View
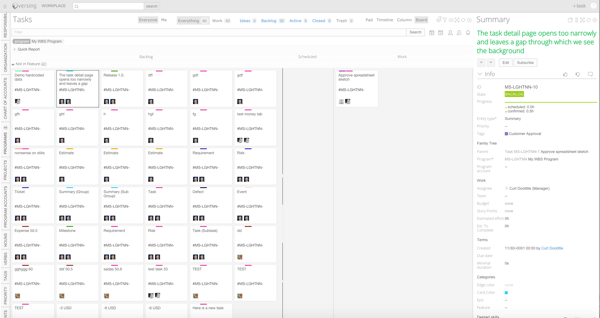
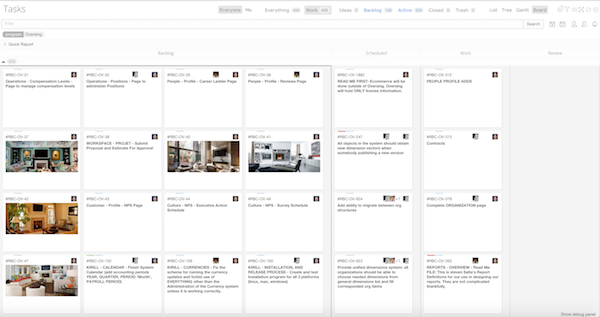
| Using | Contains | Purpose | Description |
| The Page View | An Item | Collect Information | A Single Task |
| The List(Pad) View | List | Remember Items | A Simple List |
| The Outline View | Hierarchy | Plan Work | A Hierarchical List of Tasks and Subtasks |
| The Timeline View | Time | Schedule Our Work | Lists of Tasks on a Timeline |
| The Gantt View | Sequence | Schedule Sequential Work | Groups of tasks on a Timeline |
| The Table (List) View | Table | Find Our Work | A Sortable Table |
| The Column View | State | Do Our Work | An Ordered Visual List with Horizontal States |
| The Board View | States | Manage Our Work | Buckets of Groups vertically with Horizontal States |
| The Schedule Panel | Time | Manage Our Time | Everyone's work load for the next few weeks |
| The Responsibilities Panel | Workflows | Do My Work from an Inbox | Everything I am actively responsible for. |
| The Agenda/Time Panel | Times | Do My Work from a Calendar | Everything I am responsible for today. |
| The Activity Stream | Events | Do My Work from Events. | Everything that is happening now. |
The Board View is for visually managing the flow of work through different states As scale increases, the value of the board helping you understand the state of the work, team, group or organization increases.
In larger projects we suggest you enter and plan your work on the Outline View, and use the Board View to manage it through completion
In smaller projects we suggest you use the Pad View, for sketching our your work, and the Column View to manage it through completion.
What Is It’s Purpose?
A visual representation of the flow of the work in progress.
The Idea
We human beings are very good at doing complex things if we break them down into chunks we can determine are ‘finished’, and then move onto the next.
We are also very good at understanding a two dimensional representation of just about any process.
The board is analogous to a timeline.
The number of things on the board sort of different sized boxes moving along the line.
By looking at the board we can all sort of understand what we are working on, and what everyone else is.
A public “board” makes it very easy to show successful people and groups, and very hard for unsuccessful people and groups to ‘hide’.
If we put on the board, only those things we are working on, then we tend to have an easier time focusing on getting them done.
It is very hard for … ahem… managers, executives, customers, to ask you to do ‘bad’ things for the organization when this very simple board view is available to all.
So the purpose of boards is to use a simple visual representation of the work **IN PROGRESS**.
More…
See Wiki on Kanban Boards
How is it Different From The Columns View? Scale.
The columns view does not show Swim Lanes. The Board view does.
The column view’s single-stack of cards provides a simple way of showing of steps or priority from top to bottom. The board view can be ordered yes, but it’s purpose is to show lots of work.
The column view uses large cards and presents a limited amount of information. The Board view uses all sizes of cards and can display thousands of tasks if you want it to.
Note: In the smallest size card, selecting an organizational node, and all the active programs, will allow you to see the entire part of your business moving through its steps. It’s amazing to see all these little ‘chicklet’ cards moving through different parts of the organization. Its kind of a Sim-City view of your universe.
The Board View ….
Why Are Some Columns Different Colors?
Because the View you choose might hide Cards in a column from the board.
A darker Column’s (State’s) Cards are hidden in the current filter. A lighter Column (State) means that cards for that column are visible.
If you drag and drop on a light column, then the card will remain visible.
If you drag and drop on a dark column, the card will disappear from the board.
So for example, if you use the Work View, the Trash column will be visible unless you hide it using the Filter Menu. If you drag and drop a task to the Trash column, then the card will be placed in the Trash state, and disappear from the board. So in this screenshot, notice that in the Work Filter, Backlog and Active Stages are visible, and Trash is not.
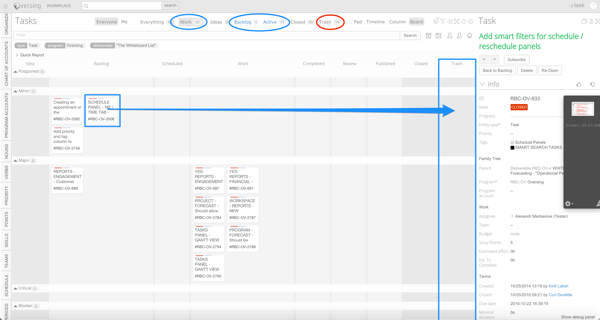
But if we select the Trash Stage, we see that there are indeed cards in the Trash.
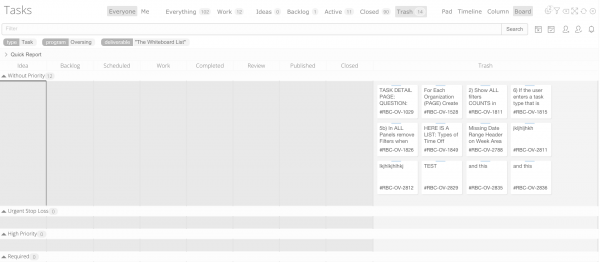
What Fields Do I see?
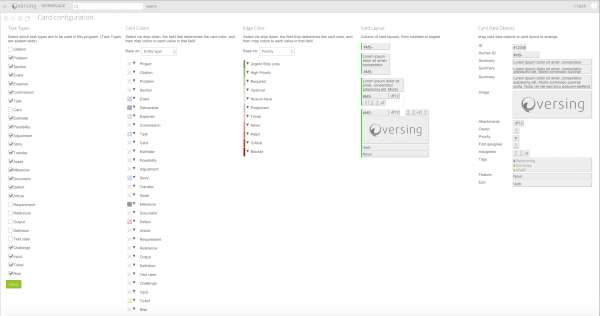
Each card’s contents are specified in the Program Profile -> Settings -> Card Configuration Tab.
We won’t cover the default configuration here.
More…
See the Card Configuration Tab for more information.
What Actions Can I Take?
Select
Selecting a card will display it in the Task Detail Panel.
Tip: Selecting a card will also ask +Task to clone it’s properties when creating a new Card.
Open
Double Click on a card to open a sliding page for the Task
or
Select the Task’s Identifier to open a sliding page for the Task.
Add A Card (Task)
Use +Task
• Select +Task. A sliding panel will open for the New Task.
Note: Runcible will fill in whatever fields it can by using the Sections on your board.
• Enter the Task Name.
The other fields should be optional unless you’ve created restrictions on in your workflow.
More…
See Using +Task for more information
• Press Save.
A sliding page will open with your new Task.
The server will send your browser a message adding the new Task’s Card to your Board.
Runcible will add it to the first available State and Stage – that will most often be the ‘Backlog’.
Then you can move the card to whatever state you want to.
Hint: When you create a state you can determine whether it’s a Start, Normal Work, or End state. You can only create a Task (card) in a start state. Why? So people (not you of course) don’t bypass the business rules for moving from backlog into the Normal (Work) states. That’s why you can’t add cards to individual states.
More…
See Using Workflows for more information.
[Select a Card and Use +Task]
Selecting a Card and then using +Task, will tell the +Task panel to clone the selected card’s values, in the new Task.
You can then just add a title and change any necessary settings.
Important Tip: Selecting and cloning cards is the fastest and easiest way to create new Cards(Tasks) on the Board View and Column View.
Edit A Card
To Edit a Card
Select a card to display it in the Task Detail Panel, then select “Edit”.
or
Double Click on a card to open a sliding page for the Task, then select “Edit”.
or
Select the Task’s Identifier to open a sliding page for the Task, then select “Edit”.
Drag and Drop to Change State
Select a card and start to drag it.
The board will show you which states are available to that card in the current workflow.
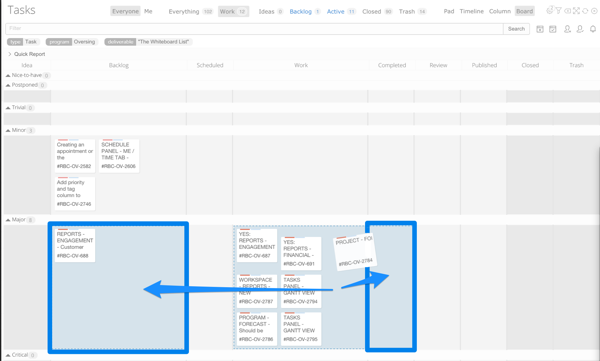
Note: If you can’t move it where you think you want to or should, then Open the card in a sliding page, and from the workflow’s button bar, select the [?] icon. It will tell you what you need to do to change states.
Issue: A task cannot be started unless all its parents have been started. This is the most common reason why you can’t change a Task’s State.
[Drag and Drop to Change Properties (Swim Lanes)]
To change properties, select a card to display it in the Task Detail Panel, or double click on a card to open a sliding page. Change the properties there. When you save the changes the board will be updated via websocket. (It’s cool.)
Note: We have not implemented vertical drag and drop between swim lanes to change properties of tasks. Why? Because until we implement the Deck, we found it wasn’t helpful. When we implement the Deck, you will be able to drag items to the deck, scroll up and down, and then drop where you want to, and change properties. You will then be able to drag and drop horizontally to change states. We do not anticipate supporting both operations at the same time.
Change Swim Lanes

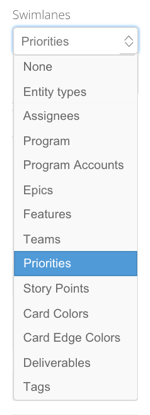
What is a Swim Lane?
They’re those horizontal bands that cross the board when you select a Swim Lane in the Tasks Panel Filters Menu.
Use Swim Lanes group Cards (Task) by one of the Panel Properties.
More…
See Wikipedia on Swim Lanes
I See Duplicates when I use Swim Lanes, Don’t I?
Yes, a Card can appear in multiple places on the board if say, you organize by something that allows multiple values like tags, assignees, or teams
4.7.7.4.1.How Should I Use The Board?
How Should I Use It?
To Manage Publications (articles)
( … )
To Manage Documents and Knowledge Bases
To Manage Tasks or Tickets
To Manage Stories, Problems, Challenges, Opportunities, and Candidates, (buckets of tasks)
To Manage Jobs or Work Orders (Small Projects)
To Manage Kanban Streams
To Manage Agile Sprints
To Manage Project Phases
To Manage Strategy and Initiatives
4.7.7.5.The Timeline View

| Using | Contains | Purpose | Description |
| The Page View | An Item | Collect Information | A Single Task |
| The List(Pad) View | List | Remember Items | A Simple List |
| The Outline View | Hierarchy | Plan Work | A Hierarchical List of Tasks and Subtasks |
| The Timeline View | Time | Schedule Our Work | Lists of Tasks on a Timeline |
| The Gantt View | Sequence | Schedule Sequential Work | Groups of tasks on a Timeline |
| The Table (List) View | Table | Find Our Work | A Sortable Table |
| The Column View | State | Do Our Work | An Ordered Visual List with Horizontal States |
| The Board View | States | Manage Our Work | Buckets of Groups vertically with Horizontal States |
| The Schedule Panel | Time | Manage Our Time | Everyone's work load for the next few weeks |
| The Responsibilities Panel | Workflows | Do My Work from an Inbox | Everything I am actively responsible for. |
| The Agenda/Time Panel | Times | Do My Work from a Calendar | Everything I am responsible for today. |
| The Activity Stream | Events | Do My Work from Events. | Everything that is happening now. |
What’s Its Purpose?
( … )
4.7.7.6.The Timeline (Gantt) View
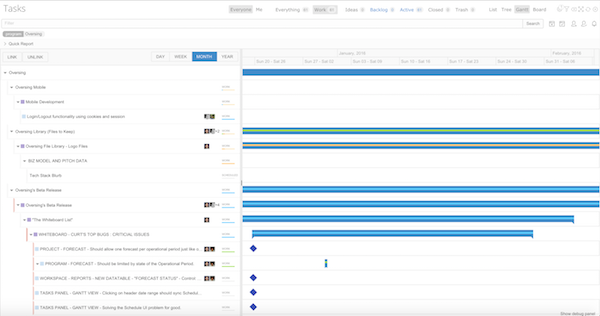
| Using | Contains | Purpose | Description |
| The Page View | An Item | Collect Information | A Single Task |
| The List(Pad) View | List | Remember Items | A Simple List |
| The Outline View | Hierarchy | Plan Work | A Hierarchical List of Tasks and Subtasks |
| The Timeline View | Time | Schedule Our Work | Lists of Tasks on a Timeline |
| The Gantt View | Sequence | Schedule Sequential Work | Groups of tasks on a Timeline |
| The Table (List) View | Table | Find Our Work | A Sortable Table |
| The Column View | State | Do Our Work | An Ordered Visual List with Horizontal States |
| The Board View | States | Manage Our Work | Buckets of Groups vertically with Horizontal States |
| The Schedule Panel | Time | Manage Our Time | Everyone's work load for the next few weeks |
| The Responsibilities Panel | Workflows | Do My Work from an Inbox | Everything I am actively responsible for. |
| The Agenda/Time Panel | Times | Do My Work from a Calendar | Everything I am responsible for today. |
| The Activity Stream | Events | Do My Work from Events. | Everything that is happening now. |
What is Its Purpose?
Use a gantt chart to:
• Estimate and plan projects – particularly contracts:
To determine resources(people) needed if the date is fixed and the resources(people) are variable.
-or-
To determine the date you’ll be finished if the resources(people) are fixed and the date is variable.
• Forecast(reserve by appointment) a NEED for people in the future.
• Schedule(reserve by appointment) time for people to do work.
• Reschedule or Re-forecast people to do work.
How is it Different from Outline View?
The gantt chart adds a panel to the right of the outline that displays colored blocks on a timeline.
How is it Different from Timeline View?
We use gantt charts to manage dependencies.
The Timeline and Board view work well together for managing work flow with limited staff.
The Outline (Tree) view and the Gantt view work well together for managing scope and resources, needed to deliver on a date.
When should I use the Timeline and When the Gantt Chart? (Scale)
Timelines help you schedule production with finite resources, when the dependencies between the units of work are comprehensible.
Gantt charts help you meet the terms of contracts for specific deliverables with third parties – particularly multiple third parties – when you can increase or decrease resources, and when scheduling the work is incomprehensible without the use of dependencies to help you.
How is Runcible’s Gantt Chart Different from Most Other Gantt Charts? (Forecasting/Appointments)
Most Gantt charts show Tasks. Runcible shows Tasks and Appointments.
You make changes in real time. The chart is updated with actual data in real time.
Assuming you break up tasks into small enough pieces, you don’t have to ask people for progress or maintain estimates to complete.
With most gantt charts the full scope of the project is included on the client side (in your browser). When you make changes, the client determines all the changes, then sends a set of updates to the server. Runcible works with a subset of tasks and sends each change to the server, which then updates the browser. Why? Well, that’s for your database guy to explain to you maybe. But lets just say that for Runcible to handle very big projects, that it’s necessary.
What Do I See?
Two More Panels!
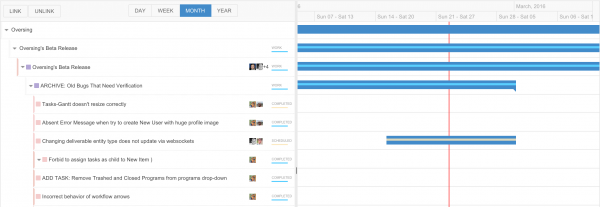
The Tasks panel is divided into two sides. On the left, a hierarchical list of tasks, on the right, the timeline.
The Outline (Tree) of Tasks
![]()
A hierarchical list of tasks, and just the minimum fields: Name, Assignees, Status and Progress Bar.
Note: As of this writing, some of the usual gantt chart fields are not visible view. We wanted to keep it as simple as possible and for the user to edit from the Task Detail Panel or from a Sliding Page. After working with it in practice we feel the need to satisfy professionals with experience by making them visible. We expect that some people will work exclusively in the Gantt view, rather than enter and estimate on the outline, and use the gantt for scheduling and resourcing.
The Time Scale
![]()
Use the time scale to display the time line by Day, Week, Month, or Year.
Note: Love your browser: don’t try to display a five year project by day. It will sacrifice itself in an attempt to serve you. But seriously, we haven’t implemented the viewport feature yet, which is a way of horizontally paginating the timeline. Once we do it won’t matter how much you demand of your browser because it will only show a portion of the timeline at a time – with ‘right now’ as the center of the viewport.
Horizontal Bars
![]()
The bars show the duration in time necessary to get the work done – the time between the start and end dates.
Note: What they do not show you is effort (work hours). You can do 8 hours of work in one day, or 8 hours, on hour at a time over 8 days (duration), or use two people and do 8 hours of work in only four hours. Duration just determines start and end date given the various calendars and work days. Runcible will calculate the minimum duration and prevent you from scheduling less time than necessary, but you can always give more time than necessary.
More…
See the topic on Points, Hours, Work, Duration, Progress for for more information.
Progress Bars
The progress bars show you how close to complete each task is.
Most Gantt charts show you the percent complete.
Runcible shows you the entire life cycle:
Progress Color Color Blank Grey Estimated Vanilla Scheduled Orange Confirmed Green Done Blue Over Red Tip: Once you have some experience you'll be able to quickly scan the progress bars and find the tasks that need your attention.
[Appointments]
Appointments show you the time reserved for each task.
The color represents the state of the appointment:
| Status | Color | Color |
| Pending | Orange | |
| Accepted | Green | |
| Cancelled | Grey | |
| Rejected | Red |
What can I do with Appointments?
A lot really.
See Appointments, Forecasting, Scheduling and Rescheduling below
[Work Logs]
Work log blocks show you the time recorded on each task.
What can I do with work logs?
Nothing really. You can open the task, and read the detail on it. You can create an adjustment. You can choose not to bill it. But if it’s there it’s a financial record.
Milestones
A milestone is an event representing a significant change – usually:
• An obligation to a third party.
• An event that we must be prepare for
• A contract date that must be met (or cannot be missed)
• The achievement of a goal.
• The point where you will run out of budget.
A milestone is usually represented by a diamond shape (arrow heads in opposite directions with zero time between them.)

Dependencies
( … )
Vertical Line
The red vertical line represents ‘today’.
What Actions Can I Take?
Scrolling: An Additional Layer of Scrolling
When you’re working with either the Gantt View or the Timeline View, horizontal scrolling in the Timeline Panel affects the Timeline area and not the workspace. Likewise, scrolling in the workspace area, does not affect the timeline panel.
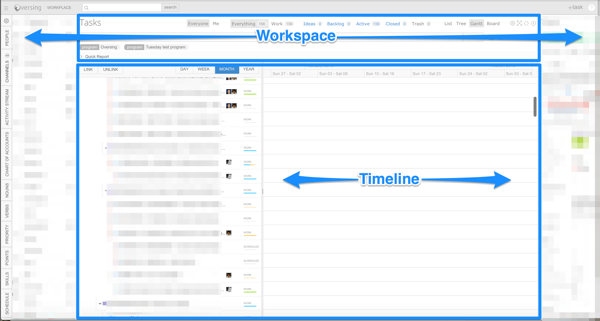
Note: It will become intuitive after you’re familiar with it. It’s far more intuitive with multi-touch touchpad. But we have noticed first time users take a few tries to catch on.
Expand the Gantt Chart View
Use ![]() to expand the panel to fill the workspace. And use
to expand the panel to fill the workspace. And use ![]() to close the Main Menu Panel.
to close the Main Menu Panel.
Why? Gantt charts are better when you have more room to work with.
Resize the Panels
Grab the Handle and drag the divider left and right to expand and contract the Task and Timeline Panels.
Link
You can link using either the left task panel by selecting and pressing the link button, or the right timeline panel by using drag and drop.
To link using Drag and Drop:
• Hover over the task to display the handle for the link

• Drag the handle to the handle for another link.

• Drop it there, to create the link. Runcible will update the workspace and the server with the change.

To link using the tasks panel and the Link Button:
• Select a task

• Use Ctrl-click to select others, or Shift-click to select a sequence of tasks.

• Press the link Button.
![]()
• Runcible will link the tasks, move the tasks to their new positions on the time line and update the server.

Note: The Link button will use Finish-to-Start links. To add other dependencies please use drag and drop.
Unlink
You can unlink by:
• Using the cursor to select the dependency, and pressing the delete key.
• Hilighting both tasks and pressing the Unlink Button.
• Deleting the dependency on the Task Page ->Dependencies Tab
To use the cursor
• Select the dependency

• Press the Delete key.
• Confirm the delete in the dialog.
Issue: We plan to eliminate the confirmation dialog because we feel it’s unnecessary.
Issue: Once a dependency has been deleted, the task should ‘fall’ back to the start date of its parent. This is an open issue. Why? We’ve been using these charts since they were invented, managed thousands of people who use them, taught generations of project managers, and have written a number of products that use them. And, we find that it has always confused users that when they delete a dependency, the task ‘disappears’ off the screen. Our thinking was that we should fix this rather problem by leaving the task in place and providing the option to:
• Leave it in place
• Move to today
• Move to the date created if it’s after the start of the parent.
• Move to the Start of the parent if it’s later than the date created.
Our plan is to add these choices to the Right-Click/Context Menu.
To Use the Unlink Button
• Select a task
• Use Ctrl-click to select others, or Shift-click to select a sequence of tasks.
• Press the Unlink Button
To Unlink from the Task Page -> Dependencies Tab
• Double Click to open the Tasks Page
• Select the Dependencies Tab

• Scroll until you see the dependency.
• Select [x] to delete it.
• Close the page.
Shorten or Lengthen a Task
Use the cursor to grab the handle on either end of the bar to change the start and end time by shortening or lengthening the duration of a task.
Note: Changing duration does not change effort. changing effort does change duration.
Move A Task
Use the cursor to grab the bar and drag it left (earlier in the project) or right (later in the project).
Right Click to display the context menu, and select Move to Top or Move to bottom.
Indent / Outdent
Use can indent to make a task a subtask of the one above. Or outdent, to make it a peer of the one above.
Add Tasks
You can add tasks by using the Context Menu or +Task
To Add a Task with the Context Menu
• Right click on a task to display the context menu.
• Select one of the options:
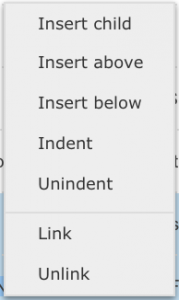
• Insert Child of the current task
• Insert Above the current task
• Insert Below the current task
A new row will appear.
![]()
• Select the Task type, enter the task name, and press “enter” to save it.
As you start typing a new row will appear below the one you’re entering.
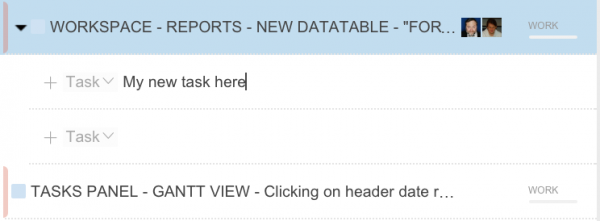
Note: Selecting any other Task will remove any unused new Task slots.
To Add a Task with +Task
• In the task list, select a task, deliverable, or project to add the task to.
• Select +Task. The New Task form will open, with the Parent property set to the selected Task .
![]()
• Fill out the +Task form , and press save.
The new Task will appear as a child of the selected Task, Deliverable or Project.
Remove Tasks
To remove a Task:
• Either:
Open the task detail panel and select the task. It will appear in the Task Detail Panel.
-or-
Double-Click on the Task to open the Task’s Profile Page.
• Press Trash to remove it.
Note: Trashing a task has no impact on it’s financial records. In most cases Runcible will ask you to close rather than trash any task with financial impact.
Note: In some cases you will need to change the state of the item in order to trash it.
Note: The ability to trash an item is included in the workflow. So if the trash option isn’t there, it’s because someone removed it, chose not to add it, or forgot to add it.
4.7.7.6.1.Using Schedule Stage

What is the Scheduled Stage?
The scheduled stage determines whether we activate the Start Date, End Date, Duration, and show tasks on the calendar. Otherwise we do not use the start, end, duration properties, or show it on the gantt and timeline charts.
Moving a Task into Scheduled Stage makes it appear on the Gantt Chart and Timeline.
If it has not been in scheduled stage, it will not be flagged to appear on the gantt chart and Timeline.
How Do I know what’s Scheduled and Not?
Use the these controls to toggle between showing Unscheduled (Left selected), Scheduled (right selected) and Both (neither selected)

Why do we want a Scheduled Stage?
To make it easy to maintain a backlog of possible work, to schedule some of the work, yet keep the unscheduled backlog off the gantt chart.
For example, lets use the simple workflow: Ideas -> Backlog -> Scheduled -> Work -> Complete -> Closed.
In Agile terms, you would schedule your planned sprints or iterations, and leave the rest of the backlog off the schedule.
Runcible allows you to combine the backlog of agile management, with the resource scheduling of traditional Work Breakdown Structures: taking the best of both worlds.
Think of it this way:
You can use (a) a traditional WBS, scope, change requests, phases, dependencies, dates, and a variable staff.
Versus (b) a backlog of various phases or iterations, each hitting a scheduled date using a variable staff.
Versus (c) iterations of the same size and duration using a fixed staff.
So Runcible lets you do what you want to or need to without asking you to demonstrate religious devotion to a methodology. Our methodology is ‘give people information’ and ‘make information transparent’, and people will succeed.
4.7.7.6.2.Using Appointments
What is an Appointment?
An appointment is a request to reserve someone’s time. (It is a special kind of task really, with it’s own workflow.)
You can make three types of appointments:
• At a time-of-day on a specific day: 4 July 2076 @ 10:00am.
• At any time, during a specific day. 4 July 2076
• On any Day, at any time, during a specific week. The first week of July 2076.

Why? These Reasons:
• Because when we are forecasting time in the future, the greatest precision we need is a week. So booking 40 hours of work some week or other is very simple.
• Because a lot of our work can be done any time during a day or week.
• Because many people choose the order of their own work, and set their own schedules.
• Because we don’t know when the work will be ready for the person to do his part of it.
• So that we don’t overload people and either stress them or cause them to fail, or under-load people, and cause our organization to fail to compete in the marketplace.
Do Appointments have a Workflow?
Yes, appointments have a workflow. The appointment workflow is outside the program, in the organization. That means appointment workflows are set as an organizational policy not as a program policy.
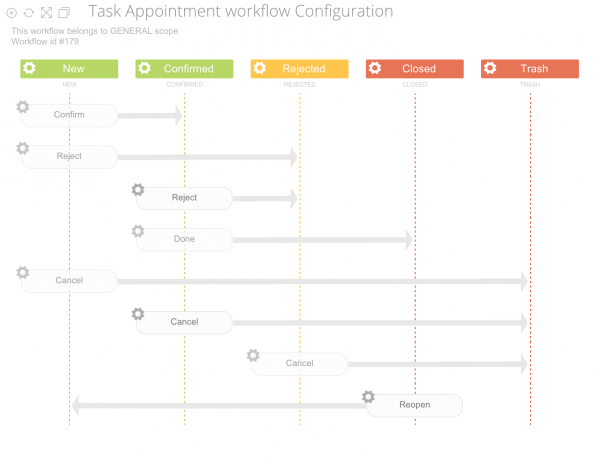
The default colors of an appointment’s workflow states on the gantt chart :
| Status | Color | Color | |
| Pending | Orange | You’ve created the appointment but it hasn’t been accepted. | |
| Accepted | Green | The assignee has confirmed that he’ll do it. | |
| Cancelled | Grey | You’ve cancelled the appointment. | |
| Rejected | Red | The assignee has rejected the appointment. | |
| Closed | Purple | The appointment was kept and the work was done | |
| Deleted | None | Deleted appointments don’t leave any record. |
What does a confirmed appointment look like on the calendar?
Confirmed appointments include a checkmark.
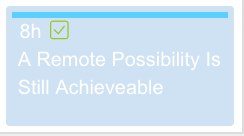
Where can I see Appointments?
You can see appointments on all the Calendar and Agenda Views:
• On the Schedule and Reschedule panels
• On each Task’s Profile Page -> Time Tab
• On the Schedule Panel’s “Me” View
• On everyone’s Profile Page -> Time Tab, in both Calendar and Agenda views
• In your Inbox -> Responsibilities View. Use Smart Search. Search for “Appointments”
What Actions Can I Take on Appointments?
[alert style=”grey ml30″]
• Open an Appointment Page
• Create an Appointment
• Edit an Appointment
• Use the Calendar Agenda Gantt or Timeline to Edit an Appointment
• Use the Calendar to Move an Appointment
• Use the Schedule and Reschedule Panels to Move an Appointment
• Cancel or Delete an Appointment
[/alert]
[actionbadge] Open an Appointment Page
Double Click to open the Appointment Page.
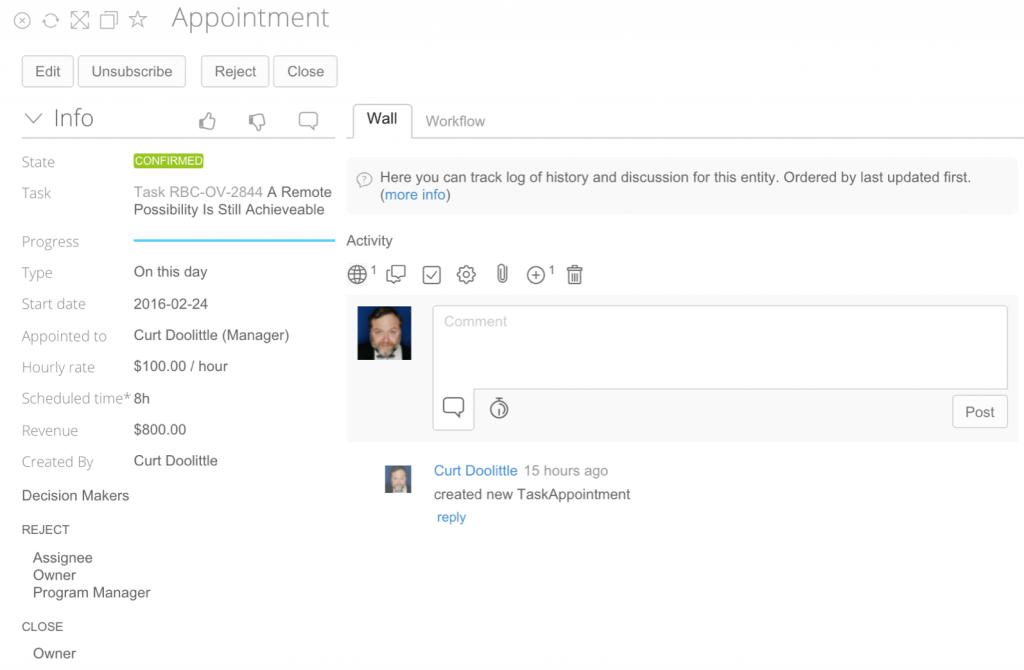
Now you can:
• Select the task name or id to Open the Task and review the Task information.
• Edit / Change an appointment (See more below).
• Accept the appointment. Runcible will update the status of the appointment, and the author will be notified.
• Demonstrate good manners – and comment before you reject the appointment.
• Comment and close the appointment as done.
• Bill time against it.
• Just leave comment.
Note: Comments on appointments are copied to the Task’s activity stream.
Note: Hours entered against an appointment are charged against the Task.
Moving or Editing Appointments
[actionbadge] Use the Calendar View, Agenda View, Gantt or Timeline to Edit an Appointment
• Double click to open the appointment.
• Press “Edit” and the panel will change to display the editable fields.
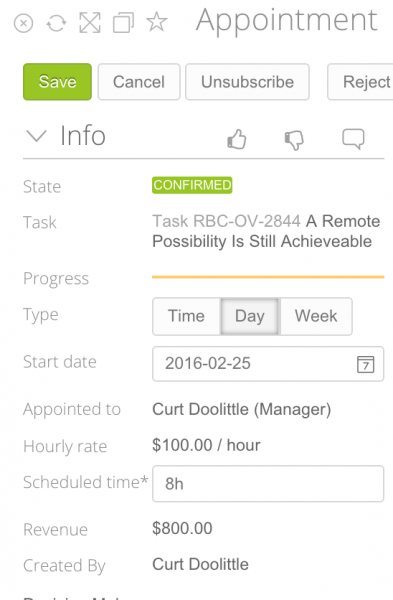
You can change the type of reservation (time, day, or week) the date and or time, and the amount of time you want to book (reserve).
Only the owner (creator) can change an appointment. Otherwise reject, cancel, close it, or trash it.
[actionbadge] Use the Calendar View to Move an Appointment
• Drag and drop the appointment to the new position. That’s it.
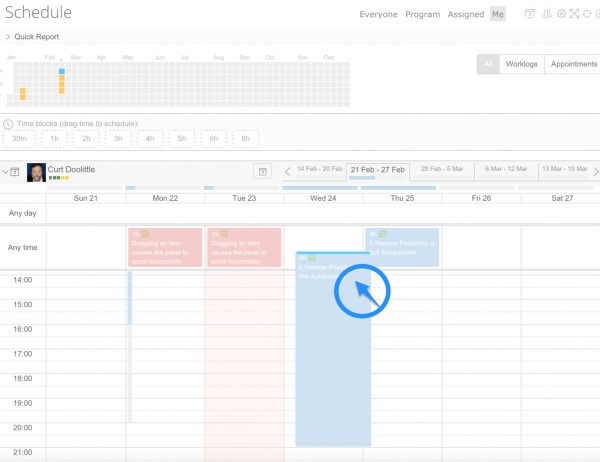
[actionbadge] Use the Schedule Panel to the Reschedule Panel to Move an Appointment
Use the Reschedule panel to move time between different weeks.
To move from the Schedule to the Reschedule Panel
• Open the Schedule, Periods, and Reschedule panels.
• Use the period panel to set them to the weeks you want to use.
• Drag and Drop from the Schedule to the Reschedule Panel (or the other way around).
This is how you easily move time between periods.
[actionbadge] [Use the Dock to Move Appointments]
Use the Dock to collect appointments or tasks and move them later.
To use the Dock to move an appointment.
• Drag and Drop an appointment to the Dock.
Note: The appointment will not disappear until you move it from the Dock to the destination.
• Then Drag and Drop the appointment from the Dock to the Calendar. Runcible will move the appointment from the source to the destination.
[Wait, Why Can’t I Move This Appointment?]
Because appointments function as a forecast, and we want to measure our forecast against our actuals.
And because confirming an appointment is a sort of contract with another person.
If the Operational Period is Locked or Closed.
Then you can’t move an appointment.
Otherwise,
1) for The Owner and the Decision Makers,
Unconfirmed and hasn’t any time billed against it:
Drag and Drop to move it.
Confirmed and hasn’t any time billed against it:
[eds: User must edit task, remove from confirmed state, then drag and drop?
or can we flip an unconfirmed bit easily, and just let them drag and drop it?]
Confirmed and has time billed against it:
[Eds: Drag and Drop creates a new appointment as copy.]
2) For The Assignee:
The Assignee can:
• Move a week task anywhere within the week.
• Move a day task anywhere within the day.
• Change the duration
• Reject the appointment.
[actionbadge] Cancel or Delete (Trash) an Appointment
Double Click to open the appointment.
From the Workflow Bar, Press “Cancel”.
![]()
Note: By default,
• The assignee rejects an appointment.
• The creator cancels an appointment.But, the entire appointment process can be configured in the workflow editor.
Creating Appointments
There are at least seven ways of creating appointments (Yes, really).
[alert style=”grey ml90″]
[• Using +Task]
[• Using the +Appointment Block]
• Using the Task Profile -> Time Tab, Drag and Drop Assignees on the Calendar.
• Using the Task Profile -> Time Tab, Drag and Drop Time Blocks to the Calendar.
• Using the Tasks Panel, Drag and Drop a Task on any Calendar: Schedule, Schedule/Me View.
• Using the Tasks and Schedule Panel, highlight a task and use the suggestion panel on the Schedule panel
• Using the Schedule Panel, Look for Unstaffed, but Scheduled work.
[/alert]
[actionbadge] [Use +Task to Create an Appointment]
To use +Task to create a task and an appointment.
• Select +Task. The New Task Panel will open in a Sliding Page.
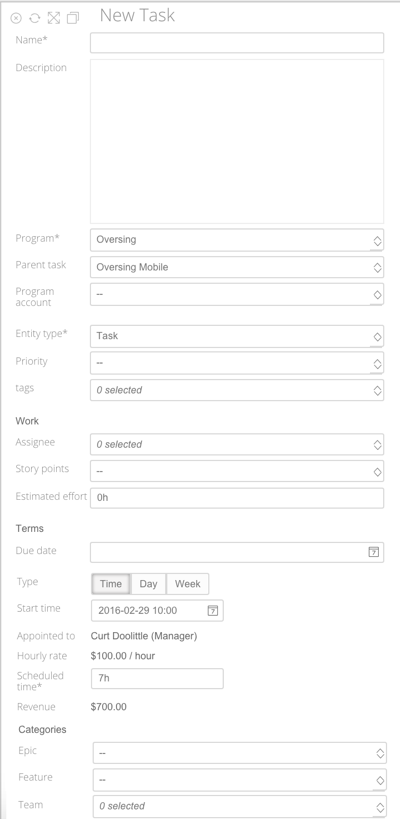
• Enter the required fields:Name, Program, Parent Container (Task)
• Select the Entity Type “Appointment“. The form will display the appointment’s fields:
– Appointment type,
– Start Time,
– Person the appointment is for,
– and Time to Book (reserve).
– You can also add the Role and Rate if needed.
• Press “Save“.
A new Task and corresponding Appointment will be created. And a sliding page will open with the new Appointment Profile Page.
[actionbadge] [Use the +Appointment Block To Create an Appointment]
Use the +Appointment block to create an appointment under an existing task
• Drag and Drop the +Appointment block to any spot on the calendar.
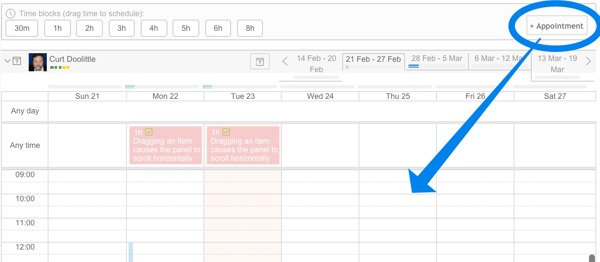
• The New Appointment panel will appear from the right, with the date already filled in.
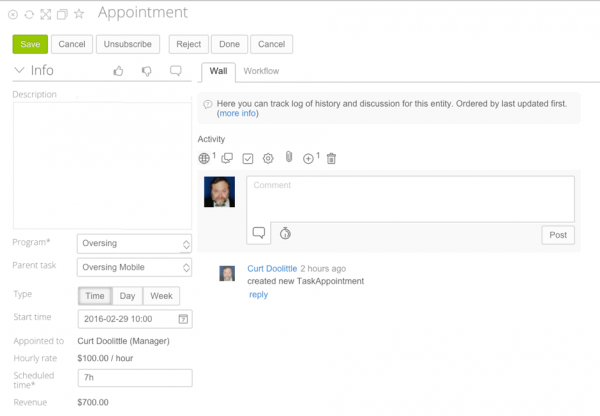
• Enter a description
• Select the Program and Parent Task
Tip: you can always just add appointments to your personal task list if you don’t have a program yet.
• Select the amount of time for the appointment. The time will default to one hour.
• Press Save.
The New appointment will appear on the calendar where you dropped the +Appointment block.
[actionbadge] Drop Assignees on the Calendar To Create an Appointment
To drop assignees on the calendar using the default time remaining:
• Either open the Task Detail Panel and use the [icon] to display it in full size, with the tabs visible.Or double click to open a Task Profile Page.
• Select the Time Tab. You will see the task’s calendar.
• Use the date control to select the week you’re looking for.
• If you see one or more assignees, Grab an assignee from the Profile Panel onto the calendar. If not, assign someone to the task.
• Drag and Drop the assignee onto the calendar.
• Drop it in the Week, Day, or Time section of the schedule.
Runcible will create an appointment for that task, using the Estimate to Complete value of the task, or 1 hour, if it is empty.
You may see a dialog asking you to select a rate if Runcible cannot determine it. Select a rate and press enter.
Runcible will add that individual or role to the program in the selected role at the selected rate.
[actionbadge] Drop Time Blocks to the Calendar To Create an Appointment (Preferred Method)
To drop assignees on the calendar with the default time remaining
• Either open the Task Detail Panel and use the [icon] to display it in full size, with the tabs visible.Or double click to open a Task Profile Page.
• Select the Time Tab. You will see the Task’s calendar.
• Use the date controls to select the week you’re looking for.
• At the top of the calendar you’ll see the Time Blocks Bar

• Select any person from the horizontal list, or select “All” assignees.
If you select “All“, then the calendar will display all appointments for all assignees.
If you select an individual, then the calendar will display only appointments for that person.
• Drag and drop a Time block onto the calendar.
Notes: Basic Appointment Rules
– Suggested times will be hi-lited in Blue with a colored background.
– Drag a block of time from the bar to the Calendar to create an appointment.
– If you drag a block from “All” it will create an appointment for all assignees.
– If you drag a block from an individual, it will create an appointment only for that person.
– No matter how big a block you drop, the appointment will be truncated at the end of the person’s work day – which is specified in the user’s profile. To create an appointment beyond the person’s work day, drag and drop it after their day ends.
– You can overload a person. Runcible won’t stop you. Why? Because it’s better for everyone to resolve conflicts by discussion rather than resolve conflicts by whomever makes the first appointment. Meanwhile, the user can reject whatever appointments he wants to.
[actionbadge] Drop a Task on any Calendar To Create an Appointment
• From the Schedule Panel, Open an individual or role’s Calendar,
• Otherwise, open the Task Detail->Time Tab, or a Task Profile -> Time Tab
• Drag a Task from any view of the Tasks panel to the Schedule Panel’s Calendar.
• Drop it in the Week, Day, or Time section of the Calendar.
• Runcible will create a new appointment for that task, using the Estimate to Complete value of the task, or 1 hour, if it is empty.
[actionbadge] Use the Suggestion Panel To Create an Appointment
Using the Tasks Panel, in any view,
• Select a task you want to create an appointment for.
• From the Schedule Panel, expand a Role or an Individual’s Calendar. You’ll see the Suggested Work Panel.
• The panel will display three options, each with a counter for the number of tasks it has found.
Selected: if a Task is selected in the Tasks Panel
Unbooked: if a task is on the timeline for this period, but without appointments.
Booked: if a task is on the timeline for this period, and it has appointments.

• Choose “Selected” if it isn’t chosen (it’s chosen by default)
• The Selected Tasks will appear below the choices.
• A set of time blocks will appear below the task
• The suggested time allocation will be highlighted
• Drag and Drop a time block onto the Calendar to create an appointment.
• If necessary, Runcible will display a dialog asking you to choose a role and rate. If so, select them and Press enter.
Runcible will create an appointment and add the individual to the program if not already a member.
Bug: Drag and Drop for the Gantt View is broken as of this writing.
[actionbadge] Look for Scheduled, but Unstaffed Work and Create Appointments
• Open the Schedule Panel
• Select
“Me” to review your calendar – shows just your calendar.
“Assigned” to view the people assigned to the selected Task – always sorted by People
“Program” to review the people in the Program – Sort by Role, by Teams, by People
“Everyone” to review everyone – always sorted by Role.
• Select the time period you want to review.
“One Week”,
“Six Weeks”, or
[“Twelve Weeks”]
• Expand a Role or The Individual’s Schedule
![]()
• Select the progress bars to expand the Calendar for the Role.

• Select [>] to expand the Users in the Role

• Select the Progress Bars to expand the Calendar for the Individual.
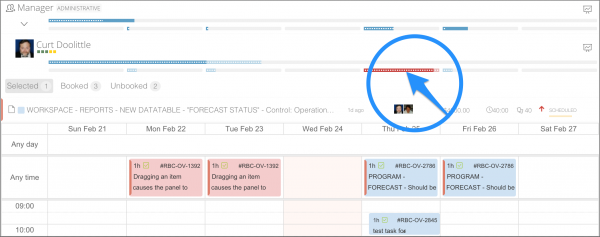
• You’ll see the Suggested Work Panel.

• The panel will display three options, each with a counter for the number of tasks
Selected: if a Task is selected in the Tasks Panel
Unbooked: if a task is scheduled on the timeline for this period, but without appointments booked.
Booked: if a tasks has appointments booked for this period – and you should see them on the calendar.
• Select Unbooked to Create Appointments, and Booked to Move or Cancel Appointments
• Then select one each of the appointments, to see the Time Block panel for that task.
• The hilited block suggests the amount of time you should Book.
• Drag and Drop a block to create (book) an appointment for that person at that time.
Repeat selecting tasks until all are Booked.
Why? This feature is very useful for forecasting work for a department or Role, but not to an individual, and not to a particular day or time. And then allocating it to an individual when the work is ready, and you know who is available.
Suggestion for Traffic Management:
• Open the Schedule and Reschedule panels, select a Program in the Programs Panel
• Use the Role view on the left, and the Person view on the right.
• Move move blocks of time from roles on the left panel to individuals on the right panel.
This makes the funneling of work to individuals much easier.
Questions About Appointments:
Why do duplicate appointments appear when I make an appointment for more than one person?
Runcible creates appointments for every individual in the “All” group. But duplicates should not all be shown on the All Appointments View.
Issue: This issue is logged, and we’ll fix it,
Why do Appointments take so long to show up after I create them? Sometimes it’s like 3-5 seconds?
For two reasons.
1 – The UI should place the appointment on the calendar in a temporary state, then confirm it when the message is received from the server. At present the UI merely waits for the server to send it the appointment before creating the appointment.
Issue: This issue is logged and we’ll fix it. We have a number of related issues where the queue is not as fast as we’d hoped – even though the reason we use it is to increase your perceived performance while background tasks are completed.
2 – Appointments create a lot of recalculation on the back end, and the more complicated your program and
project the more work the server must do. we have improved this about 300% in the past few months and we will undoubtably make it faster over time. But it will never be instantaneous. Why? Ever notice when you’re chatting that there is sometimes a delay? Works the same way here also.
Why can’t I move these appointments using the Gantt Chart?
Because it’s not precise enough for a tool to allow ourselves to affect other people’s lives with. So, move appointments on the Schedule Panel, Reschedule Panel, or the Task Page’s Time Tab.
Why can’t I delete or change an Appointment for next week?
If your organization is using Runcible’s forecasting features, then it’s likely someone has locked all the appointments for next week. If they’ve locked the forecast, you can only cancel existing appointments and make new ones, not delete them.
Why do we track all this information about appointments?
So that we understand the volatility of our work and can begin to predict what current appointments will lead to in future work logged. This is how we increase utilization. Its about the only form of efficiency that’s under our control. Like most objectives in Runcible, we’re trying to reduce the difference between optimistic or pessimistic imagination about the past and future, and the reality that ends up happening.
4.7.7.6.3.Using Forecasting
Managing Traffic
Staffing and Resourcing
Forecasting
4.7.7.7.The Table (List) View
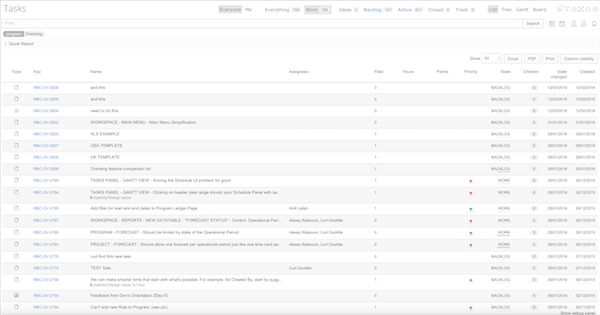
| Using | Contains | Purpose | Description |
| The Page View | An Item | Collect Information | A Single Task |
| The List(Pad) View | List | Remember Items | A Simple List |
| The Outline View | Hierarchy | Plan Work | A Hierarchical List of Tasks and Subtasks |
| The Timeline View | Time | Schedule Our Work | Lists of Tasks on a Timeline |
| The Gantt View | Sequence | Schedule Sequential Work | Groups of tasks on a Timeline |
| The Table (List) View | Table | Find Our Work | A Sortable Table |
| The Column View | State | Do Our Work | An Ordered Visual List with Horizontal States |
| The Board View | States | Manage Our Work | Buckets of Groups vertically with Horizontal States |
| The Schedule Panel | Time | Manage Our Time | Everyone's work load for the next few weeks |
| The Responsibilities Panel | Workflows | Do My Work from an Inbox | Everything I am actively responsible for. |
| The Agenda/Time Panel | Times | Do My Work from a Calendar | Everything I am responsible for today. |
| The Activity Stream | Events | Do My Work from Events. | Everything that is happening now. |
What is Its Purpose?
The Table (list) View can handle very large sets of data. Lots of records. So when you want to find and sort groups of similar things in or across projects and programs, use the Table View.
For Example:
Searching through large numbers of Tasks, and Sorting them – for example, by Priority, Points, Hours, Due Date.
Searching through Candidates.
Searching through Leads, Opportunities and Deals
Managing Queues of Tickets.
Managing Lists, like Bug lists.
Managing Articles, Definitions, References.
Managing Assets, [Liabilities], Expenses, Adjustments, Transfers, [Commissions].
But, Can’t I Just Use Search?
The Main Search helps you find a single thing.
If you want to find groups of things, then use the Table View.
But Wait, I Can See Both Stories and Their Subtasks At The Same Time?
Yes, and that’s by design. You can always filter stories and task separately. But if you want to search for all stories with tasks containing some property, use the Outline View, because every found task is displayed with it’s full list of parents.
How is it Different from the Pad (List) View?
The List View can be rearranged, but not sorted.
The Table View can be sorted but not rearranged.
How is it Different from the Inbox: Responsibilities View?
The Responsibilities View reflects the Workflow States. The Table View reflects the Workspace Filters. What does that mean? It means if your work is driven largely by responsibility for a step in a workflow you’ll prefer the Inbox:Responsibilities View. If you are responsible for creating or completing tasks, you’ll want to use the table view.
What Actions Can I Take?
All the Drag and Drop Events
• Drag and Drop to Tag or Remove Tag
• Drag and Drop to Schedule and Assign
• Drag and Drop to Change Stage
• Drag and Drop to Move Between Projects or Deliverables
• Drag and Drop to the Dock
More…
See Dragging and Dropping Tasks for more information
Select a Task
Click on a row to select it. If the Task Detail Panel is open, it will display the selected Task.
Double Click to Open
Double Click on a row to open the Task in a sliding page.
Add a Task
To add a Task use +Task.
• Select +Task. A sliding panel will open for the New Task.
Note: Runcible will fill in whatever fields it can by using the Sections on your board.
• Enter the Task Name.
The other fields should be optional unless you’ve created restrictions on in your workflow.
• Press Save. The workspace will be updated momentarily with your changes.
More…
See Using +Task for more information
Edit a Task
To Edit a Task either:
• Open the Task Detail Panel. Select a Task. And in the Task Detail Panel select “Edit”.
Or
• Double Click to open the Task in a sliding page. In the Sliding Page, then select “Edit”.
There is no edit-in-place, or edit panel in the Table View.
Select Fields to Display
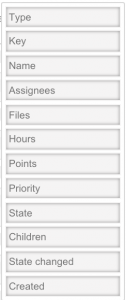
Select the Column Visibility button to display the column menu.
![]()
Then select or deselect fields to hide or show them.
Sort by a Column
![]()
To sort the table select the column heading of the field you want to sort by.
Select it again to reverse the sort.
Select it again to return to the original sort.
Export The Data
You can export the data in three formats:
• An Excel (.xls) file
• An Adobe PDF (.pdf) file
• And to a Printer
Alt-f to Open the Filter Menu
Press Alt-f to open and set focus on the Filter Panel.
Can I Add Fields?
Not yet, no. But you CAN filter for almost any field using the smart tags.
Hint: Yes, it’s easy for us to add fields to the table in the future.
4.7.7.8.On a Page: The Subtasks Tab View
( … )
4.7.8.The Task Detail Panel
4.7.9.The Scheduling Panels
Scheduling Panels
- The Schedule Panel
- The Period Panel
- The Reschedule Panel
4.7.10.Using The Quick Reports
4.7.11.The Reporting Panel
The Reporting Panel
- Report Menu
- Report Panel
4.8.Runcible's Task Types
Story types have a story panel
Deliverable types have a set of ‘brief’ panels (requirements)
Document types have a content tab
Expense, Transfer, … Types have a financial panel.
| Icon | Name | Group | Description |
|---|---|---|---|
| Project | Container | ||
| Deliverable | Container | ||
| Folder | Container | ||
| Story | Story | ||
| Problem | Story | ||
| Possibility | Story | ||
| Challenge | Story | ||
| Candidate | Story | ||
| Task | Task | ||
| Ticket | Task | ||
| Event | Task | ||
| Defect | Task | ||
| Milestone | Task | ||
| Estimate | Money | ||
| Expense | Money | ||
| Adjustment | Money | ||
| Transfer | Money | ||
| Commission | Money | ||
| Requirement | Biz | ||
| Risk | Biz | ||
| Input | Biz | ||
| Output | Biz | ||
| Test case | Biz | ||
| Asset | Asset | ||
| Document | Document | ||
| Section | Document | ||
| Article | Document | ||
| Card | Document | ||
| Reference | Reference | ||
| Citation | Reference | ||
| Definition | Reference |
4.9.Task Links and Dependencies
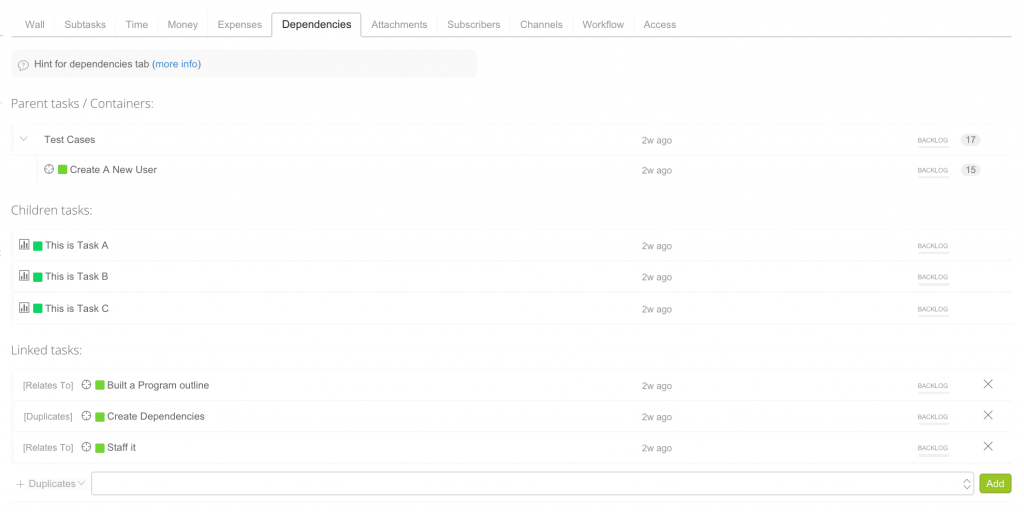
Tasks can use three kinds of dependencies:
• Parent-Child Relations (The Program, Project, Task, Subtask Family Tree)
• Dependencies (The Sequence of Tasks in Time)
• Links (Like Duplicates, Replacements, Additional Information)
What are Parent Child Relations?
When you look at the Outline View (Tree), just like a file system’s folders, parents contain children.
Runcible creates these relations whenever you move tasks within program, project, deliverable folder, story, or task.
What are Dependencies?
Dependencies let you choose what work on a task is dependent upon another task. You create these dependencies on the Gantt Chart. The Gantt Chart View uses these dependencies, and the Timeline View does not.
• Finish-to-Start: Predecessor(tail) must finish before Successor(head) can start.
• Start-to-Finish : Predecessor(tail) must start before Successor(head) can finish.
• Start-to-Start : Predecessor(tail) must start before Successor(head) can start.
• Finish-to-Finish: Predecessor(tail) must finish before Successor(head) can finish.
Why does this matter? Because the Gantt chart will always try to move Tasks “sooner” in time. So that tasks ‘float’ with one another on the timeline. In the Timeline view, you manually position when tasks will be done, and the timeline does not move tasks around for you.
(Note: Dependencies are not shown in the current illustration above)
What are Links?
Links relate *information* in one task with another.
Links work in both directions, and appear on both the task you enter it on, and the one you refer to.
Relates To -> /Is Related To <- (Meaning: Adds Information: + )
“This task relates to this other task – we probably want to work on them at the same time – or refer to it.”
“This task is related to this other task – we probably want to work on them at the same time – or refer to it.”
Duplicates -> / Is Duplicated By <- (Meaning: Identical Information : = )
“This task is a duplicate of another task – we don’t need to do both.”
“This task is duplicated by another task – we don’t need to do them both.”
Supersedes -> / Is Superseded By <- (Meaning: Replaces Information : – )
“This task supersedes (meaning, replaces) this other task. We no longer need to work on the other task. ”
“This task is superseded by (meaning, is replaced by ) this other task. We no longer need to work on it.”
4.10.Runcible Workflows
( … )
4.11.Runcible's Permissions
5.The Runcible User's Guide
6.The Home Page
Open a browser and navigate to “www.Runcible.com”.
Press any key, and you’ll see the login dialog.
The Homepage Tabs
Underneath the login dialog are additional tabs that you might need if you don’t have access to Runcible.
Register:
Use the Register tab to request an account from an administrator.
Password Reset:
Use the Reset Tab to request a new password. Enter your email address and a password reset link will be mailed to your email address. Click on the link to reset your password.
Help :

Use the Help Tab to reset your password, learn how to join, and learn how to contact support.
About :
Tells people who arrive by accident about Runcible and Runcible and displays links to our web sites for more information.
7.Logging In and Out
Logging In
- Open your browser and navigate to Runcible.com.
- Enter your login and password, then press “Login”.
- Runcible will display your default workspace.
- Note: You can select your default workspace from the Workspace Menu. See Default Workspaces (UNDONE) to learn how.
Logging Out
- Open the Main Menu by pressing [=] if it is closed.
- On the Quick Menu, press Logout
- [ICON]
- Runcible will record your logout in the user log.
- Tip: Logging out will end your Session State, end your Websocket Connection, and end your Login Status by canceling your cookies and your tokens.
- Runcible will display the Runcible Home page.
Connectivity: Timeouts, Disconnections and Tokens
Inactivity: Runcible may automatically log you out after inactivity. This is partly a security measure, and partly to reduce costs of maintaining unused connections.
Websockets (Advanced): Runcible keeps a list of everything on your workspace, and then uses Websocket technology to maintain a constant connection between your browser and the server. If anyone else changes data that’s displayed on your Workspace, the servers update your workspace automatically. However, this connection can break if you have a poor internet connection. If the connection is lost, Runcible will turn the (?) icon red. The Runcible will try to restore the connection if its lost. If not you will need to refresh your browser to restore it.
Tokens (Advanced)- Every time your browser requests something from Runcible, it receives a new Token. Runcible tries to make sure it doesn’t get confused if you stop it in the middle of something – but it’s possible. If so it will try to recover. If it gets really confused it will ask you to refresh your browser.
Updates (Advanced): When we update the software it stops the queues that manage updating your workspace, and they will often go out of sync.
Note: In the future we will add a notification to the System Status Panel that asks you to refresh your browser if we update the software.
8.Joining Runcible
this is some text in the user guide Section
8.1.Requesting Your Membership
You can join Runcible by registering to requesting membership or by being invited.
- To Request Membership (a user account)
- Open a browser and navigate to ‘Runcible.com’.
- When the home page appears, press any key to display the login dialog.
- Select the tab labeled “Register”.
- Enter a user name that you will remember. (Suggestion, use the ‘local part’ of your email address: the part before the @ symbol.)
- Tip: Runcible user names must be unique, three or more characters.
- Enter your full email address at the organization you wish to join.
- Tip: Runcible uses the domain name of your email address to determine which organization you can join. So you will need an email account at that organization in order to join.
- If your email’s domain name is not registered to an organization already in Runcible, then Runcible will ask you if you want to be added to the Runcible Community instead of a specific organization. (See Runcible Community Edition UNDONE)
- Enter your first and last names (your given name and your surname).
- Enter a comment if it will help the administrators identify you.
- Tip: A helpful comment might look like “Hi, this is Jamie Doe. I work for Amy in Marketing in the Seattle office.” Or “Hi, I am a contractor working on the Cool Startup project in LA”. Or for more formal organizations “Hi, my employee id is 999-007 and I start on Monday in the London office working John Doe.”
- Press the ‘Register’ button. And that’s it. You’ll receive a set of emails confirming (or rejecting) your membership.
- Tip: All Runcible administrators who have permissions to approve new users will receive notification of your request immediately, but they must manually approve your membership and configure your relationship with the company before you can log in. And so their response time will vary from organization to organization depending upon the number of people who can approve new users, their work loads, and their work hours.
8.2.Configuring Your Profile
To Configure your Profile:
- Press “Edit”.
- Enter your Title, Cell Phone, Facebook name and LinkedIn address. (Optional)
- Press “Save”.
- Choose your Skills
- Runcible’s skill system is often described as a “Reputation System”. And it’s one of the most important features of Runcible’s Social Management services.
- Hard Skills: Those skills that can be taught, learned, and measured: how we act with ideas, processes and things.
- Soft Skills: Interpersonal skills that
- Desirable Skills: Those skills that are most important to your organization. You can have many skills but Runcible separates the desirable skills from those that are not relevant in your organization.
- Peer360: The measure of positive to negative feedback that you accumulate during your work.
- Karma: The ratio of feedback you give to the feedback you get. In other words, it’s how good a ‘citizen’ you are as measured by how much ‘social-tax’ you contribute to Social Management, versus how much ‘social-tax’ you consume from others.
- Complete your Biography
- Copy and paste your resume, or life story. Write enough so that other people can get to know you.
- Choose your Language and Time Zone
- Change Your Password
- Runcible will send you an automatically generated password. Change it to something you can remember.
- Tip: Passwords must be 6 or more characters, and can include spaces and punctuation.
- Runcible will send you an automatically generated password. Change it to something you can remember.
That’s it.
8.3.Add and Invite a New User
To Send an Invitation of Membership (a user account)
- Log into Runcible.
- Select Main Menu ->Top -> People -> Create New User.
- The New User dialog will appear on the right of your screen.
- Fill out the “*” required fields.
- Press Save
- Runcible will create the new user, and then open a new User Profile page.
- Next, Configure the User’s account
8.4.Configure a New User Account
From the User’s Profile page:
Choose Personal rates (optional): If this user will bill at an hourly rate, select the Personal Rates tab, then:
Press +Add to enter a default Discipline, Role and Rate, the press save.
Repeat for each project role the user can fulfill in your organization.
Tip: Read the section on Personal Rates (UNDONE) so that you understand the hierarchy of Rates and where Personal Rates are used. For now, a personal rate functions as a reminder of the target rate you want to charge for an individual’s time.
Tip: Only people who bill customers for their time require personal rates.
Choose Compensation (Required):
Employment Type: Select full, part time, or contract.
Contract Type: Select whether the individual is paid hourly or by salary.
Payroll Project: Select the project that users charge non-billable time to.
Tip: Every organization has at least one payroll project that user’s bill for their payroll, holidays and other non-work time. Complex international organizations might have many, but most small and mid sized organizations will have just one. If you are unsure which to select, ask someone in accounting or human resources which one to use.
Base Hours: Enter the number of hours this individual is expected to work per week on average.
Tip: Runcible uses Base Hours to determine how utilized, busy, or heavily scheduled a person is. In most of the world, for full time employees, this value varies between 37 and 40 hours, although for many consulting firms it is 50 or more hours: 40 billable and 10 non-billable. For part time and contract workers it varies by individual and is usually determined in their employment agreement.
Target Utilization: Enter the average weekly utilization that this user should try to achieve.
Tip: Utilization refers to the number of hours worked and billed. So if your enter 40 base hours, and bill 20 hours, your utilization would be 50% ( one half of 40).
Estimated Weekly Burdened Cost: Enter the estimated weekly burdened cost of this user. Accounting or Human Resources should provide you with this value. Runcible uses Estimated costs to determine changeability.
Tip: This value is calculated by dividing the annual cost of the employee including all payroll and taxes, but not miscellaneous overhead (costs not directly related to the employee) by the number of weeks in the calendar year (fifty-two); then multiplied by an estimated burden. In the USA this number is generally about 1.3. ((salary+taxes)/52) * 1.3. Or a 30% burden. In European countries it is much higher.
Target Changeability: Changeability refers to the ratio between your costs each week, and the revenue that you generate. So if you cost 100USD per week and you bill 200USD per week, your changeability would be 200/100 or “2.00”.
Tip: most organizations target somewhere between 1.75 and 3.0 depending upon the role the person fills in the organization.
Target Charge-ability Variation %: Runcible uses this value to display a ‘gauge’ to the user that shows how well he or she is meeting his or her target charge-ability.
Tip” Some jobs can allow for little variation in billed hours and some a lot. Most jobs can tolerate 10-20% variation in Charge-ability from week to week.
Working Day Start: The start of your work day in your local time zone. (Or your home base time zone for those of us who travel a lot.) Runcible uses this value to show people when you are available to work. This is most important in multi-national organizations working on projects with people who’s work days do not always overlap.
Working Day End: The end of your work day in your local time zone.
Minimum Billable Time: Select the smallest Work Log that this user can save. This value determines two things: the initial time recorded in any work log against any task; and the rate at which the ‘clock’ increases. So if you set Minimum Billable Time to 15 minutes, then start a timer on a task, the work log will start at 15 minutes, and increment again by 15 minutes, after the first 15 minutes has passed.
Tip: “Switching costs are high.” Just as sales people have to account for travel time between appointments, most other roles pay a high switching cost whenever they must change from thinking about one thing, to thinking about something else. The purpose of Minimum billable time is to ensure that users account for not just the work, but the time it took to be able to start and finish doing the work. We suggest that for help desk requests use 1 to 5 minutes minimum. For editorial work 5-15 minutes. For technical work 15-30 minutes. And for “i have to think about this for a while’ one hour. In general we humans very dramatically in our switching costs. Some of us can multi-task on a few dozen topics a day. Some of us can think deeply about only one or two things a day. Some of us can readily switch between topics and some of us can only do so a few times a day without becoming exhausted.
Choose Permissions (Required)
Select the Permissions tab;
Press Edit
Select which permissions to grant to the user.
Runcible permissions are assigned to roles, and users are assigned roles on this tab. A user can have any number of roles. (See the Permissions section UNDONE). Just a few permissions are necessary to use Runcible.
In most cases you will only give people Profile (UNDONE), Employee, or Contractor permissions. Although your administrators can customize Runcible permissions easily.
Profile: users can only see their personal profiles, and nothing else. By default, all users have only Profile permissions.
Contractor: users cannot see financial information, and can only see projects they are assigned to, and people that they are working with on those projects.
Employee: users can use the non-administrative functions of the application, and see all other users.
Operations: users can work with and configure workflows, rates, roles and skills, as well as access any project in the system.
Accounting: users can access the accounting functions and configure calendars and various terms.
Configuration (System Administration). Users can configure the organizational structure, permissions, currencies, the home page screen, translations and many other settings that should only be performed by people who understand the business implications.
Press Save.
Choose Language and Time Zone (Only if necessary)
Select the Language and Time Zones tab.
Press Edit.
Choose the language and time zone appropriate for the user.
Tip: Runcible can support any language but we currently only include a few. If you feel a language is necessary for your organization please ask us to add it. But it will take a substantial amount of ‘editing’ to have it make sense, since Runcible uses Google Translate to convert strings of characters. (All Runcible’s display text as well as much of Runcible’s table data is translated and displayed in your language of choice. )
If helpful then select a date time format.
Tip: The USA uses month/day/year, while much of the rest of the world uses day/month/year.
Press Save
Approve the User
At the top of the User Profile Page, press the Approve button.
Tip: If the approve button is not visible, then click the (?). Runcible will display a list of required settings before you can press the Approve button.
Runcible will send an email to the user saying that he or she is approved, and can log in.
That’s it.
8.5.Receiving Notification of New User Requests
When a new user registers, or whoever a new user is added, Runcible will send anyone who is a member of the “User” workflow an Activity Stream notice, and create an entry in his or her Responsibilities list.
You can click on either the Activity Stream or Responsibilities entries, to display the new user’s Profile page. And then you can Approve the new User.
8.6.Approving a New User Request
- To approve new Users
- Choose Main Menu -> Top -> People -> Approve Registrations
- A table of people waiting for you to approve their registrations will appear.
- Either search for the person, or select him or her from the list.
- The User’s Profile page will open.
- Configure the User’s Account (See Configure a User Account, above)
- Press Approve to activate the user’s account, and send an approval email.
- Close the page by pressing [x].
- The Approve Registrations page will have refreshed, and the use that you just approved will no longer be listed.
Note: The User Approval workflow is configurable, and organizations might add more steps to this process.
9.Users
10.Groups
11.Resources
12.Working with Contacts
You can use contacts to create three kinds of relationships:
- User Contacts (Clients, Contractors, Vendors) : Have one or more Contact Profile Pages, are associated with an external Company, and also have a User Account and User Profile Page.
- Company Contacts : Clients have a Contact Profile Page, and are associated with a Company other than yours.
- Individual Contacts: Contacts have a Client Profile Page but are associated with One of Your Organizations, do not have a User account, and are not associated with other Companies.
You can associate individual contacts either with your Company, or you can create another company to hold them. This company will act as a ‘bucket’ for all people that are not yet associated with any organization.
To create a Company to hold your Contacts:
- From the main menu, choose “Top->Companies”
- From the main menu choose “New Company”.
- Name the company “*Our Contacts” (so it will sort at the top of your list).
To Create a Contact
- From the main menu, choose “Top->Contacts”
- From the main menu choose “New Contact”.
- Choose Your Organization, or *Our Contacts (or whatever you named your list).
- Select Save
13.Working with Companies
( … )
14.Collaborating
14.1.On Your Profile Page
( … )
14.2.On A Page
( … )
14.3.On The Task Detail Panel
14.4.In The Activity Stream
( … )
14.5.Subscribing and Unsubscribing to a Page
14.6.The Message Task Type
( … )
14.7.The Survey Task Type
( … )
14.8.The "Memo" Task Type
( … )
14.9.The Directive Task Type
15.Working with Tasks
15.1.Adding Personal Tasks and Notes with Quick Task
Use the Quick Task Panel to jot down ideas, things you want to remember, or things that you aren’t’ sure where to put and you want to move to the right project later on.
To open the Quick Task Panel and add Tasks.
Either
- Select [icon] to open the Main Menu. The Main Menu panel will slide open.
- Select [icon] from the Quick Menu. The Quick Task panel will slide open.
Or
- Press the [Alt]-T hotkey. The Quick Task panel will slide open.
Then
- You will see the last personal project you selected.
- You can enter tasks on that project.
- Or you can select a different Personal Project from the dropdown box.
(Note: As of this writing the Quick Task Panel is not visible to users in the Beta)
15.2.Quickly Adding a Series of Tasks To Projects
Your Runcible application might contain tens, hundreds, or thousands of projects.
Create a Favorite
- Search for your program and open it.
- Create a new Project called ‘Quick Task Lists’
- Create a Story inside the project called something like “My Quick Tasks for This Project”.
- Open the new story.
- Click the Favorites Button.
- In the main menu, select Top, Favorites,
- Scroll until you find the new Favorite you just added.
- Drag the new Favorite up or down the list and drop it.
Try it:
- Select the new Favorite. It will open in a sliding page.
- Click the Subtasks Tab
- Start entering tasks.
Create a shortcut
You can create a shortcut that will open a Task Page without the workspace.
To create a shortcut:
- Search for your program and open it.
- Create a new Project called ‘Quick Task Lists’
- Create a Story inside the project called something like “My Quick Tasks for This Project”.
- Open the new story.
- Select the [icon] Open in New Tab icon. Runcible will open a new tab or window with the Story.
- Select the Subtasks Tab to display the Tasks
- Either
- Drag the URL to your desktop – your operating system should create a new shortcut for you.
- or
- Save it to your bookmarks list – your browser should save a link for you.
Try it
- Select the Shortcut or Bookmark
- Runcible will open a new window showing the Story, and it should also be open to the Subtasks Tab.
A shortcut is the fastest and lightest way to access Runcible Pages.
Some people may work almost exclusively with pages and without the workspace.
And we designed Runcible that way.
15.3.Moving Tasks from Personal to Public Projects
To move a task from a Personal Project (where only you can see it) to a Public Project (where others can see it):
- Open a Personal Project.
- Drag one or more tasks to The Dock.
- You will see a message asking whether to Move or Copy
- Select Yes to move them, or No to copy them.
- Open the Destination Project.
- Drag the tasks from The Dock to the Tasks Panel.
- You will see a message that the move was successful, or an error why it was not.
That’s it. You have copied or moved tasks.
Tip: Runcible moves and copies files (attachments) and Page Properties only. It does not move activity streams or financial records. See Making Adjustments instead.
Note: The tasks are always copied. When you move a task, Runcible creates a new copy, and its original is trashed.
15.4.Creating Templates: Groups of Tasks, or Entire Projects
If you follow the same steps often, or use a set of similar processes, or say, in a dentist office, if you follow certain protocols, you can create a program, and collect groups of tasks that you use as templates.
To use a template, either:
- You open the project with the tasks in it, drag them to the dock, and then drag them from the dock to the destination project.
OR
- Select both programs in the workspace and drag the tasks from the template project to the target project.
That’s it.
You can create personal and private templates for yourself. Or you can create public templates for everyone. The procedure is the same.
To create a Program to be used for templates:
- Create a new Production program and call it something like “My Templates”
- Create a Project inside your My Templates program, called “Templates”
- Create a series of deliverables under your project- each of which is for a template.
- Inside of each deliverable create a whatever list of tasks, stories, expenses, or whatever you need.
- Open the Project’s Page
- Select the [icon] Favorites icon to add the Project to your Favorites.
That’s it.
To use your new templates:
- Open the program and project that you want to add tasks to.
- Open the main menu, select Favorites, and then select your “My Templates” favorite.
- Runcible will open a sliding page with your Project.
- Click on the Subtasks Tab and Drag the template you want to the Dock.
- Then from the Dock to the project, dropping them wherever you want them in the Outline.
15.5.Adding Tasks In Context
Adding Tasks to a Page
Adding Tasks to the Outline
Adding Tasks to the Board
Adding Tasks to the Timeline
Adding Tasks to the Table (List)
15.6.Adding People
15.7.Assigning People to Tasks
To assign tasks to people you have at least these four options:
- Double click to Open the Task’s Page
- Select “Edit”,
- Change “Assignee”,
- Then select “Save”.
- In the Outline View
- Open the quick edit menu by:
- selecting [3bars]
- select the task, then press the hotkey Alt-z
- or right-click and select “Edit”
- Change “Assignee”
- Press Save
- Open the quick edit menu by:
- In the Outline or List view, drag and drop the task on a user in the Team Panel.
- Drag and Drop the Task on the person’s schedule in the Schedule Panel. Runcible will Assign the task to the person, ask you to select a role, and create an appointment.
- Tip: This shortcut is very useful when managing traffic (work that is assigned ‘just in time’).
15.8.Task Responsibility (Concept)
Also see Runcible’s Workflow Voting
- Assignee: The people you plan to have do the work.
- Assigned to Role – Runcible allows you to assign a task to a role, even to schedule the task for a role, and then reassign it to an individual later on.
- Creating good solid estimates even if you don’t know who will eventually do the work.
- budgeting resources out into the future even if you don’t know who is available it helps everyone understand how much of a certain skill will be needed.
- Routing work to departments where you don’t know who will do the work, and someone else will decide.
- Putting the work ‘up for auction’ or ‘in the queue’ so that anyone with the available skills, during that time period can work on it.
- Scenarios:
- Assigned to Person, a Team of People, – or Multiple People. The working theory is that any task must be assigned to an individual, and Runcible allows you to determine whether or not that rule applies.
- Assignee Scenarios:
- Pick List: Let people take work from a list and assign it to themselves. In Runcible you can just assign it, or drag it to your schedule/agenda/timecard and Runcible will assign it to you, as well as place it on your schedule AND set the appointment to confirmed.
- Self Manage: Assign the work to someone so that they may select it from the list when they choose to.
- Assigned: ( … )
Tip: Runcible estimates costs by the role a task is assigned to.
- Scheduled (Forecast): The people who you have allocated time to do the work
Tip: Our experience and the statistics bear this out: customers will be more loyal to you if you make mistakes and work diligently to repair them, then they will if you never make mistakes at all: they will just take your work for granted. - Responsibility by Workflow: (See Runcible’s Workflow Voting)
- While Assignees are limited to to the members of the project, workflow members are not.
- This means that activity on any given task item can leave the project members and move around the broader organization if needed.
- Committed: The people who have confirmed that they will perform the work in the time frame.
- Workflow Member: The people who can change the state of an object.
Tip: make sure that you design the workflow so that when at task comes BACK to the project that it goes to a group of people who can distribute it to the right individual or group.
- Owner (Creator): By default, for a task to be closed, requires the approval of the owner (creator), unless the default workflow is modified.
- Project Manager (the “Agent”): Responsible for all work (quality, budget, time) of the customer of the project (whether internal or external).
- Account Manager: The person responsible for the relationship with the customer. Account managers can ‘see’ everything.
- Executive Sponsor : The executive who is the last-resort decision maker, and the person responsible for correcting failures (and rewarding success) for the project and everything under it. The primary function of the executive sponsor is to repair relationships that become damaged as they are almost always certain to.
⁃
You can provide accountability for every item of work all the way to the top of the organization.
Work Done: the people who performed the work and Charged time against it.
Committed: The people who have confirmed that they will perform the work in scheduled the time frame.
Scheduled (Forecast): The people who you have allocated time to do the work.
Assignee: The people you *PLAN* to have do the work.
Assigned to ROLE – Runcible allows you to assign a task to a role, even to schedule the task for a role, and then reassign it to an individual later on.
Scenarios:
Creating good solid estimates even if you don’t know who will eventually do the work.
Budgeting resources out into the future even if you don’t know who is available it helps everyone understand how much of a certain skill will be needed.
Routing work to departments where you don’t know who will do the work, and someone else will decide.
Putting the work ‘up for auction’ or ‘in the queue’ so that anyone with the available skills, during that time period can work on it.
Assigned to PERSON, a TEAM, – or multiple people. The working theory is that any task must be assigned to an individual, and Runcible allows you to determine whether or not that rule applies.
Scenarios:
Pick List: Let people take work from a list and assign it to themselves. In Runcible you can just assign it, or drag it to your schedule/agenda/timecard and Runcible will assign it to you, as well as place it on your schedule AND set the appointment to confirmed.
Hint: Runcible estimates costs by the role a task is assigned to. So
Self Manage: Assign the work to someone so that they may select it from the list when they choose to.
Assign it so that you
Auction (Using Awards): …
Workflow Member: The people who can change the state of an object.
(See Runcible’s Workflow Voting)
While Assignees are limited to to the members of the project, workflow members are not.
This means that activity on any given task item can leave the project members and move around the broader organization if needed.
Tip: make sure that you design the workflow so that when at task comes BACK to the project that it goes to a group of people who can distribute it to the right individual or group.
Owner (Creator): By default, for a task to be closed, requires the approval of the owner (creator), unless the default workflow is modified.
Project Manager (the “Agent”): Responsible for all work (quality, budget, time) of the customer of the project (whether internal or external).
Account Manager: The person responsible for the relationship with the customer. Account managers can ‘see’ everything.
Executive Sponsor : The executive who is the last-resort decision maker, and the person responsible for correcting failures (and rewarding success) for the project and everything under it. The primary function of the executive sponsor is to repair relationships that become damaged as they are almost always certain to.
Tip: Our experience and the statistics bear this out: customers will be more loyal to you if you make mistakes and work diligently to repair them, then they will if you never make mistakes at all: they will just take your work for granted.
⁃
ASSIGNED VS SCHEDULED
The difference between ‘assigned’ and ‘scheduled’, and the special meaning of ‘scheduled’ in Runcible:
“Assigned” means that a task will be your responsibility, versus someone else’s; and “due date” and “priority” advise us when it must be done.
But until something is placed onto someone’s calendar, no one has set aside the time to actually do the work. It’s just waiting either in the task list or in the Activity System for them to work on.
And until that item has been confirmed by you, on your schedule then you haven’t committed to do the work.
So responsibility for doing a task can be in the following states:
Unassigned, Assigned, Forecast, Confirmed (Scheduled), and Done.
So you can assign work in any of the following ways:
Don’t assign or schedule it, and just let people choose work, then complete it as they choose to.
Assign work but don’t schedule it, and let them, choose when to do the work assigned to them.
Assign and schedule the work loosely, so that they can organize their weekly or daily work as they see fit.
Assign and schedule the work precisely, so that they know when they must work on.
Assign work precisely and auto-commit so that assignees are obliged to do work at a certain point in time.
15.9.The Task Workflow
THE WORKFLOW FOR TASKS
[Video” Video of multiple two-three second shots of each statement]
The workflow for all tasks in Runcible is:
- Find or create a project
- Enter a task on a project, and set all its properties, depending upon what type of task it is.
- Estimate it (sometimes, estimating is done later, but you can do it on entry)
- Assign it to someone (including yourself)
- Forecast it (put it on your schedule).
- Confirm it (tell the author that you’re going to do it in that time frame – or not. Runcible automatically confirms what you assign to yourself.).
- Work on it, leave comments etc, and Charge Time and Expenses against it.
- Change the status of of the task when your work on it is complete.
- [Future: Add Products to the task]
- Submit your time card at the end of the week.
- The project owner (maybe you) will review the time, and bill the customer’s account for it as he or she sees fit. Then approve it.
- Others may approve it for business purposes.
- Your time card, and all task activity on it, is now complete.
That’s the workflow for most Tasks in Runcible.
16.Working With Documents
( … )
16.1.Integrating with Wordpress
Introduction
( … )
Installing the Runcible Plugin
( … )
Configuring Your Connection to Runcible
( … )
Creating a Page
( … )
Using the Shortcode
( … )
Customizing a Template
( … )
Advanced: Customizing your CSS
( … )
The User Experience
Displaying Content
( … )
Searching Content
( … )
Editing Content
( … )
Adding Content
( … )
17.Setting Up Programs
( … )
17.1.Adding a New Program
( … )
17.2.The Program Profile Page
( … )
17.3.Adding People
( … )
17.4.Configuring Cards (Settings)
( … )
17.5.Configuring Estimating
( … )
17.6.Choosing a Workflow
( … )
17.7.The Program Workflow
( … )
17.8.Contracts
17.8.1.Contract Allocations
17.8.2.Program Accounts
17.8.3.Account Allocations
18.Working with Projects
18.1.Sketching
18.2.Requirements
18.3.Designing
18.4.Planning
18.5.Estimating
18.6.Resourcing
18.7.Forecasting
18.8.Doing Work
18.9.Time
18.10.Expenses
18.11.Adjustments
18.12.Transfers
18.13.[Commissions]
18.14.Timecards
( … )
18.15.Invoices
( … )
19.Keeping Score
Runcible provides many ways to evaluate success of departments, groups, teams, projects (which can also be thought of as temporary departments), or individuals
- Number of Tasks
- Points (ideal time)
- Time (hours, days)
- Cost
- Revenue
- Profit
- Velocity
- Utilization
- Chargeability
- Awards
- Net Promotor Score (NPS)
- Karma (participation)
- Likability (Peer360)
19.1.Our Approach to Showing Money
Exposing financial information to employees is usually a good thing. It makes visible to all employees just how precious each dollar is, how difficult it is to make money, and how no one is running out of the office with buckets of money every month. Making profits is hard work, and profits are usually small. As of early 2015, the average services sector business produces a net profit after taxes of 8%. On a rate of inflation of 3%, the rate of return that isn’t much better than that of a savings account.
Tip: Creating transparency into finances will likely have the biggest effect among revenue generating employees.
Runcible shows issues, points, and time in the Tasks Panel but requires that users expressly look for money.
We made a deliberate decision to not show money (cost, revenue, and profit data) up front.
Usually, when profit and loss is exposed to people they will modify their behavior to generate profit. The exception is when this asks too much of them. We encourage you to consider the individual people, their role in your organization, the type of business, and the situation.
Some examples:
* People who support your organization with overhead work may feel offended when they realize everything they do is a cost. Their work should be evaluated by cost (staying on budget), time, or possibly points.
* In some businesses (like movie production or book publishing) most projects lose money. The very small percentage of successes make the total effort profitable. In such businesses, exposing everyone to profit and loss data might have a net demoralizing effect.
* When a business is undergoing stress or restructuring, there may be temporary situations where opaque finances are necessary employee certainty.
Note: A second reason why we designed the interface around tasks and time is that designing it around money would limit Runcible’s potential market to organizations that bill by the hour. Runcible’s appeal is much wider. It is entirely possible and enjoyable, to Use Runcible to manage a business, even if users don’t bill for their time. We did not want to clutter the user interface with monetary information when many workers in the world operate on a task and time basis.
Hint: If permissions allow it, Users can find cost, revenue, and profit data the Tasks Panel’s Quick Reports or under the Money Tab on the Profile Page of any Organization, Project, Deliverable, or Task.
19.2.Transparency
( … )
20.The Reputation System
( … )
20.1.Likes and Dislikes
( … )
20.2.Peer360 Feedback
20.3.Skill Ratings
( … )
20.4.Karma Score
( … )
20.5.Working with Skills
( … )
21.Gamification and Awards
( … )
22.NPS : Using Net Promotor Scores
( … )
23.Your Work Style
Self Driven
I work from my own Task Lists.
Collaboration Driven
( … )
Goals and Objectives Driven
I am assigned goals and objectives and must work to implement them over some period of time.
I am assigned Goals and objectives and Must get a part of the organization to Accomplish them.
I create goals and objectives and must get a part of the organization to accomplish them.
I create strategic goals and objecties and must get all or part of the Organization to accomplish them
Event Driven
I Work From An Inbox as “it happens”.
I Pick from Available Tasks or Tickets
I Work as Part of a Flow of Just-in-time ‘Traffic’
I Work from a Schedule, Calendar or Agenda
Task, Job, or Project Driven
I Work on Assigned Work from Multiple Projects
I Work from Assigned Work on a single large Project or Program
I “Traffic” Work: I find people to do work as it becomes available.
I Organize and Assign Work, and Others Pick when to do the Work
I Organize, Assign, and Schedule Work
I Organize, Assign and Schedule Work, and Manage Budgets, or Costs, or Revenue.
Tidbit: As an homage to id Software, here is how some of the team works:
From Curt:
“I have five shortcuts on my Dock to different workspaces and single page views.
I usually have three or four different Runcible windows open when I’m working.
My default Workspace is usually Runcible’s Active Tasks using People, Channels, Activity, Projects and Tasks.
I seem to work in Outline view for planning, and Table(List) view for searching.
I seem to use only two or three workspaces, and I change them often.
I seem keep my Favorites in pretty good order, and I use it all the time. I would say that’s my primary menu. And I think we should make shortcuts to administration pages available on the Favorites Menu Also.
I don’t seem to use the task detail panel very often.
My favorite panel is the Scheduling Panel because I can sort of ‘feel’ everything by looking at it.
I definitely feel the need for the timeline panel and I wish I had prioritized that over the gantt chart.”
23.1.Using Just Your Profile Page
If you don’t manage programs or projects, you can work with just your Profile Page, it’s Tabs, and Sliding Pages. You do not need to use the Workspace at all. We call this the Single Page Workspace. Or the Single Page View.
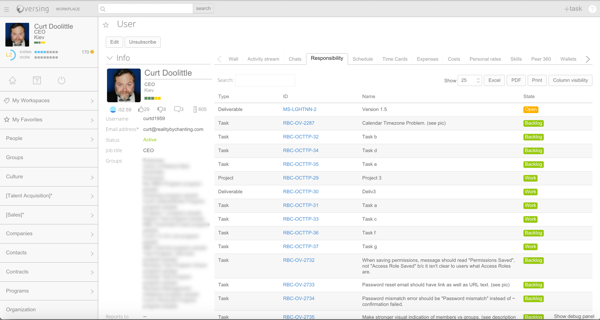
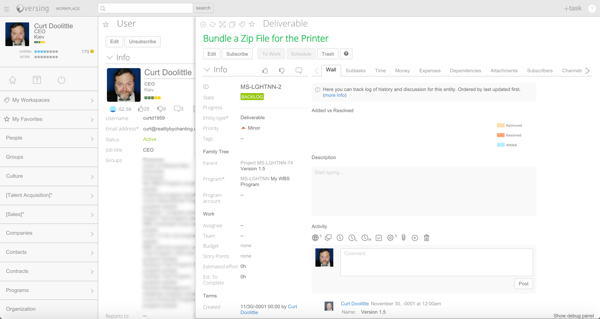
To Use Your Profile Page as your Single-Page Workspace.
- Open the Main Menu
- Select your profile image. The profile page will open.
- Select the [ icon ] Star to add it to your favorites.
- Use the main menu to navigate to Top -> Favorites.
- Scroll until you see your new favorite.
- Drag it to the top of favorites list.
- Open it by selecting it.
- Open the workspace Menu
- Save the Workspace as your default
Whenever you open Runcible it will display your profile page.
You can write on your wall. Watch your Activity Stream. Work with your responsibilities. Open your quick tasks.
That’s it.
Note: You can work from the Activity Stream and the Responsibilities Panel. And you can open projects using the Programs Tab. But as of this writing, the Programs Tab does not yet drill down into your Tasks. That’s an open feature request in the queue. So until them, use the Quick Tasks Panel or search for your project and open it in a sliding panel.
23.2.Using Just Pages Without the Workspace
Every Profile Page in Runcible has an Activity Stream Tab, and a Subtasks (Tasks) Tab.
By saving your most common Programs, Projects, Deliverables, or Tasks to the Favorites Menu you can create your own personal version of Runcible, using pages as if they were forms – and you won’t need to use the workspace at all. Without the Workspace Runcible works comfortably on touch-tablets, where screen space (and processing power) is limited.
To Use Single Pages Instead of the Workspace
• Open your Profile Page and select [ icon star ] to add it to your favorites.
• Select [ icon window ] to open your profile in a new window.
• Save the URL to your Bookmarks, Bookmark Bar, or save it as a shortcut on your Desktop.
Note: We don’t have the option (yet) to save a favorite (single page) as the default workspace. It’s in the queue. Bookmarking or creating a shortcut will provide you with the same functionality. So by default Runcible will open the workspace when you log in. But if you use a shortcut to a favorite it will load the single-page view. (And it’s fast.)
• Now search for your most commonly used programs, projects, deliverables, or tasks.
• For each of them, select [ icon star ] to add them to your Favorites Menu.
• Then, from Menu->Top->Favorites, drag and drop your Favorites into the order you desire.
So you can save Workspace views for use on your laptop, and save Favorites views for use on your Tablet, or when you want to do something quickly.
Example:
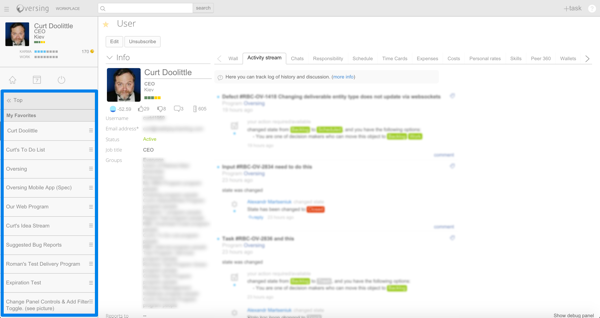
Note: This is Curt’s Favorites List while working on Runcible
23.3.Using Just Collaboration and Pages
23.4.Using Collaboration Projects and Pages
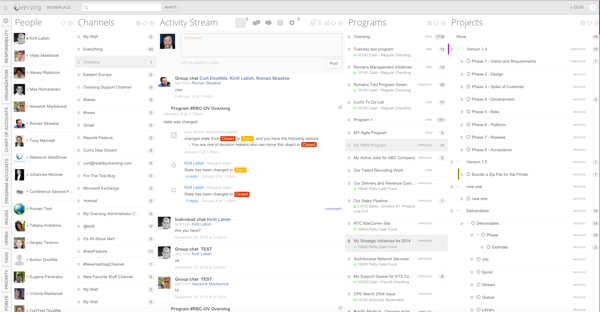
A workspace without the Tasks Panel is a clean way to work if you’re style is self-directed. It’s relatively ‘distraction free’.
To Create a Distraction Free Workspace:
Clear filters in all the panels
Open the following Panels, and close the others:
People,
Channels,
Activity Stream,
Programs, and
Projects
You should see all Programs you have permissions to see, plus all active projects, and all active deliverables.
Double-Click on Projects or Deliverables to open a Profile Page.
Select the Subtasks (Tasks) Tab.
Tip: “I really like this as my default workspace. If I have something to do I just add it as a deliverable, open it’s profile page, maximize it, and start making a task list. And when it’s out of sight, it’s out of mind.”-cd
23.5.Using the Workspace
Basics of Using The Workspace
( … [ Add Video ] … )
- Open the Programs, Projects, and Tasks Panels.
- The Workspace will display the Programs, Projects and Tasks that you have permission to see.
- Select a Program, and then the Project and Tasks Panels will display projects and tasks for that program.
- Select a Project, and then the Tasks Panel will display the tasks for that project.
- De-select the Project and all the tasks for the Program will appear again.
So it’s pretty simple: when you select none, one, some, or all, of the choices in a panel, the selection filters everything to the right of it.
23.6.Many Ways: Opening Programs Projects Deliverables and Tasks
23.7.Power Users: Using Just the Tasks Panel
( … )
(everything can be done with smart tags)
23.8.Power Users: Entering Wall Commands
( … )
24.Working Together
( … )
24.1.Working with Teams
24.2.Working with Departements
24.3.Working with the Organization
24.4.Working with Customers
25.Working Together on Production Work
( … )
25.1.For Scheduling Patients or Rooms
( … )
25.2.For Protocols (Medical/Dental)
( … )
25.3.For Help Desk and Support
( … )
25.4.For Managing Traffic
( … )
25.5.For Jobs and Production Work
( … )
26.Working Together On Projects
( … )
26.1.For Kanban (Streams)
( … )
26.2.For Agile Projects (Iterations)
( … )
26.3.For WBS Projects (Phases)
( … )
26.4.For Resource Management
( … )
26.5.For Delivery Management
27.Driving the Organization
( … )
27.1.For Creative and Marketing
( … )
27.2.For Recruiting and Hiring
( … )
27.3.For Vetting Deals (VC)
( … )
27.4.For Professional Sales
( … )
27.5.For Career Development and MBO's
( … )
27.6.For Executive Strategy and MBOs
( … )
28.The Culture Guide
( … )
29.The Operations Guide
( … )
30.The Accounting Guide
( … )
31.The CEO's Guide
( … )
32.The Advanced Guide
Test Content
32.1.Switching Costs
What are switching costs and why do they matter
(tie to division of labor – switching costs is why it works so well)
Educating yourself on the costs of your directives (excellent)
Educating yourself about the individuals you direct (excellent)
Helping People Evolve through self awareness and repetition. (great)
Forcing people not to procrastinate ( good)
Forcing people to concentrate (sprints of limited stress are ok)
Forcing People into relying upon adrenaline (bad)
Forcing people in to failure (very bad)
Forcing your organization into failure (very, very, bad)
(Citations below)
33.The Administrator's Guide
( … )


