[actionbadge] [Use +Task to Create an Appointment]
To use +Task to create a task and an appointment.
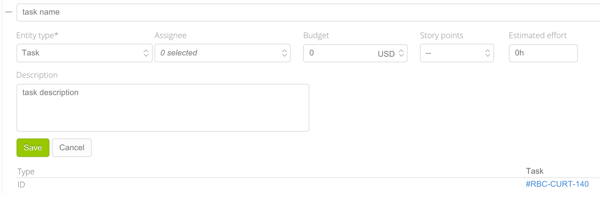
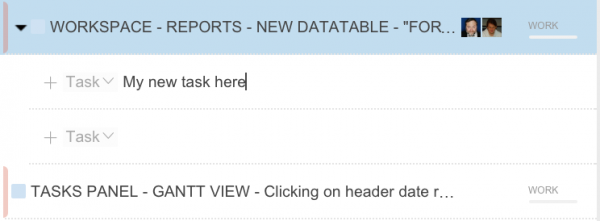
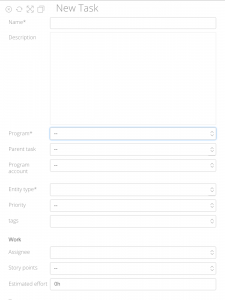
• Select +Task. The New Task Panel will open in a Sliding Page.
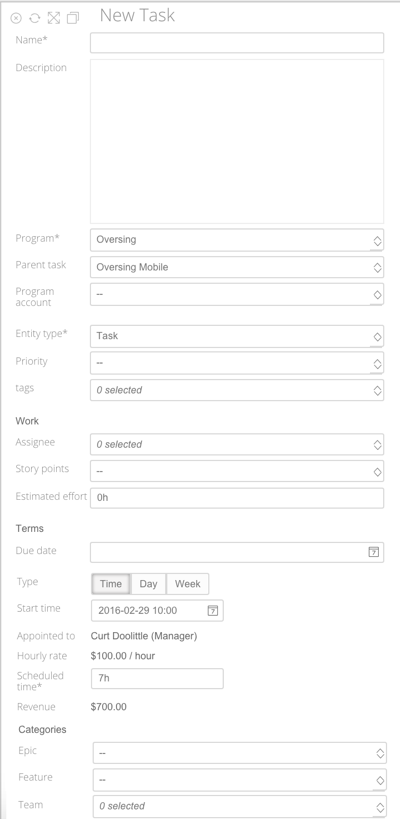
• Enter the required fields:Name, Program, Parent Container (Task)
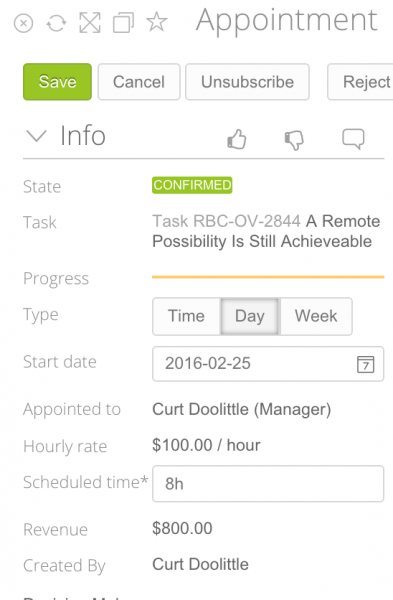
• Select the Entity Type “Appointment“. The form will display the appointment’s fields:
– Appointment type,
– Start Time,
– Person the appointment is for,
– and Time to Book (reserve).
– You can also add the Role and Rate if needed.
• Press “Save“.
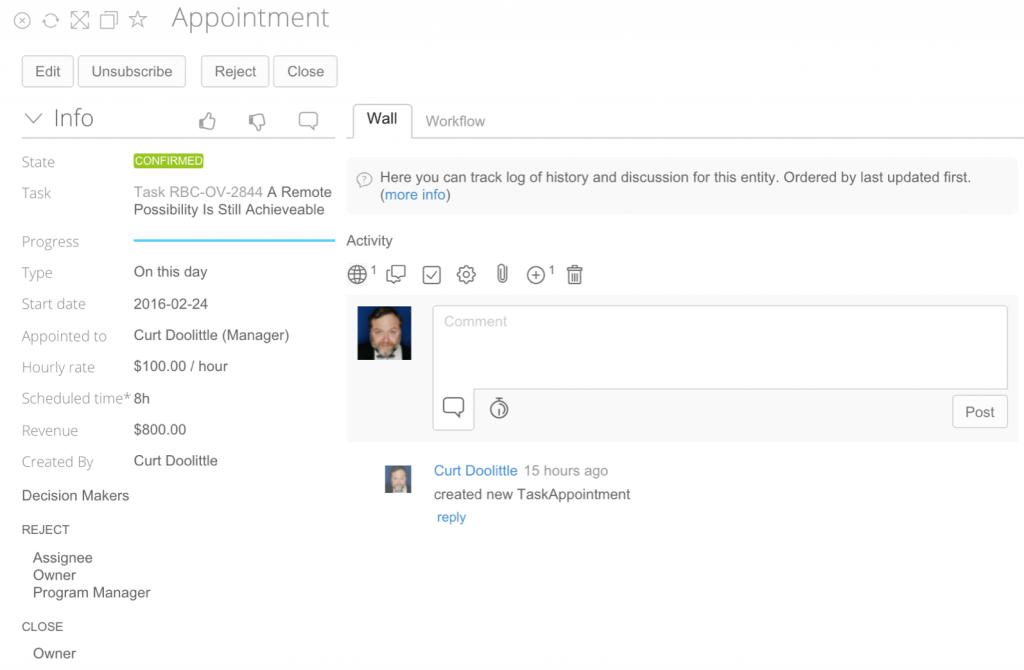
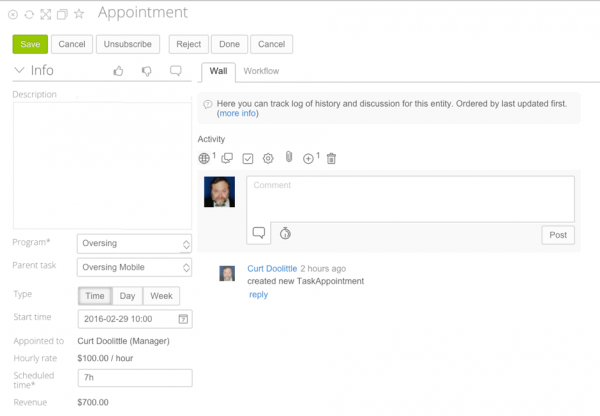
A new Task and corresponding Appointment will be created. And a sliding page will open with the new Appointment Profile Page.
[actionbadge] [Use the +Appointment Block To Create an Appointment]
Use the +Appointment block to create an appointment under an existing task
• Drag and Drop the +Appointment block to any spot on the calendar.
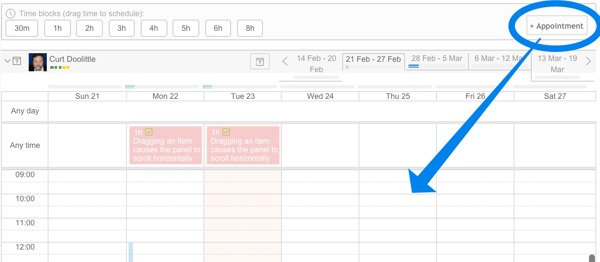
• The New Appointment panel will appear from the right, with the date already filled in.
• Enter a description
• Select the Program and Parent Task
Tip: you can always just add appointments to your personal task list if you don’t have a program yet.
• Select the amount of time for the appointment. The time will default to one hour.
• Press Save.
The New appointment will appear on the calendar where you dropped the +Appointment block.
[actionbadge] Drop Assignees on the Calendar To Create an Appointment
To drop assignees on the calendar using the default time remaining:
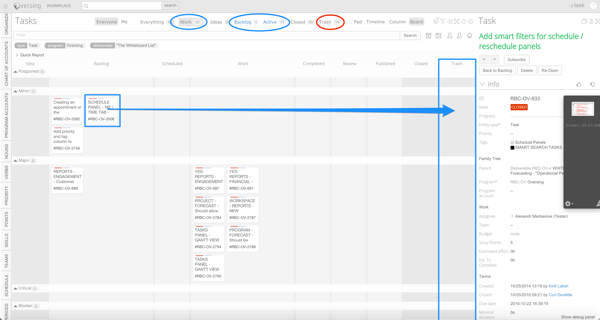
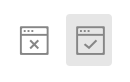
• Either open the Task Detail Panel and use the [icon] to display it in full size, with the tabs visible.Or double click to open a Task Profile Page.
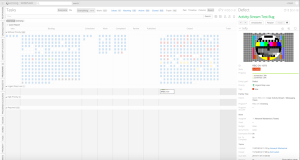
• Select the Time Tab. You will see the task’s calendar.
• Use the date control to select the week you’re looking for.
• If you see one or more assignees, Grab an assignee from the Profile Panel onto the calendar. If not, assign someone to the task.
• Drag and Drop the assignee onto the calendar.
• Drop it in the Week, Day, or Time section of the schedule.
Oversing will create an appointment for that task, using the Estimate to Complete value of the task, or 1 hour, if it is empty.
You may see a dialog asking you to select a rate if oversing cannot determine it. Select a rate and press enter.
Oversing will add that individual or role to the program in the selected role at the selected rate.
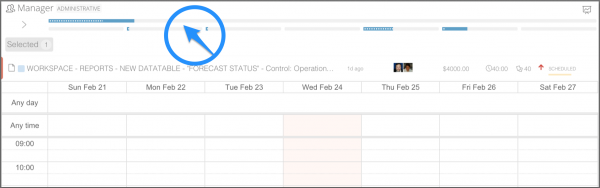
[actionbadge] Drop Time Blocks to the Calendar To Create an Appointment (Preferred Method)
To drop assignees on the calendar with the default time remaining
• Either open the Task Detail Panel and use the [icon] to display it in full size, with the tabs visible.Or double click to open a Task Profile Page.
• Select the Time Tab. You will see the Task’s calendar.
• Use the date controls to select the week you’re looking for.
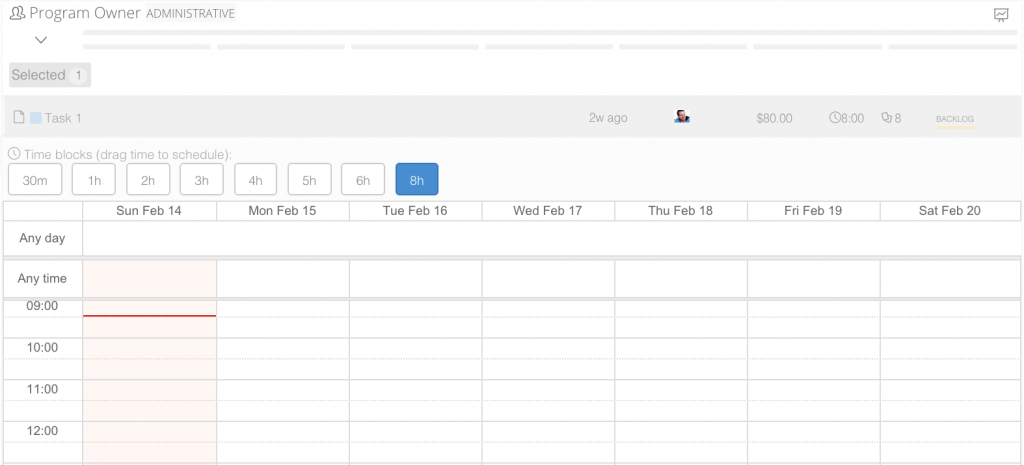
• At the top of the calendar you’ll see the Time Blocks Bar

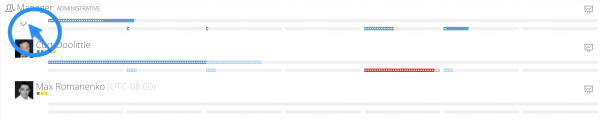
• Select any person from the horizontal list, or select “All” assignees.
If you select “All“, then the calendar will display all appointments for all assignees.
If you select an individual, then the calendar will display only appointments for that person.
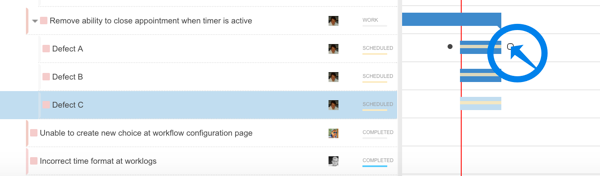
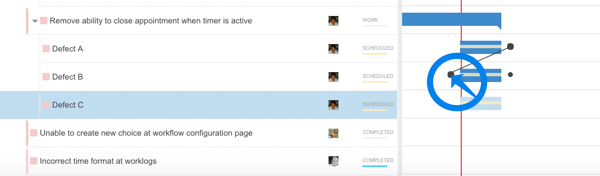
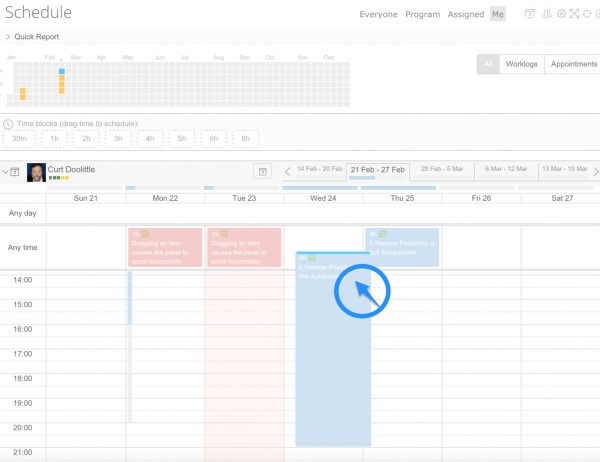
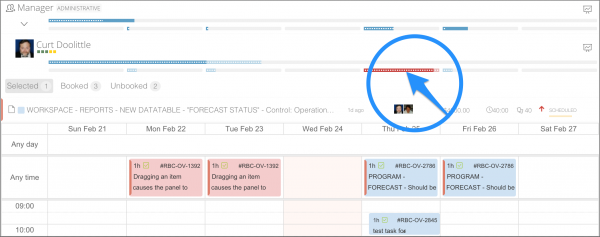
• Drag and drop a Time block onto the calendar.
Notes: Basic Appointment Rules
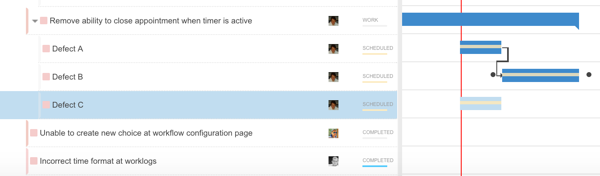
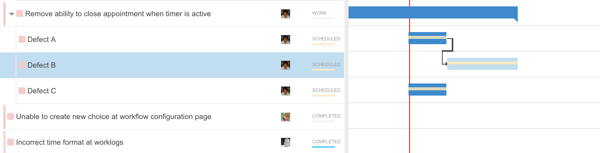
– Suggested times will be hi-lited in Blue with a colored background.
– Drag a block of time from the bar to the Calendar to create an appointment.
– If you drag a block from “All” it will create an appointment for all assignees.
– If you drag a block from an individual, it will create an appointment only for that person.
– No matter how big a block you drop, the appointment will be truncated at the end of the person’s work day – which is specified in the user’s profile. To create an appointment beyond the person’s work day, drag and drop it after their day ends.
– You can overload a person. Oversing won’t stop you. Why? Because it’s better for everyone to resolve conflicts by discussion rather than resolve conflicts by whomever makes the first appointment. Meanwhile, the user can reject whatever appointments he wants to.
[actionbadge] Drop a Task on any Calendar To Create an Appointment
• From the Schedule Panel, Open an individual or role’s Calendar,
• Otherwise, open the Task Detail->Time Tab, or a Task Profile -> Time Tab
• Drag a Task from any view of the Tasks panel to the Schedule Panel’s Calendar.
• Drop it in the Week, Day, or Time section of the Calendar.
• Oversing will create a new appointment for that task, using the Estimate to Complete value of the task, or 1 hour, if it is empty.
[actionbadge] Use the Suggestion Panel To Create an Appointment
Using the Tasks Panel, in any view,
• Select a task you want to create an appointment for.
• From the Schedule Panel, expand a Role or an Individual’s Calendar. You’ll see the Suggested Work Panel.
• The panel will display three options, each with a counter for the number of tasks it has found.
Selected: if a Task is selected in the Tasks Panel
Unbooked: if a task is on the timeline for this period, but without appointments.
Booked: if a task is on the timeline for this period, and it has appointments.
• Choose “Selected” if it isn’t chosen (it’s chosen by default)
• The Selected Tasks will appear below the choices.
• A set of time blocks will appear below the task
• The suggested time allocation will be highlighted
• Drag and Drop a time block onto the Calendar to create an appointment.
• If necessary, Oversing will display a dialog asking you to choose a role and rate. If so, select them and Press enter.
Oversing will create an appointment and add the individual to the program if not already a member.
Bug: Drag and Drop for the Gantt View is broken as of this writing.
[actionbadge] Look for Scheduled, but Unstaffed Work and Create Appointments
• Open the Schedule Panel
• Select
“Me” to review your calendar – shows just your calendar.
“Assigned” to view the people assigned to the selected Task – always sorted by People
“Program” to review the people in the Program – Sort by Role, by Teams, by People
“Everyone” to review everyone – always sorted by Role.
• Select the time period you want to review.
“One Week”,
“Six Weeks”, or
[“Twelve Weeks”]
• Expand a Role or The Individual’s Schedule

• Select the progress bars to expand the Calendar for the Role.
• Select [>] to expand the Users in the Role
• Select the Progress Bars to expand the Calendar for the Individual.
• You’ll see the Suggested Work Panel.
• The panel will display three options, each with a counter for the number of tasks
Selected: if a Task is selected in the Tasks Panel
Unbooked: if a task is scheduled on the timeline for this period, but without appointments booked.
Booked: if a tasks has appointments booked for this period – and you should see them on the calendar.
• Select Unbooked to Create Appointments, and Booked to Move or Cancel Appointments
• Then select one each of the appointments, to see the Time Block panel for that task.
• The hilited block suggests the amount of time you should Book.
• Drag and Drop a block to create (book) an appointment for that person at that time.
Repeat selecting tasks until all are Booked.
Why? This feature is very useful for forecasting work for a department or Role, but not to an individual, and not to a particular day or time. And then allocating it to an individual when the work is ready, and you know who is available.
Suggestion for Traffic Management:
• Open the Schedule and Reschedule panels, select a Program in the Programs Panel
• Use the Role view on the left, and the Person view on the right.
• Move move blocks of time from roles on the left panel to individuals on the right panel.
This makes the funneling of work to individuals much easier.
Questions About Appointments:
Why do duplicate appointments appear when I make an appointment for more than one person?
Oversing creates appointments for every individual in the “All” group. But duplicates should not all be shown on the All Appointments View.
Issue: This issue is logged, and we’ll fix it,
Why do Appointments take so long to show up after I create them? Sometimes it’s like 3-5 seconds?
For two reasons.
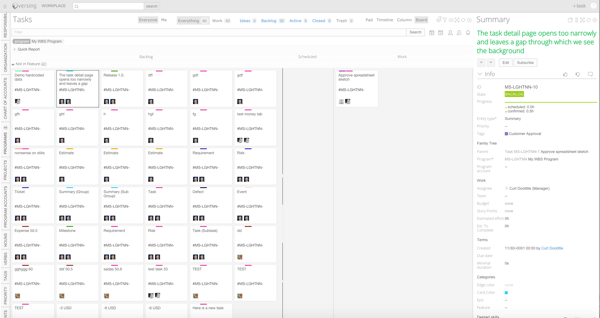
1 – The UI should place the appointment on the calendar in a temporary state, then confirm it when the message is received from the server. At present the UI merely waits for the server to send it the appointment before creating the appointment.
Issue: This issue is logged and we’ll fix it. We have a number of related issues where the queue is not as fast as we’d hoped – even though the reason we use it is to increase your perceived performance while background tasks are completed.
2 – Appointments create a lot of recalculation on the back end, and the more complicated your program and
project the more work the server must do. we have improved this about 300% in the past few months and we will undoubtably make it faster over time. But it will never be instantaneous. Why? Ever notice when you’re chatting that there is sometimes a delay? Works the same way here also.
Why can’t I move these appointments using the Gantt Chart?
Because it’s not precise enough for a tool to allow ourselves to affect other people’s lives with. So, move appointments on the Schedule Panel, Reschedule Panel, or the Task Page’s Time Tab.
Why can’t I delete or change an Appointment for next week?
If your organization is using Oversing’s forecasting features, then it’s likely someone has locked all the appointments for next week. If they’ve locked the forecast, you can only cancel existing appointments and make new ones, not delete them.
Why do we track all this information about appointments?
So that we understand the volatility of our work and can begin to predict what current appointments will lead to in future work logged. This is how we increase utilization. Its about the only form of efficiency that’s under our control. Like most objectives in Oversing, we’re trying to reduce the difference between optimistic or pessimistic imagination about the past and future, and the reality that ends up happening.


 `
`